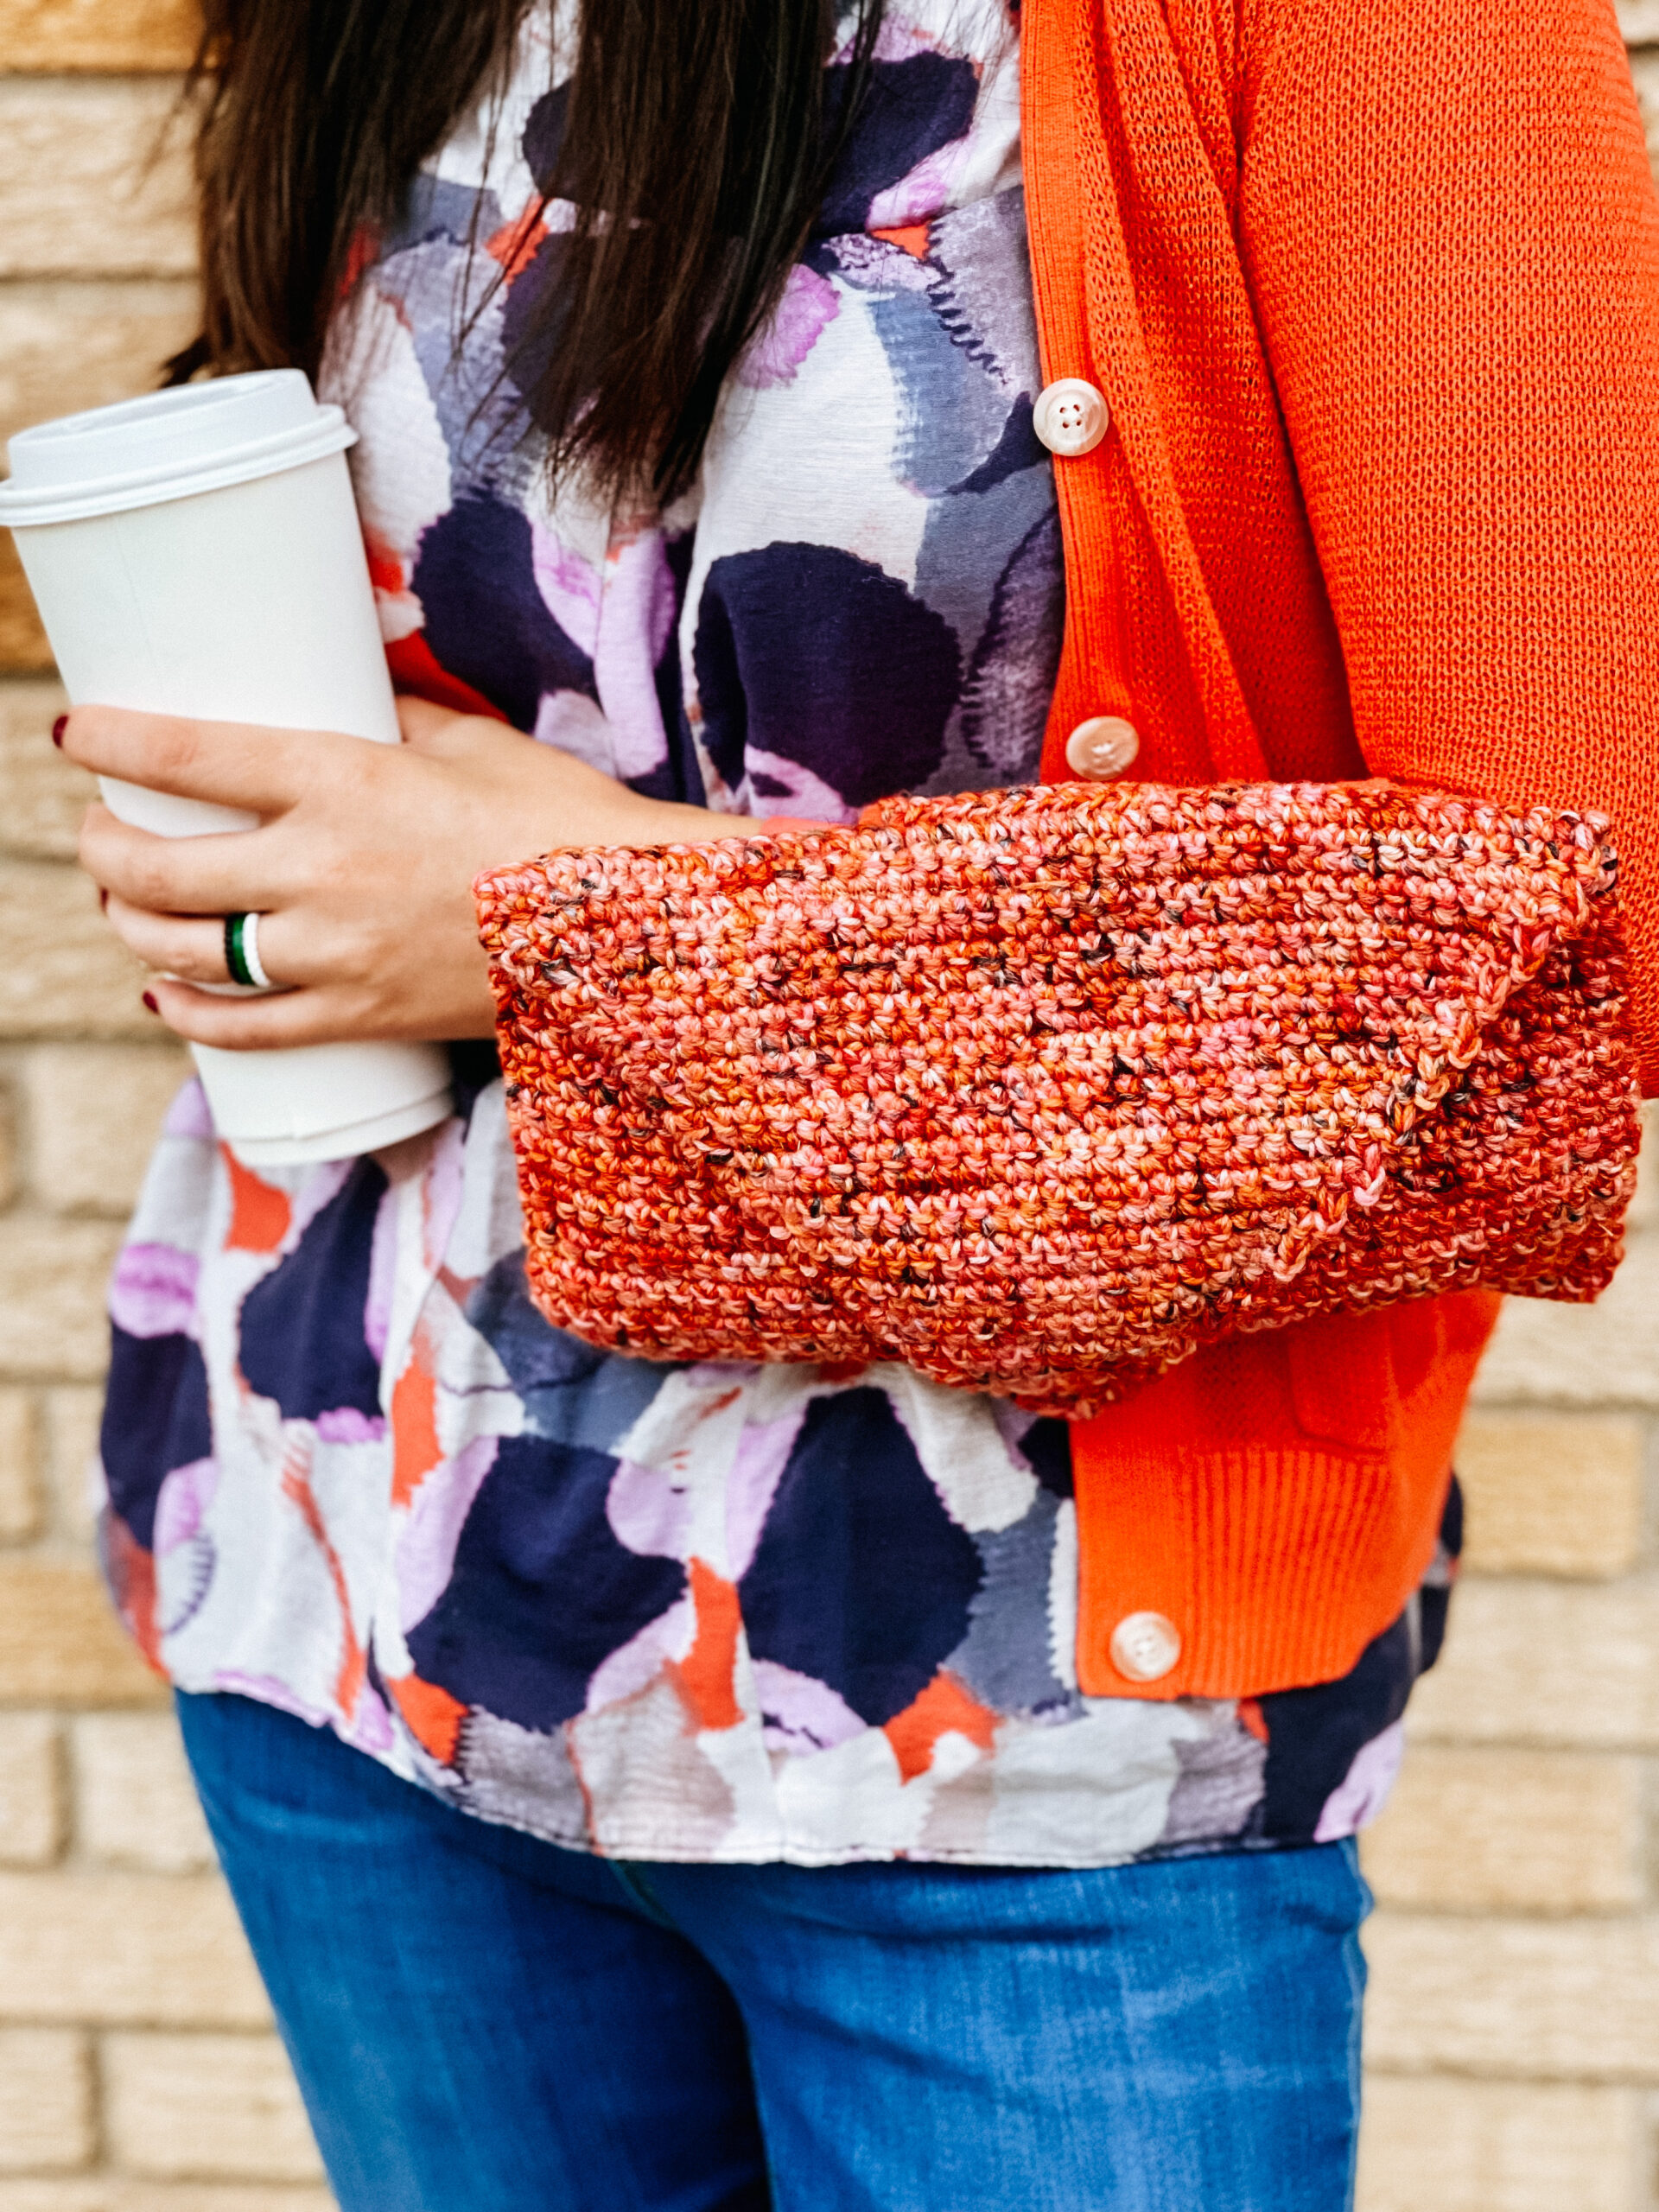
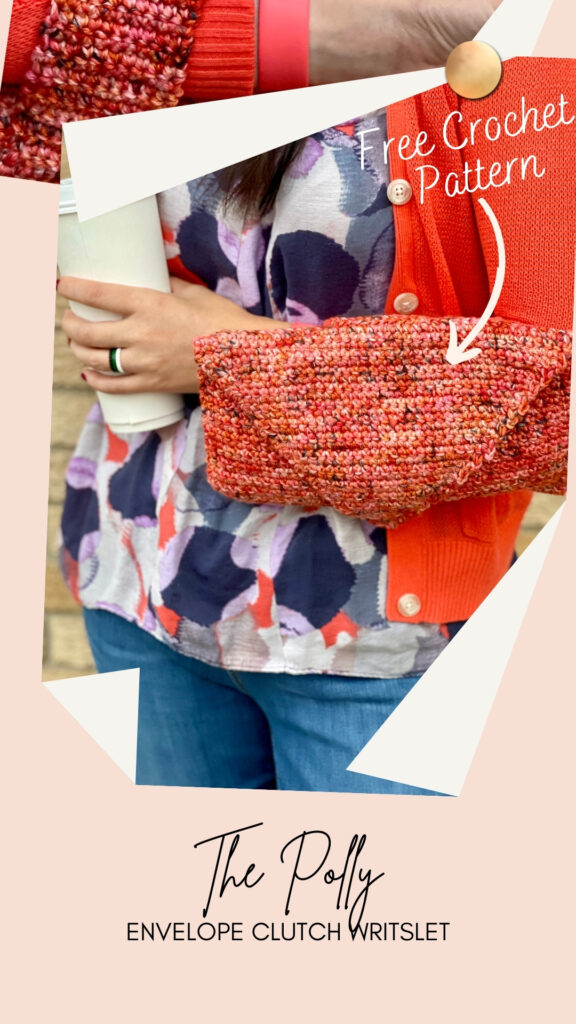
Free Pattern: The Polly
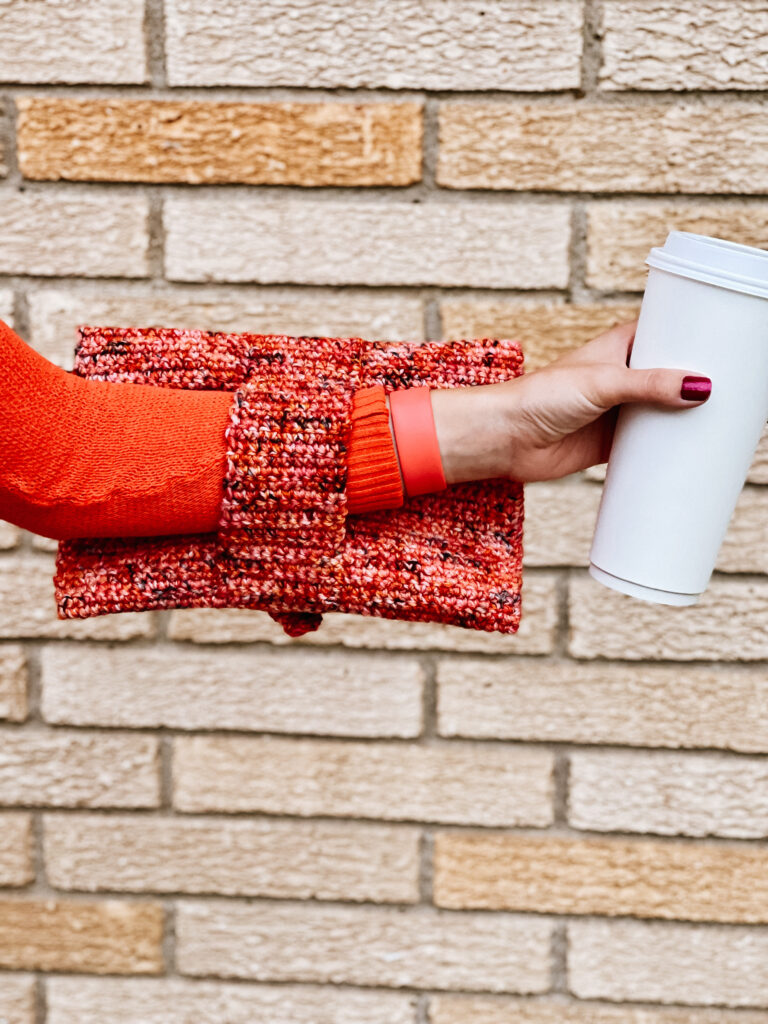
The Polly Envelope Clutch is a nod to the past. The strap is on the back of the bag instead of hanging from your wrist/elbow.

This post for the Polly Envelope Clutch free crochet pattern may contain affiliate links. That means I may make a small commission on items purchased through links in this post at no extra cost to you! Affiliate Disclaimer
Retro Style Envelope Clutch Wristlet
Who’s ready for a fun purse with a nod to the past? This Polly Envelope Clutch was inspired by s bag I saw in an old movie called “The Bachelor Mother” with Ginger Rogers and David Nevin. The entire movie is silly and ridiculous (as it’s supposed to be), but there was a bag Ginger Rodgers had in a scene that I absolutely LOVED and had to try and re-create.

See? How cute is that bag on her arm? AND… it is on her arm!! So of course I had to try and re-create this! As a bonus for me, this was another collaboration with the one and only Fairy Tale Yarn Co! This one uses Mermaid Hair DK in her latest collection, Star Trek!
If you’ve never used her yarn, I highly recommend it! Hand-dyed yarn can be expensive, but her yarn is amazing! It’s soft and the colors are so vibrant and beautiful.
This Polly Envelope Clutch pattern not only shares how to crochet the bag, but how to sew it all together and line it (if you choose).
Get the ad-free version!
You can purchase an INEXPENSIVE AD & COMMENT FREE PDF version. Look For The Polly-Envelope Clutch in the Shop


Want the stamper pictured picture? I bought that at West & Sage. She is fabulous to work with (Just make sure you’re able to send her a high-resolution logo image).
Or add the Polly Envelope Clutch pattern to your Ravelry projects by clicking the links below (the patterns on both sites do NOT include the tags).
Remember, any purchase you make from my affiliates, my shop, and/or my designs on Lovecraft’s or Ravelry helps support my small business and helps me to create other awesome patterns for you.
OK, ON TO THE PATTERN!
This Polly Envelope Clutch pattern is written using standard U.S. terms. Basic stitch knowledge is assumed.
Finished Measurements (all are approximate)
Finished and folded:
- Length: 10.5 inches (27 cm)
- Width: 7 inches (18 cm)
Opened and prior to sewing together
- Length(from top to bottom: 20.5 inches (54 cm)
- Width(across): 10.5 inches (27 cm)
Yarn
- 3-Light | DK Yarn (2 strands held together). I used Fairy Tale Yarn Co, Mermaid Hair DK, but any of her DK weights would work beautifully!
- For project: approximately 490yds (8 oz)
Crochet hooks
- I9/5.5mm Crochet Hook
Notions
- 4 Stitch Markers
- Scissors
- darning needle for finishing
- Snap closure/button (I used snap fasteners because that’s what I had, but snap closures but be easier).
For Optional Lining:
- Sewing Machine (I linked the exact one that I have. It is seriously used maybe 10 times a year. I use it for very basic sewing, but for me it’s perfect and it’s less than $100, so if you’re not looking for a workhorse, this is a nice option).
- straight pins
- thread (something that will match your yarn, or as close as possible.
- cotton fabric for lining
Gauge
using 2 strands together: 8 sc in 10 rows should measure approximately 2” X 2” (after blocking)
Some Gauge Notes:
I crochet tightly; one person who tested for me, had a higher sc than I did, so our gauge was off a little. She had to use a 5mm crochet hook. But because this is for a bag, it’s not as concerning, except that I use almost all of the yarn in this project. So if you crochet looser, err on the side of caution and grab an extra skein.
Notes
- This project uses 2 strands held together.
- It will be made up flat, lined, and then sewn together.
Terms to Know
Ch(s): chain(s)
SC: Single Crochet
sc2tog: Single Crochet Together
St(s): stitch(es)
* * = Repeat instructions between * and * the number of times indicated
Stitch Terms
- Single Crochet (SC): Insert into the second chain from the hook (or the first stitch). Yarn over (YO) and pull back through the space. YO and pull the yarn through the two loops on your hook. The stitch is now completed. Insert your hook into the next chain (or stitch) and repeat.
- Single Crochet Together (sc2tog): Yarn over (YO), insert the hook from back to front to back around the post of the previous round stitch, yarn over (YO), pull up a loop, yarn over (YO) and pull through two loops (two left on hook), yarn over (YO), insert the hook from back to front to back around the next post of the previous round stitch, yarn over (YO), and pull through two loops (three left on hook), yarn over (YO), pull through last 3 loops
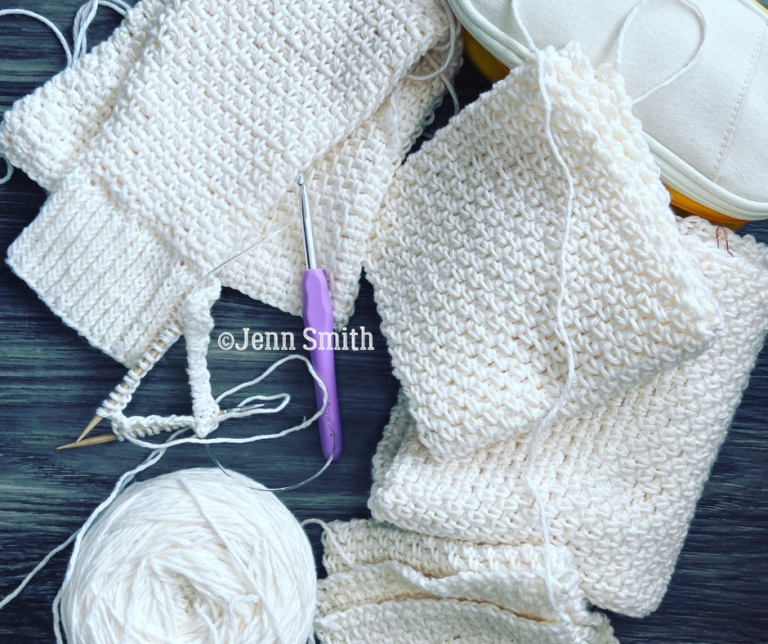
Directions:
Starting with the Bag…
Making the Envelope Flap
*If you would rather not do the lining or the snap closure, you can simply ch 5 at the end of row 93, then slip stitch into the 1st ch creating a button loop.
Making the Arm Strap.
Ch 11
Rows 1: sc into the first ch from the hook, sc across, ch 1 turn
Rows 2-30: Sc across (10), ch1, turn
Cut and Weave in ends. I highly recommend blocking the Polly Envelope Clutch. It tends to twist otherwise.
Decide where your snap closure will be. The closure on the body of the bag will go in before the liner. The other half will go on the liner itself.
Assembly (with lining instructions)
The Lining for the Polly Envelope Clutch
Cut a piece of fabric that is the shape of the bag. The lining should be the exact size or a little larger than the bag. I like to use the bag as the template and carefully trace it with a cloth pencil.


Before you sew on the lining, you will need to double-check your snap buttons and see how they need to be attached. Mine needed prepping to decide where I wanted the snap closure to be.
On one side the snap (the one on the inside of the bag, where the envelope top flap connects) I had to insert into the bag prior to sewing on the lining.

The envelope flap needed the clasp attached to the lining itself (prior to the lining being sewn on).

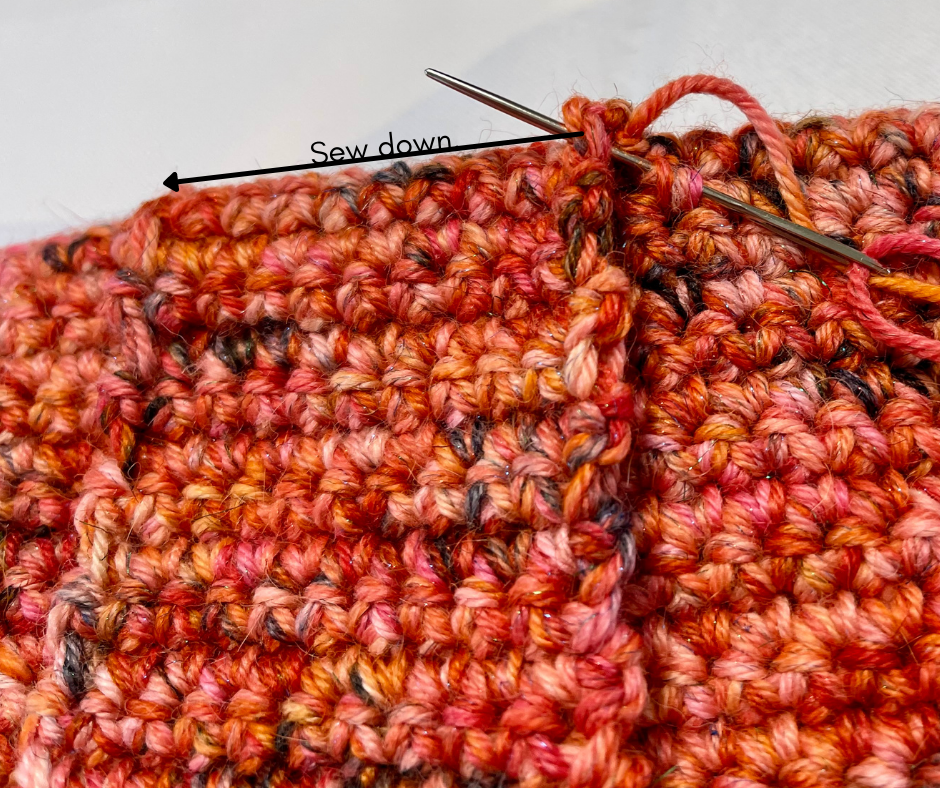
Also, I highly recommend adding a piece of felt to this part so it’s a little stronger as you pull on the button (see the image below).

Once you have all the snaps figured out and in place, fold the material creating a seam. You should have about a 1/4 inch (or 1 cm) gap of knitted material exposed around the edge. I would pin the lining to the bag, then sew it on. Try to use a thread in a matching color to the bag, You can use a sewing machine to complete this part.

Fold the body part of the bag in half. Slide it down about a quarter of an inch so that the top corner of the envelope flap touches the bottom of the bag, and does not hang over.

Sew up each side

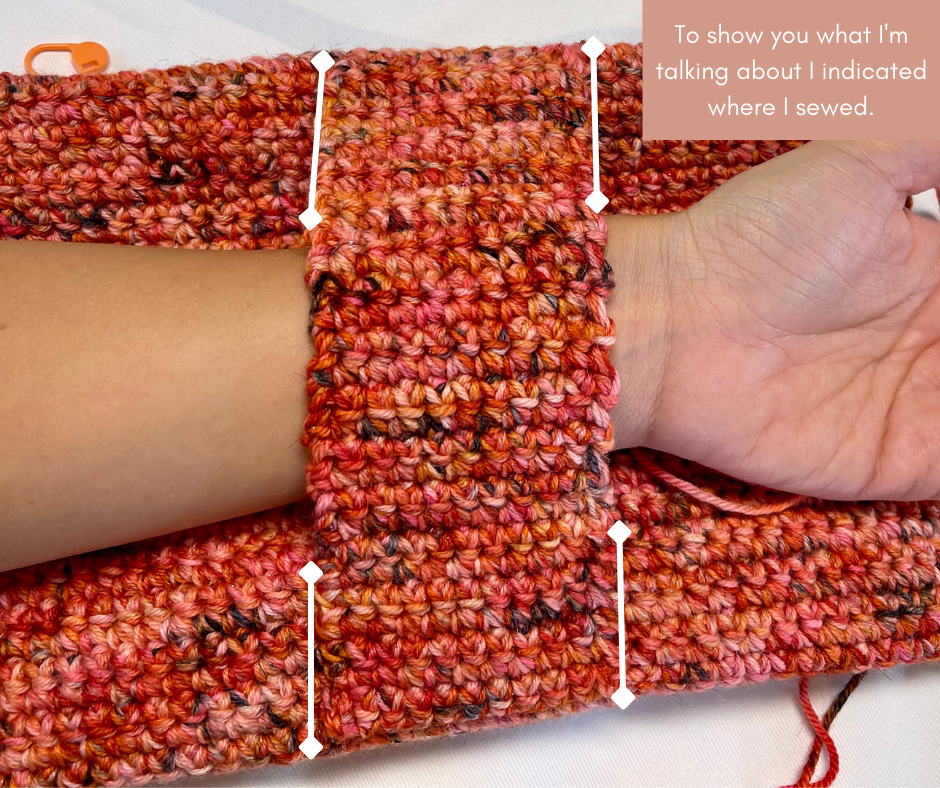
Now we’re going to add the Arm Strap.
Lay the strap flat onto the back of the bag and center it. You will be sewing the strap on the top and bottom first, then, if needed for fit, you can sew up the sides.

I found it easier to “pin” them with stitch markers.

Then sew the strap on. at the very top and bottom of the strap to the bag where pinned.
Next, check to see how loose the strap is on your arm, and if needed, you will sew a little on the sides to tighten the fit. I have pretty skinny arms, so I went up about 8 rows on the top and 8 rows on the bottom.
*Remember, there will be some stretch. so account for that when you’re trying to decide how tightly to sew it.
That’s It! Now you’re all set for your next adventure or party with your Polly Envelope Clutch!


Making it as a gift?
Remember to include a gift tag when giving your gift.
Don’t forget to tag me on Instagram or Facebook, @jenngiamsmith #JennGiamSmith
I love seeing your makes and I will always share your posts on my stories and tag you!
You can also share it on this post’s Pinterest Pin! Don’t forget to follow me on Pinterest for all kinds of inspiration!
The photographs presented in this content for the Polly Envelope Clutch Free Crochet Pattern, are the property of Always Jenn Smith and her company, Jenn Smith, LLC, formerly known as Smith Country, LLC. The year of creation is 2021.
This blog post is the exclusive property of Always Jenn Smith™ and Jenn Smith, LLC (previously known as Smith Country, LLC).
I kindly request that you respect my copyright and refrain from any infringement.
Please Be Respectful
All photos, designs, and patterns are the sole property of Jenn Smith of Always, Jenn Smith, also known as Jenn Smith, LLC (formerly Smith Country/Smith Country LLC), unless explicitly stated otherwise. Reposting, selling, trading, sharing, redistributing, or claiming any of my content, including this pattern, as your own is strictly prohibited.
You are welcome to sell any items you create using my patterns. However, it is imperative that you give credit to Jenn Smith of Always Jenn Smith™ and link to the corresponding blog post as I am the pattern designer under Jenn Smith, LLC. Failure to do so will not be tolerated. Thank you for your cooperation.
Proper credit and linking must be given to Jenn Smith of Always Jenn Smith™ for any content used from my blog posts in a list post. It is imperative that the original post is linked back to it. This requirement applies to Jenn Smith, LLC (formerly known as Smith Country, LLC) as well.
Please feel free to ask any questions by leaving a comment below or by sending me an email directly.
Thank you for visiting!
Please review our terms and conditions carefully, as this website includes third-party ads and affiliate links.
Jenn Smith, the owner of Always Jenn Smith™ and Jenn Smith, LLC (previously known as Smith Country, LLC), is an active participant in the Amazon Services LLC Associates Program. This program allows websites to earn advertising fees by linking to amazon.com. In addition, I am an esteemed member of the Performance Partners Program, which was formerly known as the Apple affiliate program.