Free Pattern: The Large Crochet Tray Basket
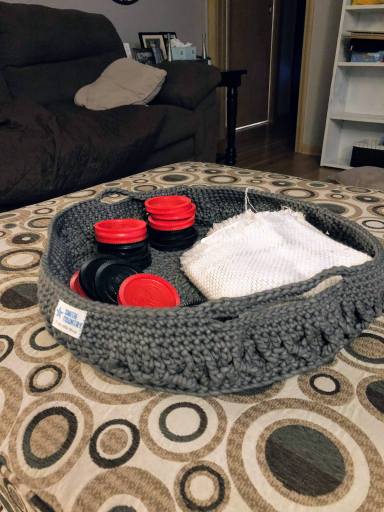
I’m so excited to share my latest pattern, a crochet tray basket! This one actually came about because of our current move. My son found some huge checker with a mat-board at a rummage sale a few years ago when we lived in Black Earth. In our previous house, I’ve always had a nice small table the set would just lay out on and could be played anytime.
This post may contain affiliate links. That means I may make a small commission on items purchased through links in this post at no extra cost to you! Affiliate Disclaimer
I’m so excited to share my latest pattern, a crochet tray basket! This one actually came about because of our current move. My son found some huge checker with a mat-board at a rummage sale a few years ago when we lived in Black Earth. In our previous house, I’ve always had a nice small table the set would just lay out on and could be played anytime.
Fast forward a bit to May of this year…
Unpacking and situating in our new home, as I’m putting things where I want them, I consequently could not figure out where to put the checker set. I tried having them lay on my ottoman all cute and set up, ready to play, like the table, but my current youngest now stands and “walks” around, pulling and yanking on anything she can reach. Huge smiles on her face as she watches them fly about and plop to the floor, or ground, or anywhere. Obviously, that’s not going to work. That table I originally had them on is now in my basement (boxes galore on top of it) eventually set to be used as a craft table in my future office/craft room.
Let the crafting begin!
I wanted a tray but in a basket style. Nothing that would take me a long amount of time to make, and something that would be sturdy enough to stand on its own (for the most part). So the sides really needed to be shorter. Tada! The Crochet Tray/Basket.
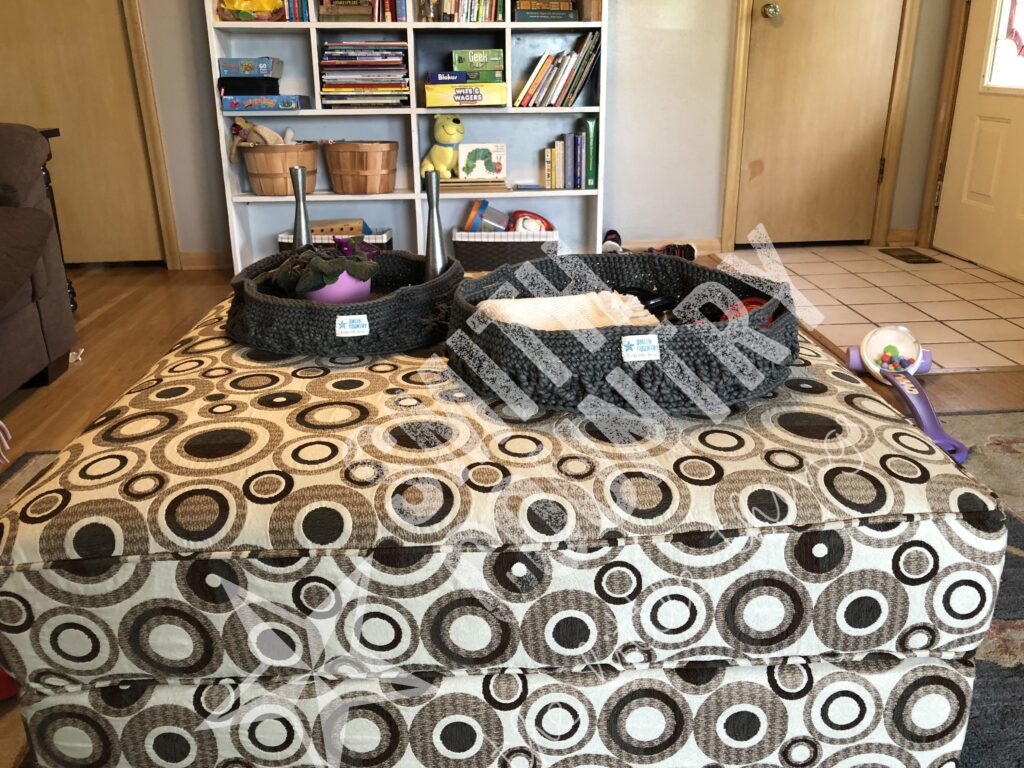
With the skein yarn amount, I was able to create 2 different sizes to test out how they would work out. I love both, but the larger of the 2 turned out perfect for the checker set.
Ready for the pattern?
Below is the free pattern for the Crochet Tray/Basket with pictures and details on most of the process for the stitches. You can also purchase an INEXPENSIVE AD & COMMENT FREE PDF version on my shop.
Remember, any purchase you make from my affiliates, my shop, and/or my designs on Lovecraft’s or Ravelry helps support my small business as well as helps me to keep on creating.
Materials
- 2 skeins of Bulky Yarn. I used Bernat Maker Outdoor Yarn in Summer Storm Gray, however, that yarn is now discontinued. You can still find it on Amazon, or use a substitute such as Lang Yarns Neon Yarn, which by comparison, is very similar in its style and weight. Or, certainly, ou can check these other substitute options.
- L/8mm hook and M/9mm hook (or size needed to obtain gauge)
- 4 stitch markers
- Yarn needle (for weaving in ends)
- Scissors
Gauge
11 dc by 4 rows using 9mm hook (or hook to obtain gauge) = 3” X 5”
Abbreviations
- ch = chain
- sc = single crochet
- st = stitch
- sl st = slip stitch
- dc = double crochet
- fptr = front post treble/triple crochet
- BLO = back loop only
- sl st edging = slip stitch edging
- sc2tog = single crochet 2 single crochets together
- sm(s) = stitch marker(s)
Special Stitches
Magic circle: Make a loop; Pick up the yarn, and pull through the first loop. Pick up the yarn again, to make a chain stitch. Chain 3; Yarn over, pull through the loop, yarn over, pull the loop through, and finish the first double crochet stitch. Continue around to the required number. Pull on the yarn end to gather the hole closed, and continue with your pattern.
Front post treble/triple crochet: Yarn over (YO) hook two times. Insert hook behind post of stitch (st). YO hook, pull up a loop, four loops on the hook, YO hook, pull through 2 loops, 3 loops on hook, YO hook, pull through 2 loops, 2 loops on hook, YO hook, pull through the last two loops.
Sc2tog: Insert hook into stitch and draw up a loop. Insert the hook into the next stitch and draw up a loop. Yarn over, and draw through all 3 loops on the hook.
slst edging: INSERT HOOK into stitch directly next to your ch and pull the working yarn through it. Slip the working yarn loop THROUGH the first loop you pulled through (just as you would to slst) Repeat around.
Notes
- Unless otherwise stated, ch does not count as a stitch
- This is worked in rounds and is only turned after the BLO round.
- For a smaller tray basket, use your smaller hook for the entire pattern instead of switching hooks. Below is the explanation for the larger basket (with hook size change).
- Regardless of whether you want to do the larger basket only or both, you will need 2 balls of yarn As one is not enough. Conversely, if you choose the smaller tray basket you will only need 1 ball of Outdoor Maker Yarn.
Measurements
The approximate sizes for the crochet tray basket are 14.5″ in diameter and 3″ side height for the “smaller” one and 17″ diameter and 4″ side height for the larger one.
The Pattern
- Round 1: if you are making a larger bag; start with a 9mm hook; Magic circle; ch 3, 12 dc [12]
- Round 2: Ch3, {2 dc in dc}, repeat {} around, Join with a join together with a slst [24]
- Round 3: Ch3, {2dc in the first dc, dc in next dc}, repeat {} around, join with a join together with a slst [36]
- Round 4: Ch3, {2dc in first dc, dc in the next 2 dc}, repeat {} around, join together [48]
- Round 5: Ch3, {2dc in first dc, dc in the next 3 dc}, repeat {} around, join together [60]
- Round 6: Ch3, {2dc in first dc, dc in the next 4 dc}, repeat {} around, join together [72]
- Round 7: Ch3, {2dc in first dc, dc in the next 5 dc}, repeat {} around, join together [84]
- Round 8: Ch3, {2dc in first dc, dc in the next 6 dc}, repeat {} around, join together with a sl st [96]
- Round 9: Ch3, {2dc in first dc, dc in the next 7 dc}, repeat {} around, join together with a sl st [108]
- Round 10: Ch3, {2dc in the first dc, dc in the next 8 dc}, repeat {} around, join together with a slst, and turn [120]
End of the Increases
- Round 11: Ch1, sc BLO around, slst [120]
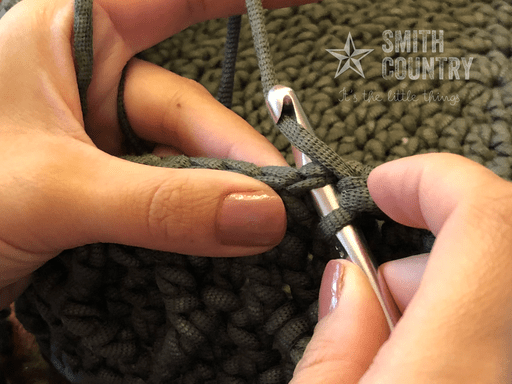
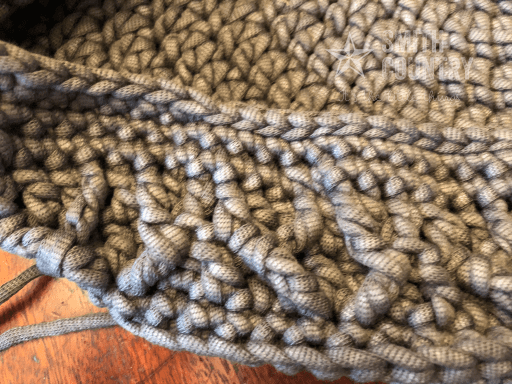
- Round 12: Ch3 (counts as a dc) skip 2, fptr in the post of 2nd skipped st dc in the 2 skipped stitches (from behind fptr), dc in the next 3 stitches, fptr in the post of sc directly after the first fptr (it will look like a V), dc in next stitch} repeat {} around to the last 5 stitches. skip 2, fptr in the post of 2nd skipped st, dc in the 2 skipped stitches (from behind fptr, dc in the next 3 stitches, fptr in the post of sc directly after the first fptr. Join with a slst.
See the images below to see details of the process of Round 12.


- Round 13: Ch3 (counts as a dc), {skip fptr, dc in both of the dc from the previous round, fptr in skipped fptr from the previous round, dc, skip the next 2 dc st from the previous round, fptr in fptr, dc in both skipped st (from behind fptr), dc in next dc} repeat {} around to last 6 stitches. skip fptr, dc in both of the dc from the previous round, fptr in skipped fptr from previous round, dc, skip next 2 dc st from previous round, fptr in fptr, dc in both skipped st (from behind fptr). Join with a slst.
See the images below to see details of the process of Round 13.


- Round 14: ch1 {sc2tog, sc 10} repeat {} around to the last 4 stitches. Sc2tog, sc 3 [144]
- Round 15: if you are making a larger bag, switch to 8mm; ch1, sc around placing sms at st 27, 45, 99, and 117.
- Round 16: ch1, sc the first 27 st (to the first sm), slst edging in the next 18 (to the next sm), sc in the 54 st (to the next sm), slst edging in the next 18 st (to the next sm), sc the last 27 st (to the last sm).
- Round 17: ch1 sc the first 27 st, ch 18 (also skip the 18 slst edged stitches from the previous round), sc in the next 54 st, ch 18 (also skip the 18 slst edged stitches from the previous round), sc in the last 27 st.
- Round 18: slst edging the first 27 sc from the previous round; sc in each of the 18 ch from the previous round; slst edging in the next 54 sc from the previous round; sc in each of the 18 ch from the previous round, slst edging in the last 27 sc from the previous round. Join with a slip stitch and weave in ends.
Want the PDF Version?
Buy the tray basket PDF Here
Making it as a gift?
Remember to include a gift tag when giving your gift.
Don’t forget to tag me on Instagram or Facebook, @jenngiamsmith #JennGiamSmith I love seeing your makes and I will always share your posts on my stories and tag you! You can also share it on this post’s Pinterest Pin! Don’t forget to follow me on Pinterest for all kinds of inspiration!
Want to remember this post? Pin it to your favorite Pinterest Board!


Photograph ©2018 Always Jenn Smith; Jenn Smith, LLC FKA Smith Country, LLC