Free Pattern: The Birch Leaf Beanie
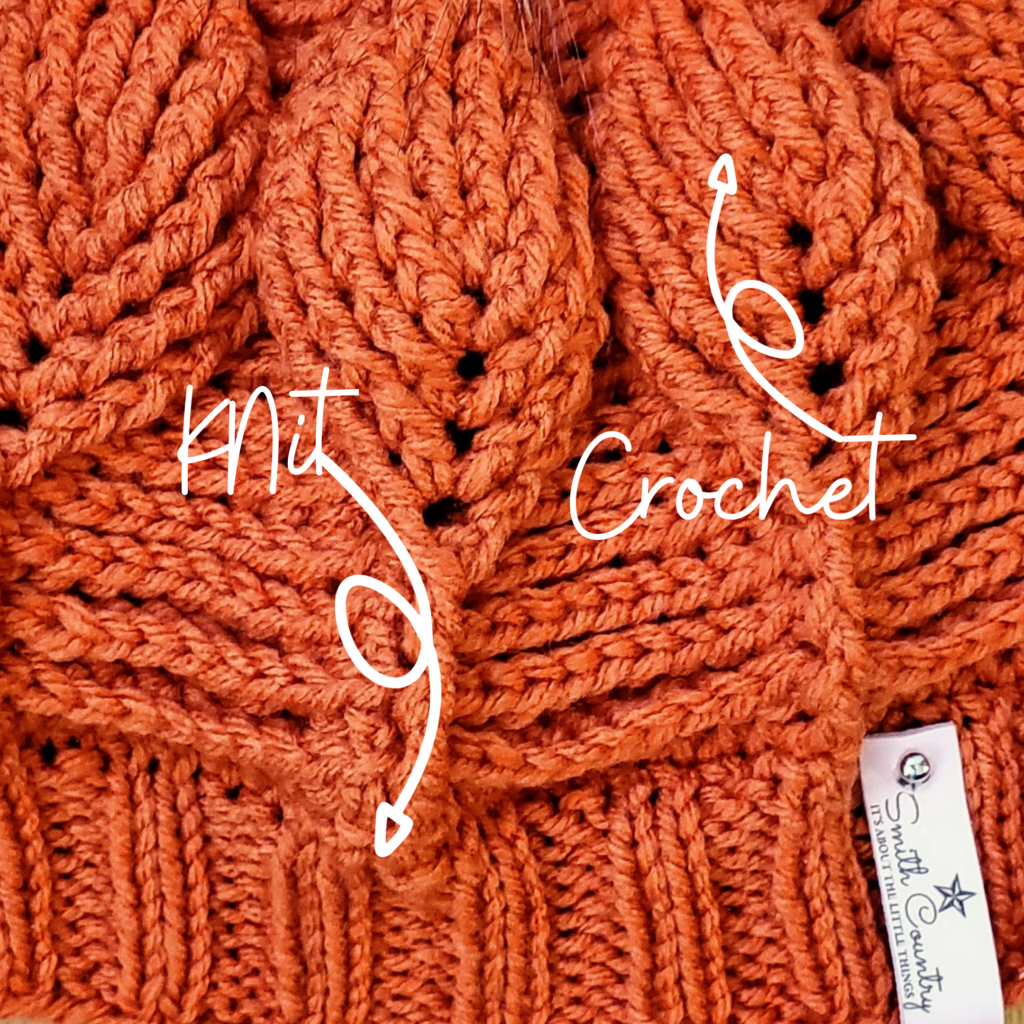
Knit meets crochet in the Birch Leaf Beanie free pattern. Learn how to make this fashionable hat and impress with your skills.

This post for the Birch Leaf Beanie free pattern may contain affiliate links. That means I may make a small commission on items purchased through links in this post at no extra cost to you! Affiliate Disclaimer
PART III
We’re finally at the last of my crochet leaf stitch patterns! WHAT?! This pattern is seriously my favorite! When I started blogging and offering patterns, my first 2 were knitted washcloths with a crochet border, and ever since I’ve had this interest and love of merging the 2 techniques together.
So many people are either #teamknit or #teamcrochet. I’m over here singing “Why can’t we be friends? Why can’t we be friends?” (in case you didn’t know, this is the Song Why Can’t We Be Friends By WAR).
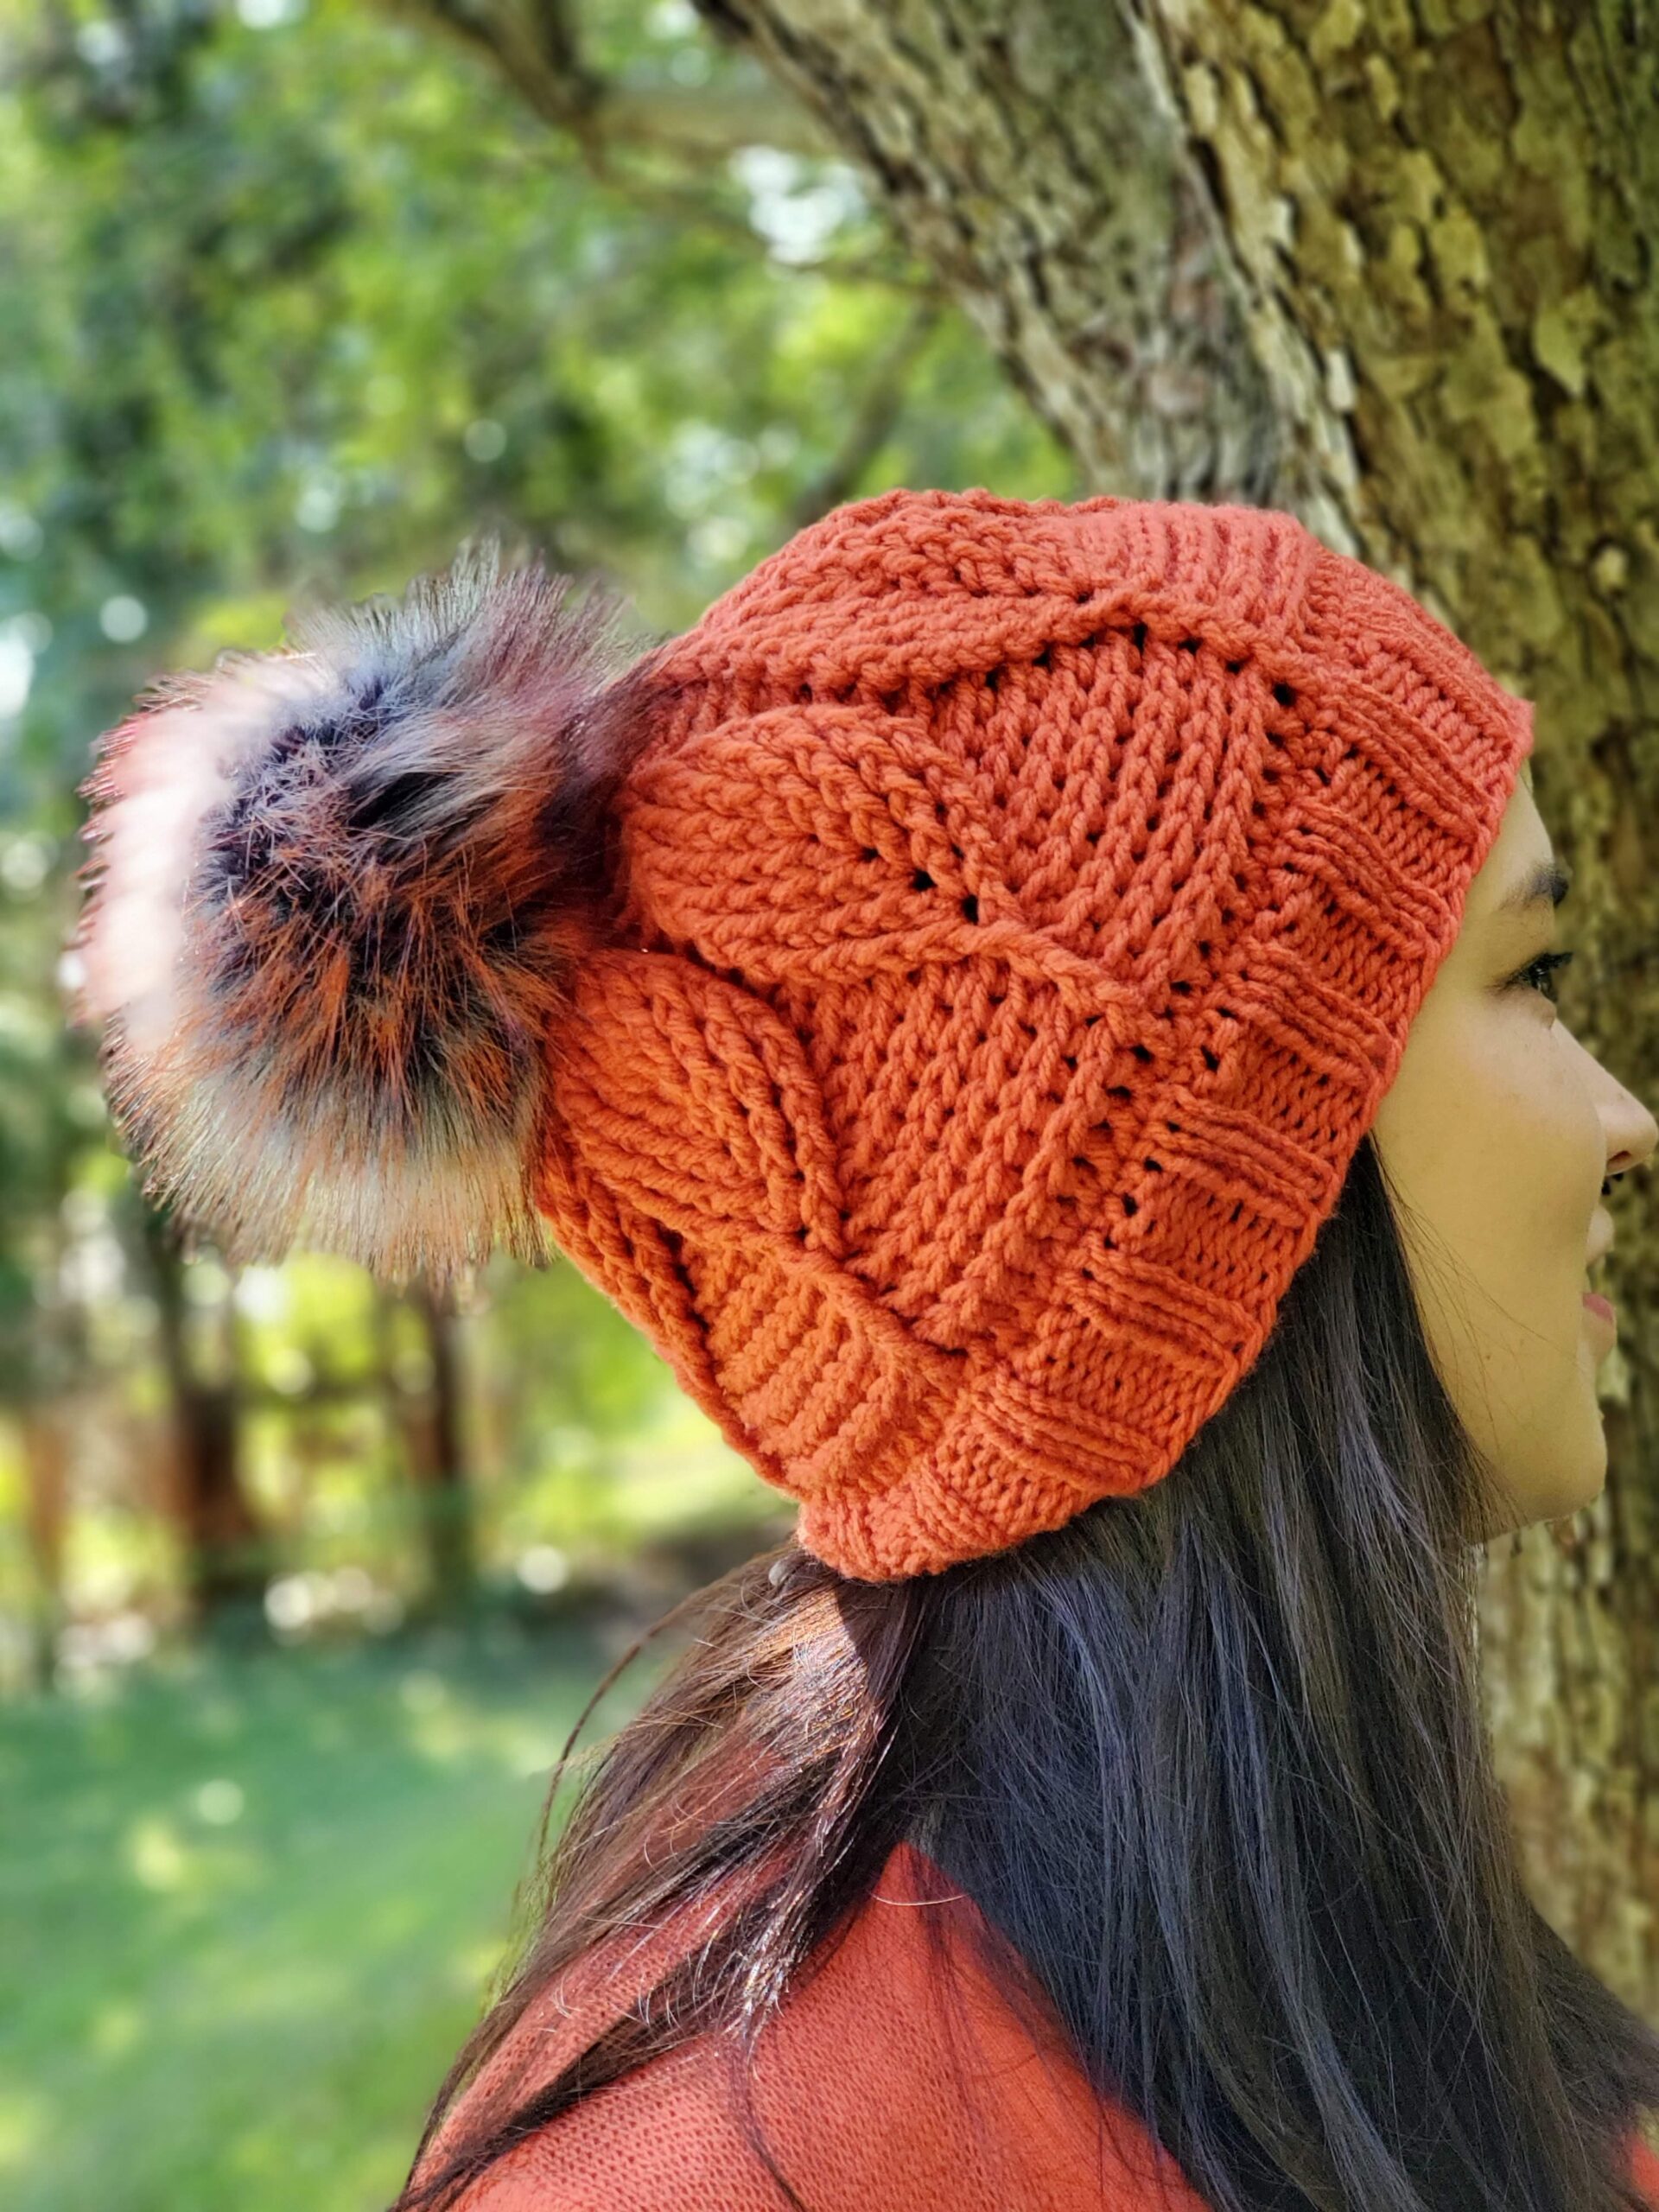
So in the spirit of fiber friendship and comradery, I present… my first (of several) knit brim, crochet body hats! But don’t worry… if you’re nervous about doing the knit part, I gotchu! First, have a video for you on how to move from knitting to crocheting without casting off and sewing it on. Second, I have an option to crochet the brim if you absolutely are not comfortable (or refuse) to knit it.
Either way… I KNOW you’re going to love this hat! It works up so fast and you’ll be wearing it out in no time!
Oh! And FYI, you should be able to use one skein of the Red Heart With Love to make both this AND the Birch Leaf Ear Warmer. You Might even have enough to make the Cup Sleeve too!
You can purchase an INEXPENSIVE AD & COMMENT FREE PDF version. Look For The Birch Leaf Beanie in the Shop

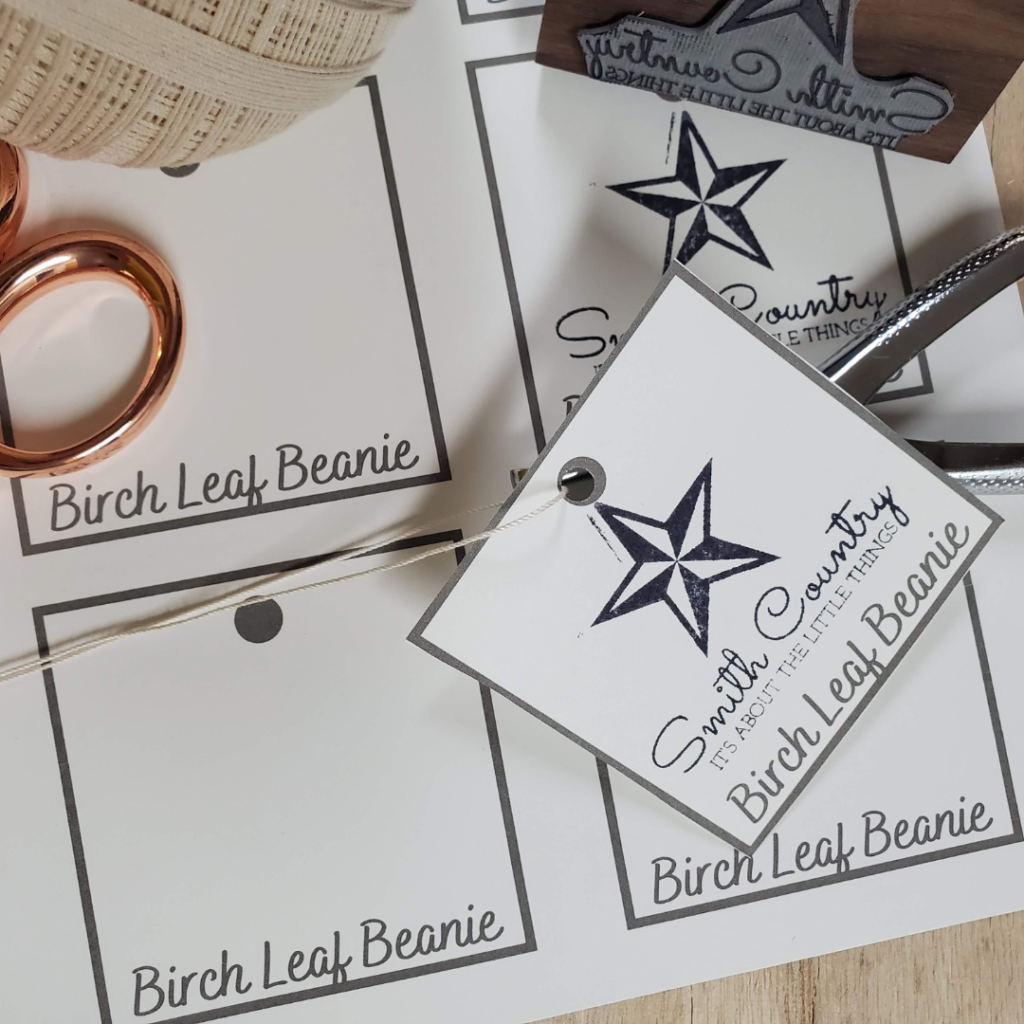
Want the stamper pictured picture? I bought that at West & Sage. She is fabulous to work with (Just make sure you’re able to send her a high-resolution logo image).
Pssst By the Way… I offer all of my Leaf Patterns in an ad-free bundle! They all come with product tags for each item (with matching fonts so they are cohesive) for those of you that sell made items at fairs, markets, and shops.
Or add it to your LoveCrafts or Ravelry projects by clicking the links below (the patterns on both sites do NOT include the tags).


Remember, any purchase you make from my affiliates, my shop, and/or my designs on Lovecraft’s or Ravelry helps support my small business and helps me to create other awesome patterns for you.
OK, ON TO THE PATTERN!
This pattern is written using standard U.S. terms. Basic stitch knowledge is assumed.
Finished Measurements (all are approximate)
- Length (When folded in half and at the widest point): 10 inches (25.4 centimeters)
- Circumference (at the widest point): 20 inches (50.8 centimeters)
- Height (not counting Pom): 8.5 inches (21.59 centimeters)
Yarn
- 4-Medium | Worsted Weight Yarn, I used Red Heart With Love Yarn – Tigerlily (approximately 180 yards/3. oz)
Crochet hooks
- J10/6mm Crochet Hook
- H8/5mm Crochet Hook
Knitting Needles
Notions
- Stitch Marker
- Pom Pom (Faux Fur or yarn). Pictured is Smoke Bomb in Large
- Tag (Optional) Mine come from The Beam City
- Finishing needle for weaving in ends
- Scissors for cutting off at the end.
Gauge 7 dc 4 rounds approximately 2” X 2” square using medium yarn and J10 (6.00mm) crochet hook. (adjust hook or yarn as needed to get the gauge size correct)
Notes
- To adjust the length, increase or decrease the foundation double crochets by 5 stitches.
- Every Round Ends with a slip stitch; unless otherwise noted.
- Every Round Starts with a ch2 (this ch2 does not count as a stitch, instead the very first BPdc will be done around the very first BPdc from the previous round); unless otherwise noted.
Terms to Know
CO: Cast on [If Knitting Brim]
PM: PM [If Knitting Brim]
K2P2: Knit two stitches then Purl two Stitches [If Knitting Brim]
SC: Single Crochet
Ch(s): chain(s)
BPdc: Back Post Double Crochet
BPdc2tog: Back Post Double Crochet Together
FPdc: Front Post Double Crochet
FPdc2tog: Front Post Double Crochet Together
DC: Double Crochet
St(s): stitch(es)
* * = Repeat instructions between * and * the number of times indicated
Stitches
- Foundation Double Crochet (FDC): Chain two, yarn over (YO), insert hook into very first chain made, pull up a loop (three loops on hook), yarn over (YO), pull through one loop (three loops on hook), yarn over (YO), pull through two loops, yarn over (YO), pull through remaining two loops on hook. First complete. Continue this by: Yarn over (YO), insert the hook into both sides of the BOTTOM of the previous stitch, pull up a loop (three loops on hook), yarn over (YO), pull through one loop (three loops on hook), yarn over (YO), pull through two loops, yarn over (YO), pull through remaining two loops on hook. Continue until desired length (or amount of Double Crochets) are acquired.
- Double Crochet (DC): yarn over (YO), insert your hook, pull up a loop, yarn over (YO) and pull through two loops (two left on hook), yarn over (YO), pull through last 2 loops.
Watch the following video to see how to do a FDC
- Back Post Double Crochet (BPdc): Yarn over (YO), insert the hook from back to front to back around the post of the previous round stitch, yarn over (YO), pull a loop, yarn over (YO) and pull through two loops (two left on hook), yarn over (YO), pull through last 2 loops
- Back Post Double Crochet Together (BPdc2tog): Yarn over (YO), insert the hook from back to front to back around the post of the previous round stitch, yarn over (YO), pull up a loop, yarn over (YO) and pull through two loops (two left on hook), yarn over (YO), insert the hook from back to front to back around the next post of the previous round stitch, yarn over (YO), and pull through two loops (three left on hook), yarn over (YO), pull through last 3 loops
- Front Post Double Crochet (FPdc): Yarn over (YO), insert the hook from front to back to front around the post of the previous round stitch, yarn over (YO), pull up a loop, yarn over (YO) and pull through two loops (two left on hook), yarn over (YO), pull through last 2 loops
- Front Post Double Crochet Together (FPdc2tog): Yarn over (YO), insert the hook from front to back to front around the post of the previous round stitch, yarn over (YO), pull up a loop, yarn over (YO) and pull through two loops (two left on hook), yarn over (YO), insert the hook from front to back to front around the next post of the previous round stitch, yarn over (YO), and pull through two loops (three left on hook), yarn over (YO), pull through last 3 loops
Watch the following video to see how to BPdc and FPdc
Directions:
If You’re Knitting the Brim…
For you crocheters who are a little nervous about starting with knitting. It’s not bad, I promise, and I think you’d really like the way the brim stretches which will make your hat super unique from other crochet hats.
Now, starting with your circular knitting needles, CO 80 st, PM; join in the round (Careful not to twist. I like the Long Tail Cast-On for this. See the video below for details.
Then K2P2 around until the brim is 2”. Next, Grab your 6mm Crochet Hook and SC all 80 stitches off the needles ( to SC the stitches off the needle, remove the Marker, with your crochet hook, and remove the 1st stitch on your left-hand needle with your hook. YO, pull the loop through, ch1, then sc into the original loop. Then, *remove another loop off your left-hand side with the hook keeping your hook in the loop, YO, pull the loop through. Now you have 2 loops on the hook, YO, and pull through both loops on the hook.* continue repeating ** until you reach the 1st sc, sl st). Below is a video on how to.
Rather Crochet the Brim? No problem!
Start with a Ch 10, sc in the second ch from hook, sc to end, turn (9 sc)
Next, Ch 1, *sc in back loops to end, turn, ch1* repeat ** until your edging has reached 20 inches (or your desired size). Match up your two ends (careful not to twist) and slst together, do not fasten off!
Now, switch to your 6mm Crochet Hook. You will do one round of SC along the side of your brim, totaling 80 SC (80)
The Hat
This part of the pattern is the same whether you knitted or crocheted the brim.
Round 2: DC around (80)
Round 3: *BPdc in first 9 dc, FPdc* repeat **around 7 times, or a total of 8 times. (80)
Round 4: *BPdc in first 9 dc, FPdc* repeat **around 7 times, or a total of 8 times. (80)
Round 5: *BPdc in first 9 dc, FPdc* repeat **around 7 times, or a total of 8 times. (80)
Round 6: *BPdc2tog in the next 2 st BPdc from the previous round, BPdc in the next 5, BPdc2tog in the next BPdc; [FPdc, ch 1, FPdc] all on the previous FPdc* repeat **around 7 times, or a total of 8 times. (80)
Round 7: *BPdc2tog in the next 2 st from previous round, BPdc in the next 3, BPdc2tog in the last 2 BPdc from previous round; FPdc on FPdc from previous round, [DC, ch 1, DC] all on the ch from previous round; FPdc on FPdc from previous round* repeat **around 7 times, or a total of 8 times. (80)
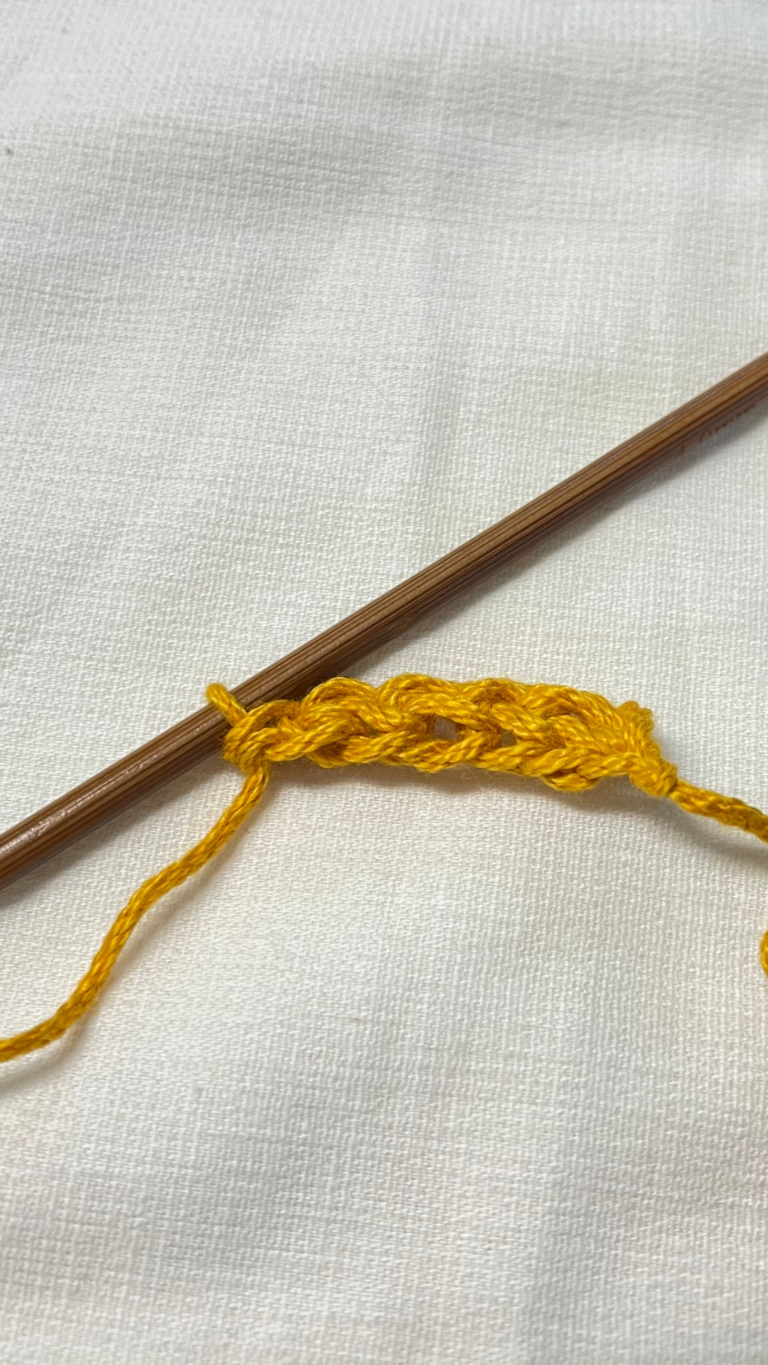
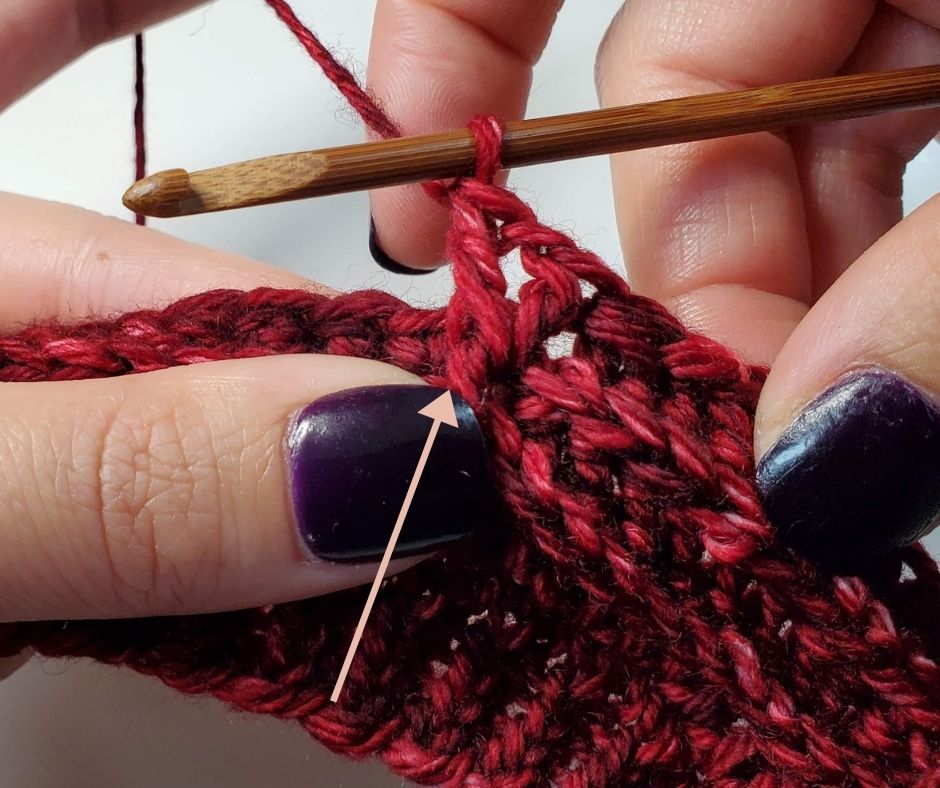
See the next 3 images on details with FPdc and BPdc2tog
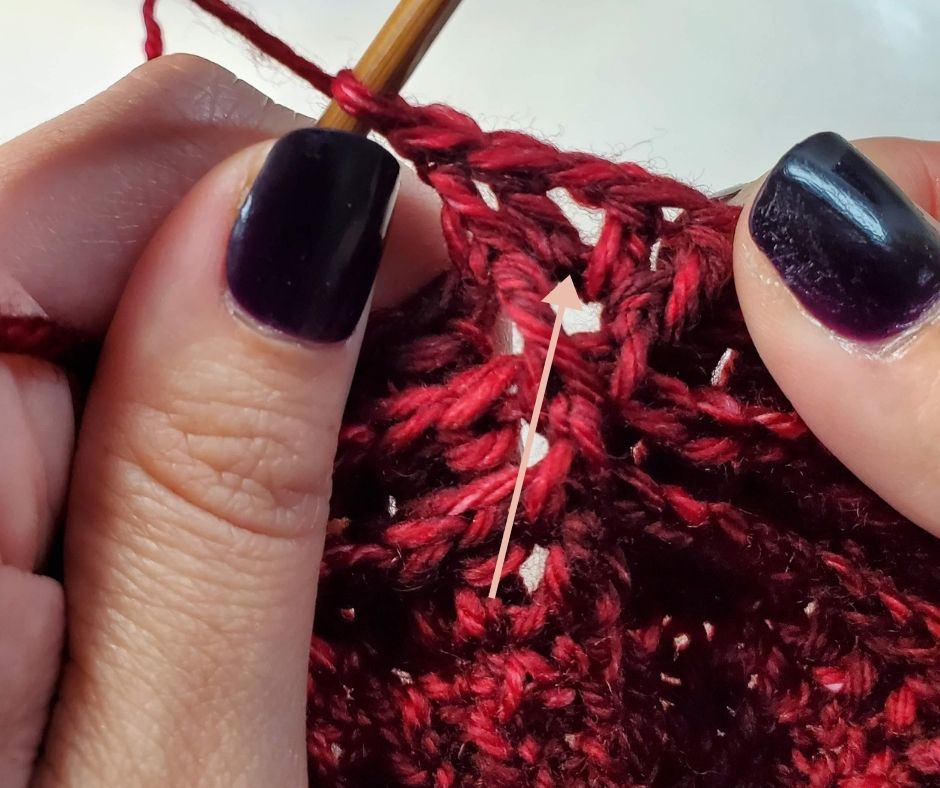
Pictures on how to do the Back Post Double Crochet Together


Round 8: *BPdc2tog in the next 2 st from previous round, BPdc in the next st, BPdc2tog in the last 2 BPdc from previous round; FPdc on FPdc from previous round, FPdc on DC from previous round, [DC, ch 1, DC] all on the ch from previous round; FPdc on DC from previous round, FPdc on FPdc from previous round* repeat **around 7 times, or a total of 8 times. (80)
Round 9: *BPdc in each of the 3 st from previous round; FPdc on the next 2 FPdc from previous round, FPdc on DC from previous round, [DC, ch 1, DC] all on the ch from previous round; FPdc on DC from previous round, FPdc on the next 2 FPdc from previous round,* repeat **around 7 times, or a total of 8 times. (96)
Round 10: *BPdc in each of the 3 st from the previous round; FPdc on each of the next 3 FPdc from the previous round, FPdc on DC from previous round, [2 DC] all on the ch from previous round; FPdc on DC from previous round, FPdc on each of the next 3 FPdc from previous round,* repeat **around 7 times, or a total of 8 times. (104)
This is the start of the hat’s decrease and the leaf’s finishing.
Round 11: *BPdc in each of the 3 st from the previous round; FPdc2tog on the next two FPdc from the previous round; FPdc on each of the next 2 FPdc from the previous round, FPdc on DC from the previous round, FPdc on DC from previous round, FPdc on each of the next 2 FPdc from previous round, FPdc2tog on the next two FPdc from previous round*; repeat **around 7 times, or a total of 8 times. (88)
Round 12: *BPdc in each of the 3 st from the previous round; FPdc2tog on the next two FPdc from the previous round; FPdc on each of the next 4 FPdc from the previous round, FPdc2tog on the next two FPdc from the previous round*; repeat **around 7 times, or a total of 8 times. (72)
Round 13: *BPdc in each of the 3 st from the previous round; FPdc2tog on the next two FPdc from the previous round; FPdc on each of the next 2 FPdc from the previous round, FPdc2tog on the next two FPdc from previous round*; repeat **around 7 times or a total of 8 times. (56)
almost done…
Round 14: *BPdc in each of the 3 st from previous round; FPdc2tog the next two FPdc from previous round, FPdc2tog on the next two FPdc from previous round*; repeat **around 7 times, or a total of 8 times. (40)
Round 15: *BPdc in each of the 3 st from previous round, FPdc2tog on the last two FPdc from previous round*; repeat **around 7 times, or a total of 8 times. (32)
Round 16: *BPdc in each of the 3 st from previous round, FPdc*; repeat ** around 7 times, or a total of 8 times. (32)
Round 17: *BPdc2tog in the next 2 st from the previous round, BPdc in the next st, FPdc*; repeat ** around 7 times, or a total of 8 times. (24)
Round 18: *BPdc2tog in the next 2 st from previous round, FPdc*; repeat ** around 7 times, or a total of 8 times. (16)
finishing
Now, cut a long tail and weave it into each stitch, then pull tightly to bring the top of the hat together. Pull through the inside of the hat. Tie off and weave in the ends. Add a pom-pom of your choice and your tag!


Making it as a gift?
Remember to include a gift tag when giving your gift.! Don’t forget to tag me on Instagram or Facebook, @jenngiamsmith #JennGiamSmith I love seeing your makes and I will always share your posts on my stories and tag you! You can also share it on this post’s Pinterest Pin! Don’t forget to follow me on Pinterest for all kinds of inspiration!
Want to remember this post?
Pin it to your favorite Pinterest Board!


Photographs, videos, and content ©2020 Jenn Giam Smith, LLC FKA Smith Country, LLC
This Blog Post is ©2020 Jenn Giam Smith™; Jenn Smith, LLC (FKA Smith Country, LLC) See below for details
Please Be Respectful
All photos are copyrighted by Jenn Giam Smith™; Jenn Smith, LLC (FKA Smith Country, LLC) unless otherwise noted. Please do not (in any way repost) sell, trade, share, redistribute or claim my photos, this DIY or any of my content as your own. You may NOT use any of my photographs for your site (unless you are using the title photo in a list post directly linking back to the original blog post, or you receive explicit permission from Jenn Giam Smith™; Jenn Smith, LLC (FKA Smith Country, LLC)).
You may link any blog post to a list post as long as you give credit for the content to Jenn Giam Smith™; Jenn Smith, LLC (FKA Smith Country, LLC), and link back directly to that blog post.
Feel free to comment below or e-mail me directly if you have any questions.
Thank you for visiting!
This site displays third-party ads and contains affiliate links, See terms and conditions for ALL affiliates.
Jenn Giam Smith™; Jenn Smith, LLC (FKA Smith Country, LLC) is a participant in the Amazon Services LLC Associates Program, an affiliate advertising program designed to provide a means for sites to earn advertising fees by advertising and linking to amazon.com. As well as the Apple affiliate program, now called the Performance Partners Program.