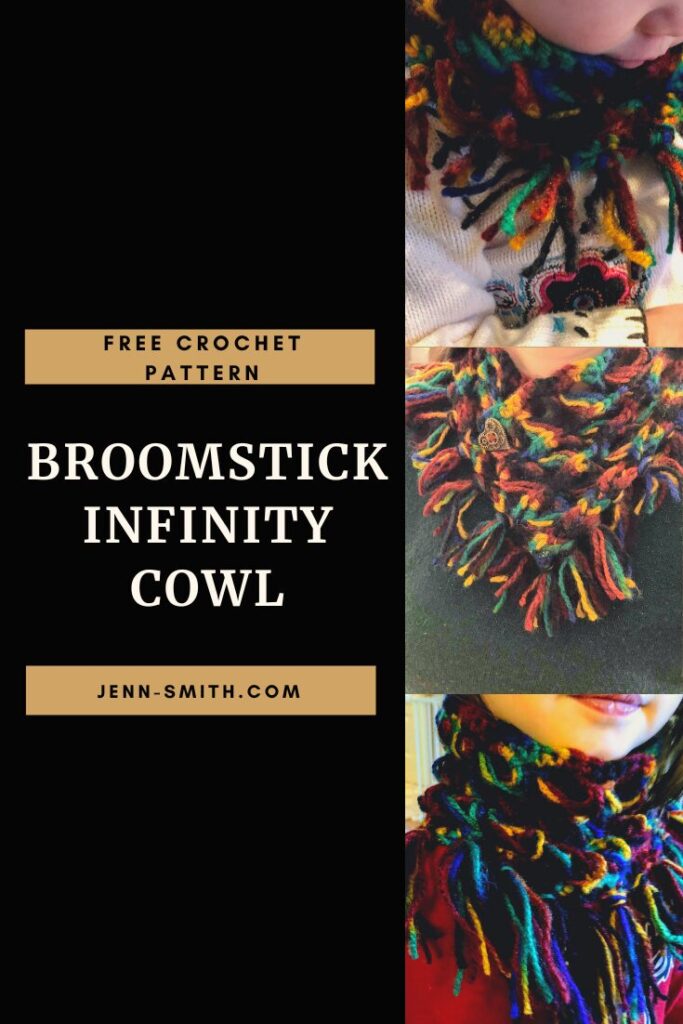
Free Pattern: Broom Stick Cowl
Happy Halloween Everyone! Who’s ready to try the Broomstick stitch? I swear it’s not as scary as it may look. My Broom Stick Cowl is easy and makes up quick. So you still have plenty of time to make up a couple for you and your favorite witchlets (if you want to make the toddler and baby sizes, you will need to buy the pattern set).

This post may contain affiliate links. That means I may make a small commission on items purchased through links in this post at no extra cost to you! Affiliate Disclaimer
Happy Halloween Everyone! Who’s ready to try the Broomstick stitch? I swear it’s not as scary as it may look. My Broom Stick Cowl is easy and makes up quick. So you still have plenty of time to make up a couple for you and your favorite witchlets (if you want to make the toddler and baby sizes, you will need to buy the pattern set).
How I came up with this…
I don’t know about where you are, but here in Wisconsin Halloween has the craziest weather EVER! It could be cold rain and snow or warm and sunny. Because of that, costumes either have to work with the weather OR the costume gets covered with a big coat. I really try to work with the kids and make costumes they can wear. I’d rather not cover up all their hard work with a coat. So We try to plan out costumes so that work with the weather… unless it’s snowing, then everyone is a stay-puffed-marshmallow man or Ralphie from a Christmas Story. That being said, this year the 2 older girls wanted to be witches. Since the girls wanted to be witches, I could make both a fun & warm cowl. I also make one for my youngest, who ended up being a black cat, to continue the theme (yes we try to theme our kids’ costumes). In case you’re wondering, my son was a man that was “hexed” into a tap-dancing cow (I just go with it).

I remembered seeing a broomstick stitch on Pinterest, and a few months ago my (at the time 2-year old) found some fun super colorful yarn at JoAnn’s (the yarn I bought is no longer in stock, but the link will take you to the closest yarn choice), that I knew would look super cute in that stitch.
Personally, I found the broomstick stitch to be easy and quick to make. However, my mother said she found it difficult to be to figure out. So to help delve deeper into this, I’m going to share details and pictures of how I do the stitch (and yes, I used a broomstick).
Update (9/29/2020): I now use a large US50/25.00mm Crochet hook to make my broomstick, but the same size in a knitting needle would also work. Following the picture instructions, I also have a video tutorial coming soon on how to make Broomstick Lace.
Looking for the Ad-Free Version?
You can purchase an INEXPENSIVE AD & COMMENT FREE PDF version by clicking here to download it directly from my site.
You can also grab any of the 3 sizes OR all three at the shop.
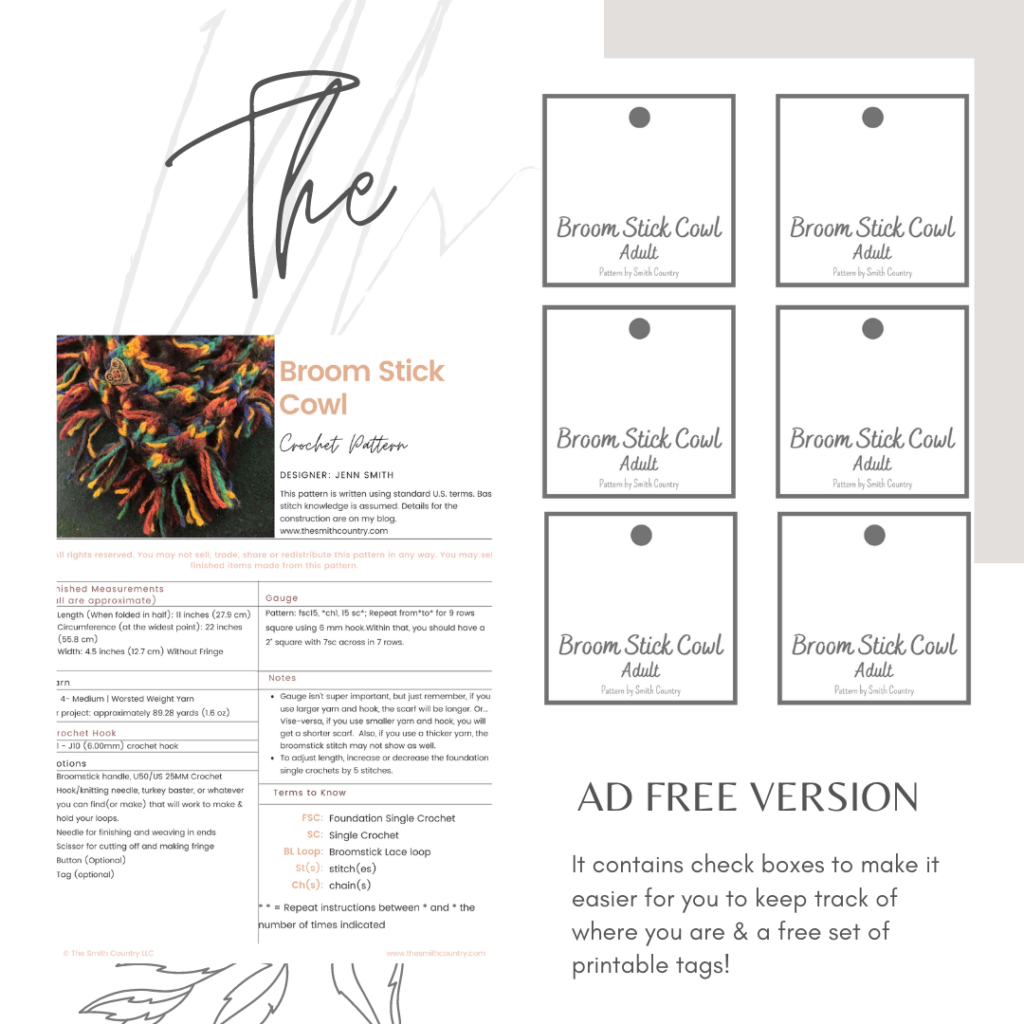
Or add it to your Ravelry projects by clicking the button below (the pattern on Ravelry does NOT include the tags).
Remember, any purchase you make from my affiliates, my shop, and/or my designs on Ravelry helps support my small business and helps me to create other awesome patterns for you.
Making Broomstick Lace
Start with a “base” some people start with a chain, and some people do a chain with a single crochet row. I like to do the foundation single crochet. I find it to be a good start, especially for this cowl.
Making Loops

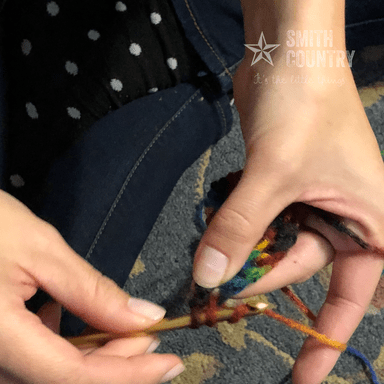
Next, you’re going to pull up the yarn currently around your hook making a big loop (And yes, that is my baby sitting on my lap).
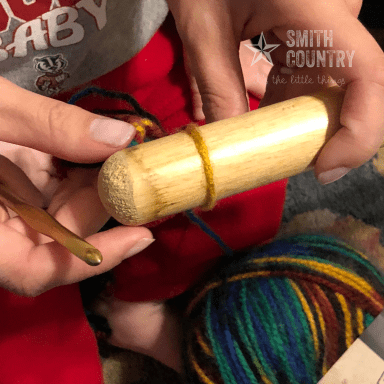
Grab your broomstick and loop the yarn over the stick. I use my hook to loop it over, but you can just loop it over with your hands too. Pull the ball end of the yarn to make the loop snug (but not tight!) around the stick.


*For “loop” rows, always work through the back loops only of the single crochets.*
Next, you’re going to hold your stick, and working in back loops, insert your hook, and pull up a loop for each single crochet from the previous row. If needed, pull the ball-end yarn and tighten it. Continue doing this until you reach the end. (you should have the same amount of loops as single crochets).
If you deiced to pull them off like I did (above) make sure of the following:
- Your yarn is stiff enough
- Be VERY careful not to pull on the loops.
I will say, this was easier for me than pulling 5 loops each while still on the stick.
And now… The Broomstick Lace


Grab up your hook again and insert it through the first five loops, pulling them a little tight, but careful not to pull too hard.
Now grab the ball end of the yarn in your non-hook using your hand and start the very first lace group (this same process will continue with every single crochet row).
First, insert your hook through the “eye” of the lace group, yarn over, and slip stitch around all five loops, this locks the loops but does not count as a single crochet.
Next, you need to make 5 single crochets in the loop group.
Next, insert your hook through the “eye” of the next lace group, yarn over, and single crochet (no-slip stitch is needed in any of the following groups).
Next, you need to make 4 single crochets in the loop group.
And that’s it. Now you can make the scarf! 🙂
If you need a little more, check out this tutorial to help you out.
Bonus, the yarn I used worked quickly and easily into the loops.
Well, let’s get into the cowl pattern!
This pattern is written using standard U.S. terms. Basic stitch knowledge is assumed.
Finished Measurements (all are approximate)
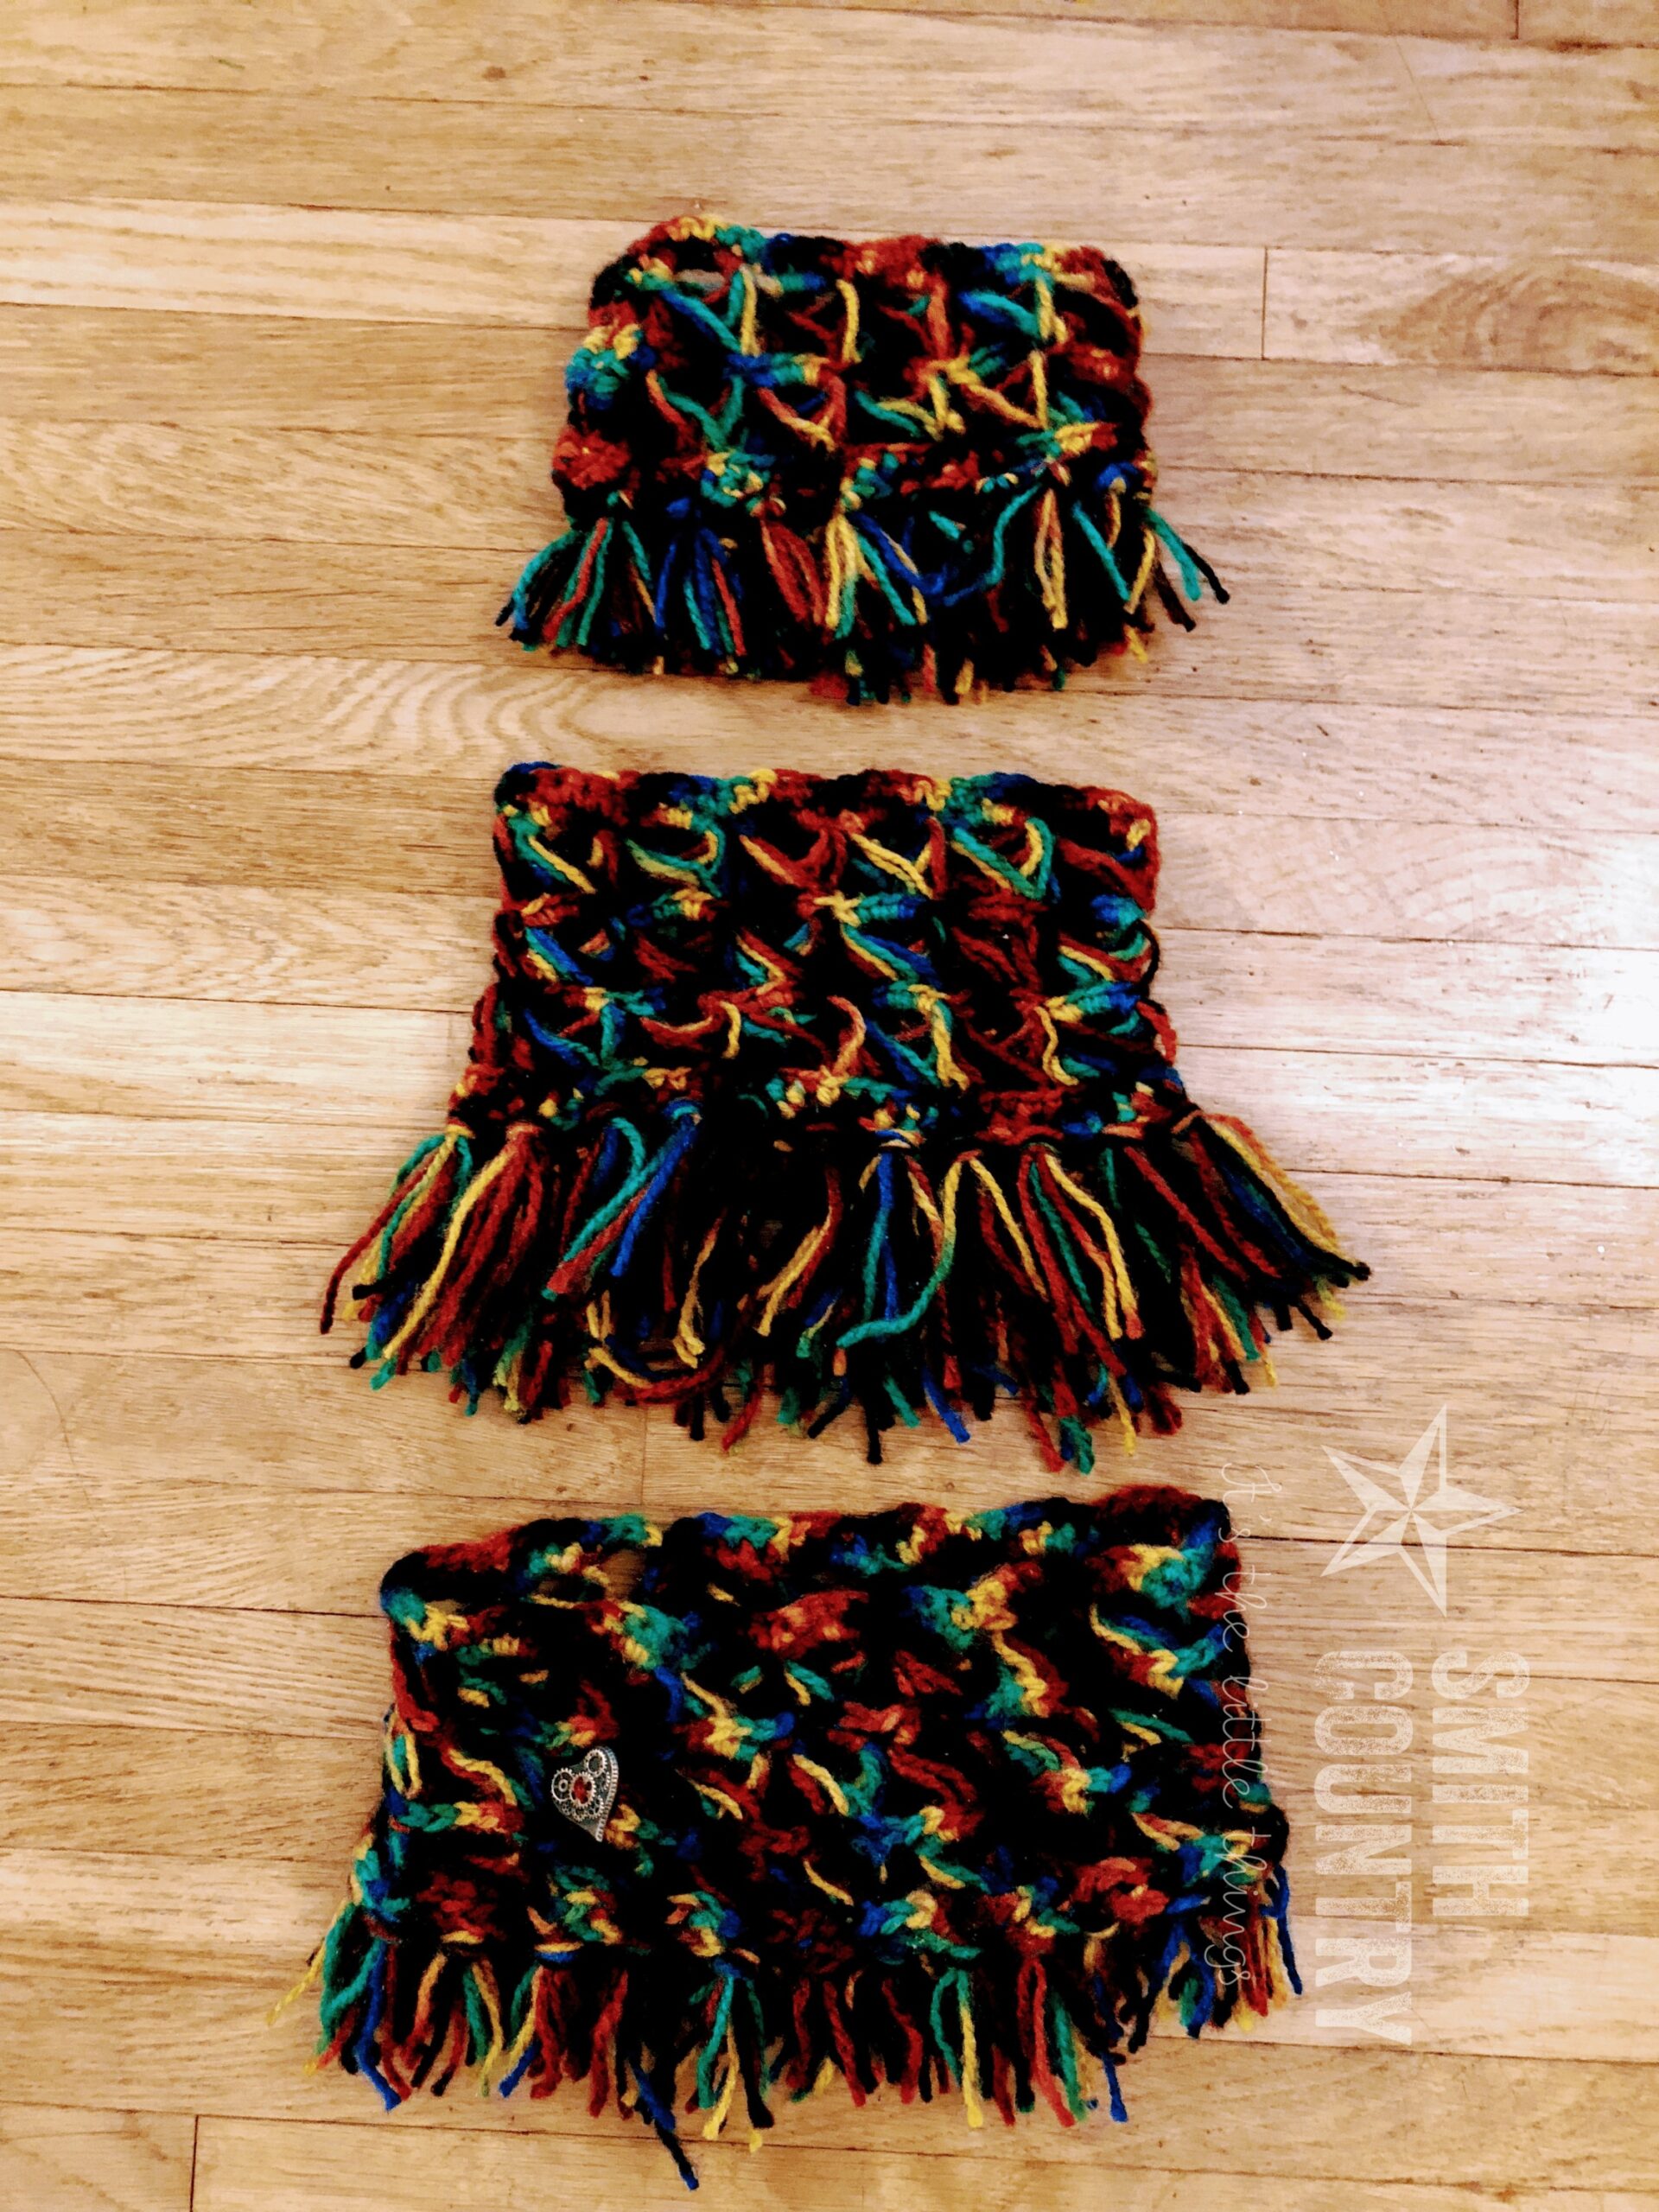
- Length (When folded in half): Adult: 11 inches
- Circumference:Adult: 22 inches
- Width: Adult: 4.5 inches (without Fringe)
Yarn
- 5-Bulky Yarn – I used Big Twist – Rainbow Classic in Brights and Blacks (Unfortunately, this coloring is no longer available. But if you click on the link it will take you to Big Twist – Classic in Fun Brights, which is very close to the yarn I originally used, but any of their colorways would be perfect). For project: about 30 yards
Crochet hook
Notions
- Broomstick handle, U50/US 25MM Crochet Hook/knitting needle, turkey baster, or whatever you can find(or make) that will work to make & hold your loops.
- Yarn Needles for finishing and weaving in ends
- Scissors for cutting off and making fringe.
Gauge and Pattern
Pattern
fsc15, *ch1, 15 sc*; Repeat from *to* for 9 rows square using a 6 mm hook.
Gauge
Within that, you should have a 2″ square with 7sc across in 7 rows.
Notes
- Gauge isn’t super important, but just remember, if you use larger yarn and hook, the scarf will be longer. Or… Vise-versa, if you use smaller yarn and hook, you will get a shorter scarf. Also, if you use a thicker yarn, the broomstick stitch may not show as well.
- To adjust length, increase or decrease the foundation single crochets by 5 stitches.
Terms to Know
FSC: Foundation Single Crochet
SC: Single Crochet
BL loop: Broomstick Lace loop
St(s): stitch(es)
Ch(s): chain(s)
* * = Repeat instructions between * and * the number of times indicated
Stitches
- Foundation Single Crochet (FSC): Chain two, insert hook into very first chain made, pull up a loop (two loops on hook), yarn over (YO), pull through one loop (two loops on hook), yarn over (YO), pull through remaining two loops on hook. First complete! Continue this by: inserting hook into both sides of the BOTTOM of the previous stitch, pull up a loop (two loops on hook), yarn over (YO), pull through one loop (two loops on hook), yarn over (YO), pull through remaining two loops on hook. Continue until desired length (or amount of single crochets) are acquired.
- Single Crochet (SC): insert your hook, pull up a loop, yarn over (YO) and pull rough both loops.
- Broomstick Lace loop (BL loop): Loop the yarn over the stick (pull the ball-end of the yarn to make the loop snug, but not tight, around the stick). Working in back loops of the sc, insert your hook, and pull up a loop for every single crochet from the previous row (See picture or video instruction for details).
Directions:
The free instructions are in adult size only. To make the other sizes, you will need to purchase the ad-free (no comment) version.
Row 1: 85 fsc
Row 2: ch 1 (does not count as a sc) sc across [85]
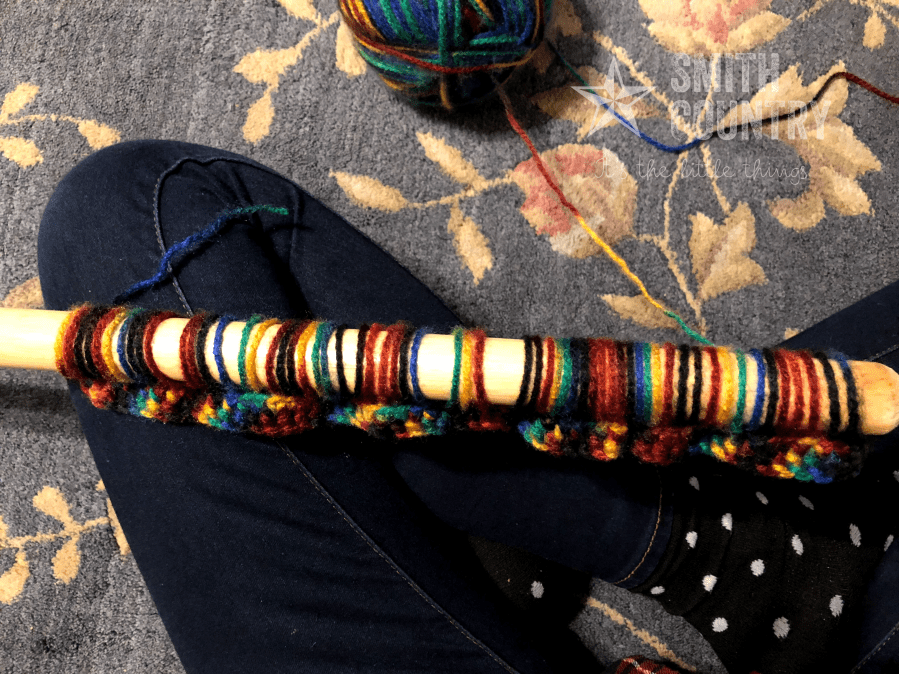
Row 3: Pull up a BL loop in each sc. [85 loops]
Row 4: Work in groups of 5 BL loops. Make 5 sc in each group of 5 BL loops. [85]
Repeat Rows 3 & 4 two more times, totaling three rows of Broomstick Lace. Do not cut or weave in ends yet.
Making the edge and putting together the cowl
Sc 2 more in the same stitch as the last sc continue down the side, *ch 5, sc into the sc of the top of the BL loop*, repeat * * two more times.
Ch 1 (does not count as a sc) sc into each ch and sc [20]
Continue the sc across the top [85]
2sc in the corner, then down the side; *ch 5, sc into the sc of the top of the BL loop*, repeat * * two more times.
Ch 1 (does not count as a sc) sc into each ch and sc [20]
Cut yarn, leaving a long length for sewing (about 16 inches). Finish off. Weave in the yarn tail from the first row.
Without twisting, bring the two ends together (wrong side facing out). Using the long yarn tail, whipstitch the two ends together evenly, working under both loops of the “v” in the sc. When you reach the end, secure the yarn with a small knot and weave in the excess.
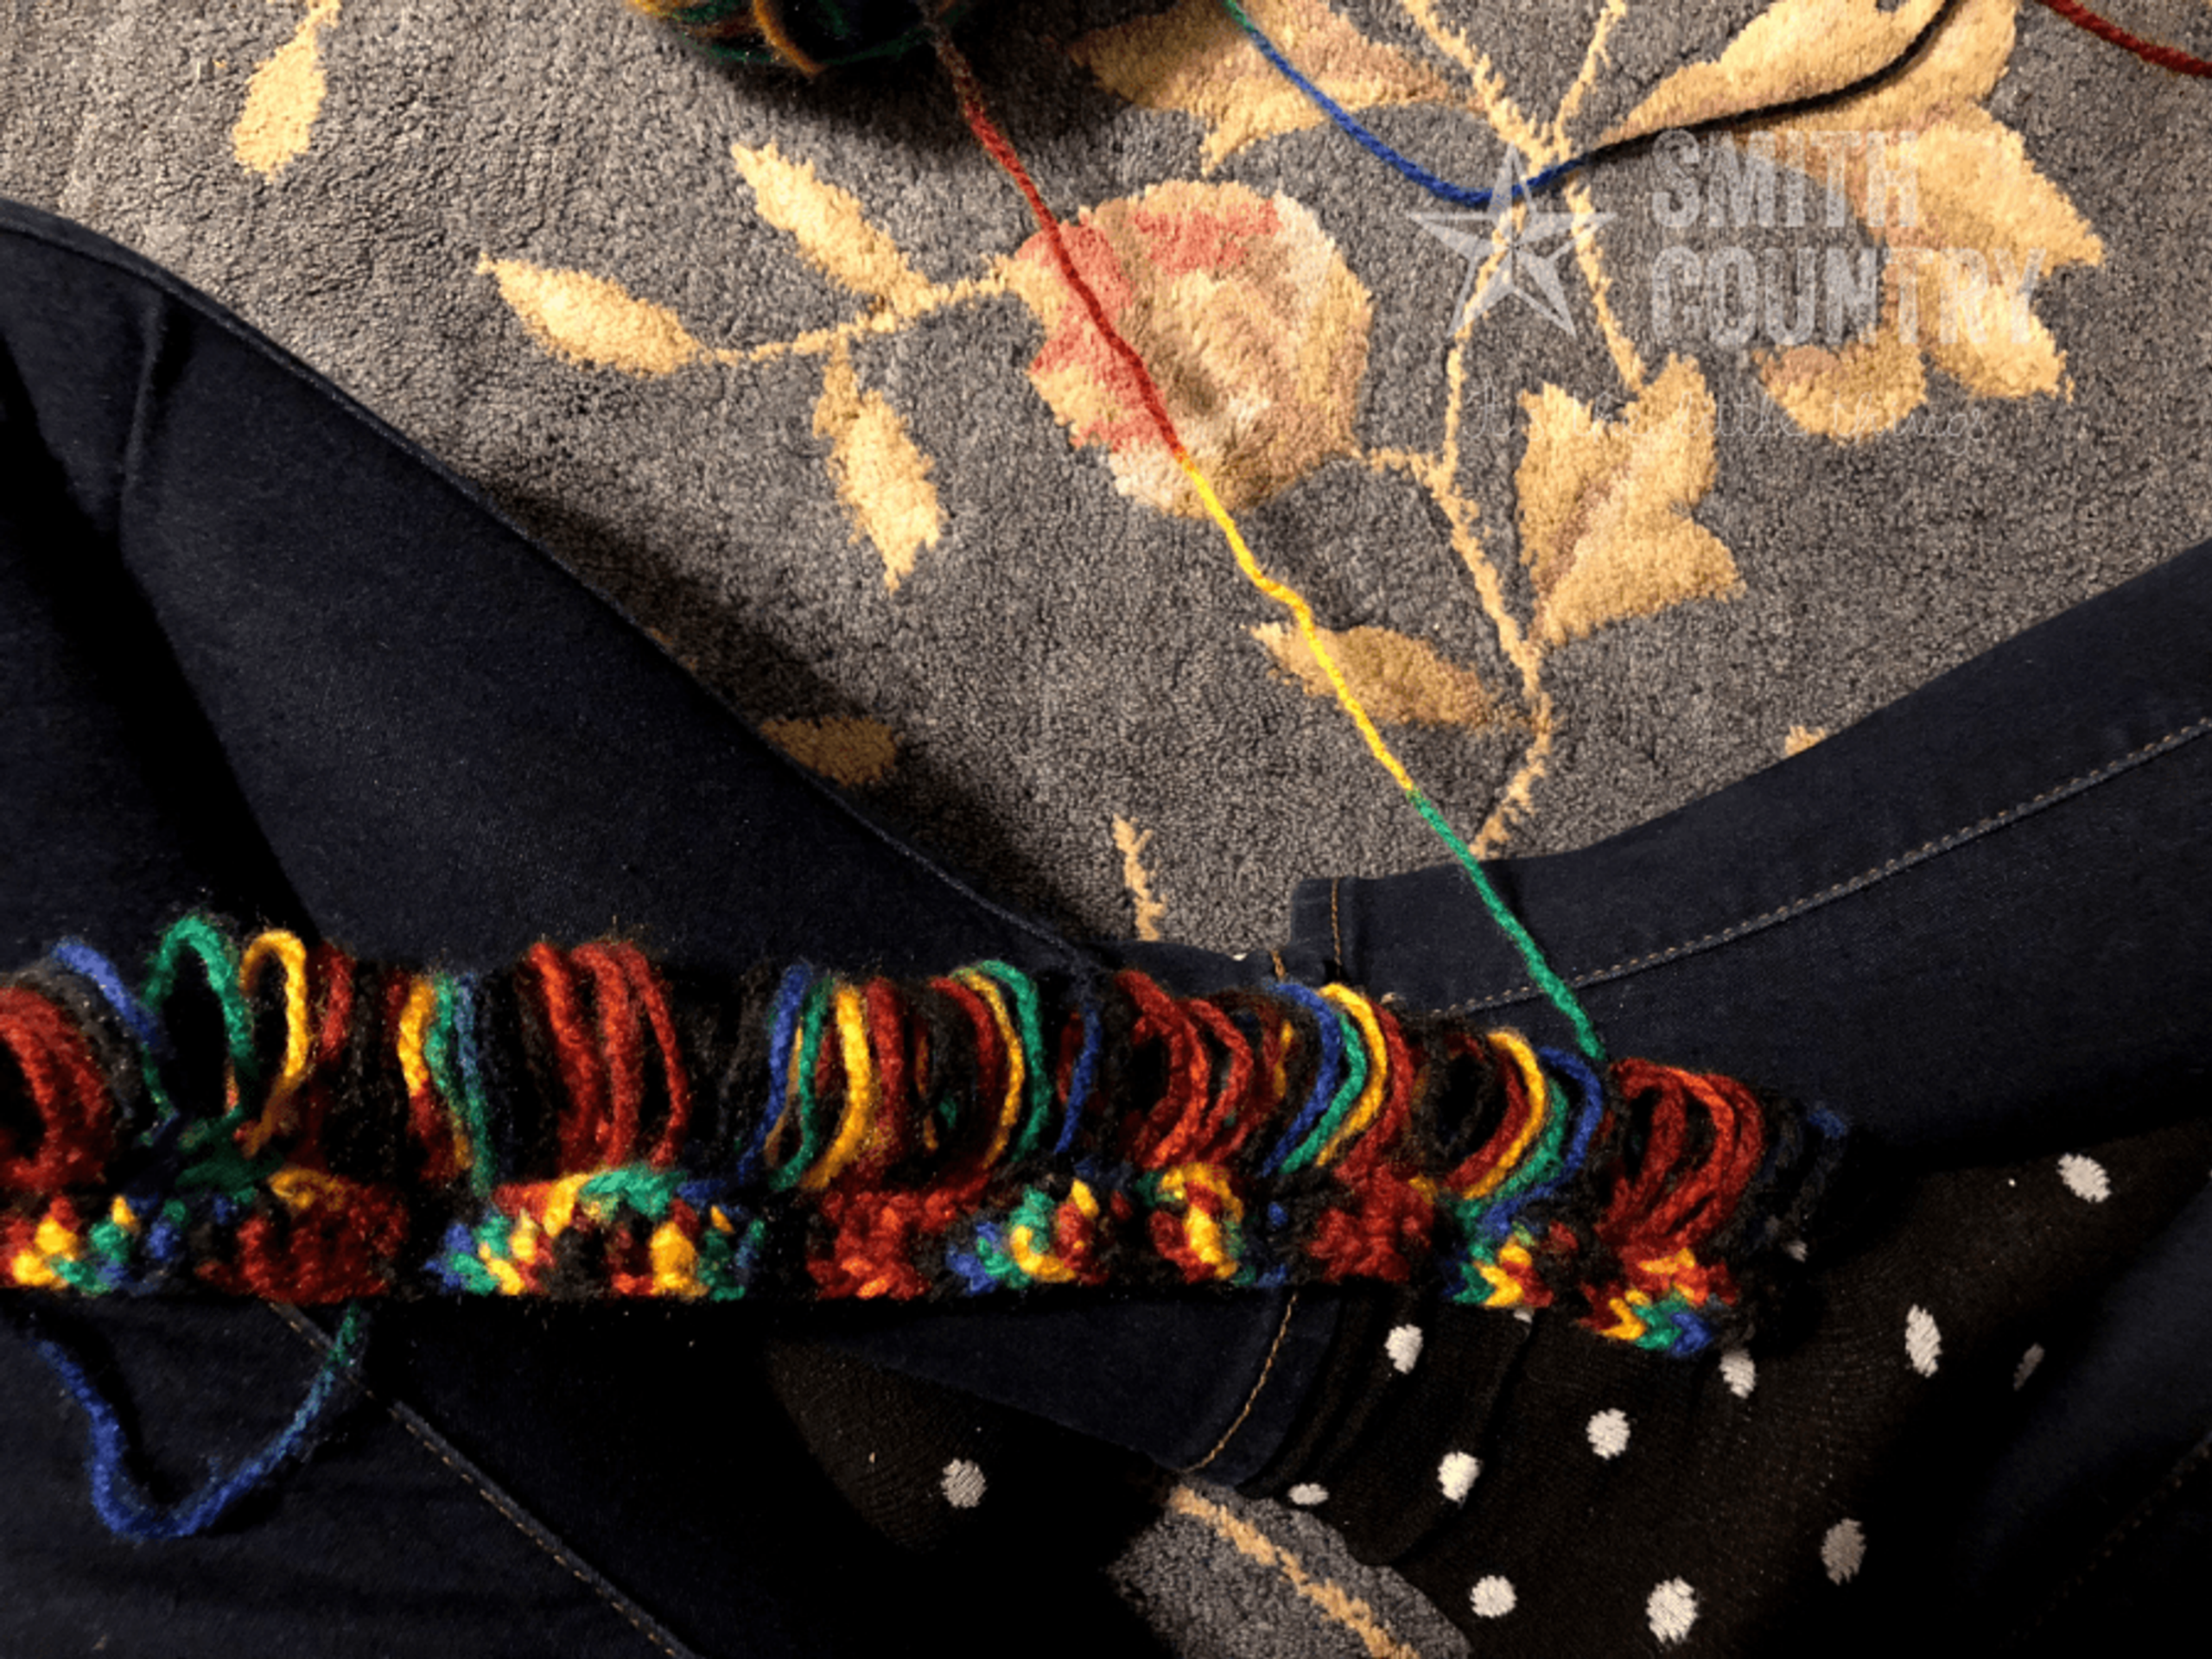
Making the Fringe
Cut yarn pieces approximately 8 inches long [120 fringe strings]
Using your crochet hook, pull from the middle of the fringe, making a loop, and pull up enough that you can pull the end through the loop whole. grab the strands and pull tight. Place them in groups of 5, every 3 stitches. [24]
There you go! You have a cowl. My Oldest added a button and uses the large opening as a buttonhole. (click through the slide to see what the other sizes look like).


Making it as a gift?
Don’t forget the gift tag! If you share it on Social Media, tag me on Instagram or Facebook using #alwaysjennsmith or @alwaysjennsmith! I LOVE seeing your makes!

Want to remember this post? Pin it to your favorite Pinterest Board!
Photograph ©2018 Always Jenn Smith; Jenn Smith, LLC FKA Smith Country, LLC
This Blog Post is ©2018 Always Jenn Smith™; Jenn Smith, LLC (FKA Smith Country, LLC) See below for details
This blog post is the exclusive property of Always Jenn Smith™ and Jenn Smith, LLC (previously known as Smith Country, LLC).
I kindly request that you respect my copyright and refrain from any infringement.
Please Be Respectful
All photos, designs, and patterns are the sole property of Jenn Giam Smith of Jenn Smith, LLC (formerly Smith Country/Smith Country LLC), unless explicitly stated otherwise. Reposting, selling, trading, sharing, redistributing, or claiming any of my content, including this pattern, as your own is strictly prohibited.
You are welcome to sell any items you create using my patterns. However, it is imperative that you give credit to Jenn Giam Smith™ and link to the corresponding blog post as I am the pattern designer under Jenn Smith, LLC. Failure to do so will not be tolerated. Thank you for your cooperation.
Proper credit and linking must be given to Jenn Giam Smith™ for any content used from my blog posts in a list post. It is imperative that the original post is linked back to it. This requirement applies to Jenn Smith, LLC (formerly known as Smith Country, LLC) as well.
Feel free to comment below or e-mail me directly if you have any questions.
Thank you for visiting!
Please review our terms and conditions carefully, as this website includes third-party ads and affiliate links.
Jenn Giam Smith, the owner of Jenn Giam Smith™ and Jenn Smith, LLC (previously known as Smith Country, LLC), is an active participant in the Amazon Services LLC Associates Program. This program allows websites to earn advertising fees by linking to amazon.com. In addition, I am an esteemed member of the Performance Partners Program, which was formerly known as the Apple affiliate program.