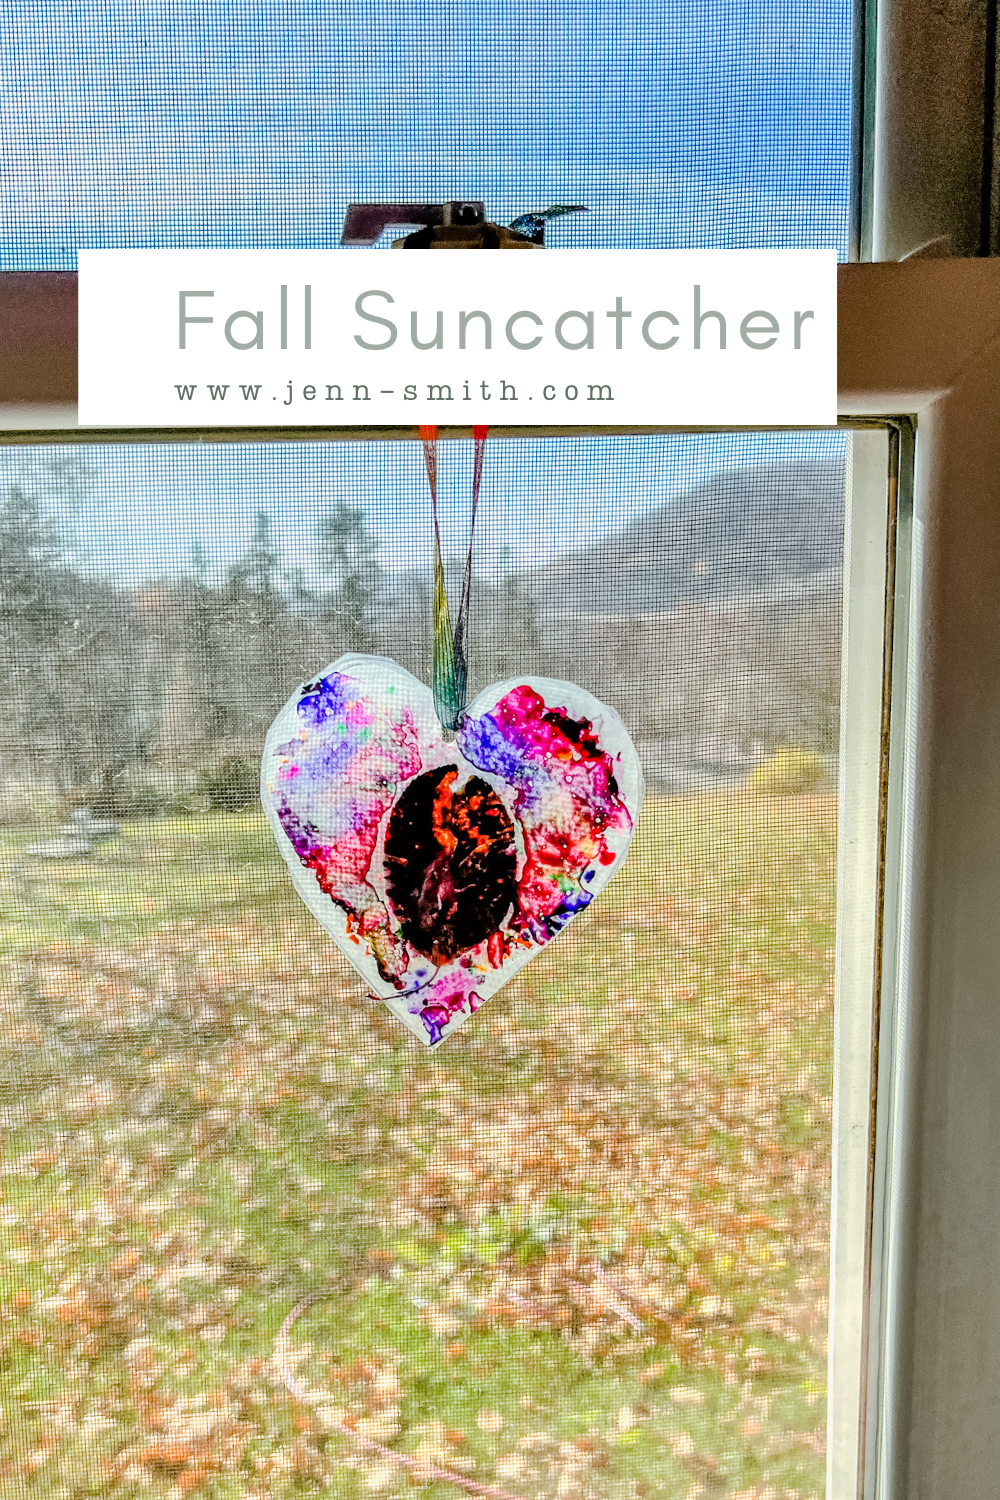
DIY Fall Suncatcher Craft
Make lasting memories with your kids with this simple and affordable DIY fall suncatcher craft. Create unique suncatchers using leaves and enjoy the process.
This post may contain affiliate links, which means that I make a small commission off items you purchase at no additional cost to you. Please read my Affiliate Disclosure

This post may contain affiliate links. That means I may make a small commission on items purchased through links in this post at no extra cost to you! Affiliate Disclaimer
Who’s ready for fun #fallcraftsforkids? These Fun Fall Suncatchers are not only easy but so fun! They’re easy to make, a little messy, but totally worth the look on your kids’ faces when it’s done. A perfect activity for kids of all ages and a great opportunity for you to do a craft with your kids.
I’ve been making these since I was little. My mom’s oldest friend used to take my brother and me out for walks, collect leaves, and make these fun suncatchers for our rooms. Now I do them with my kids!
They’re so easy to make and affordable! Anyone can do this.
What I love most about this is it gives you all an opportunity to walk outside and let the kids explore. Mine always enjoy it, even if it’s just in the backyard.
Here are all the details
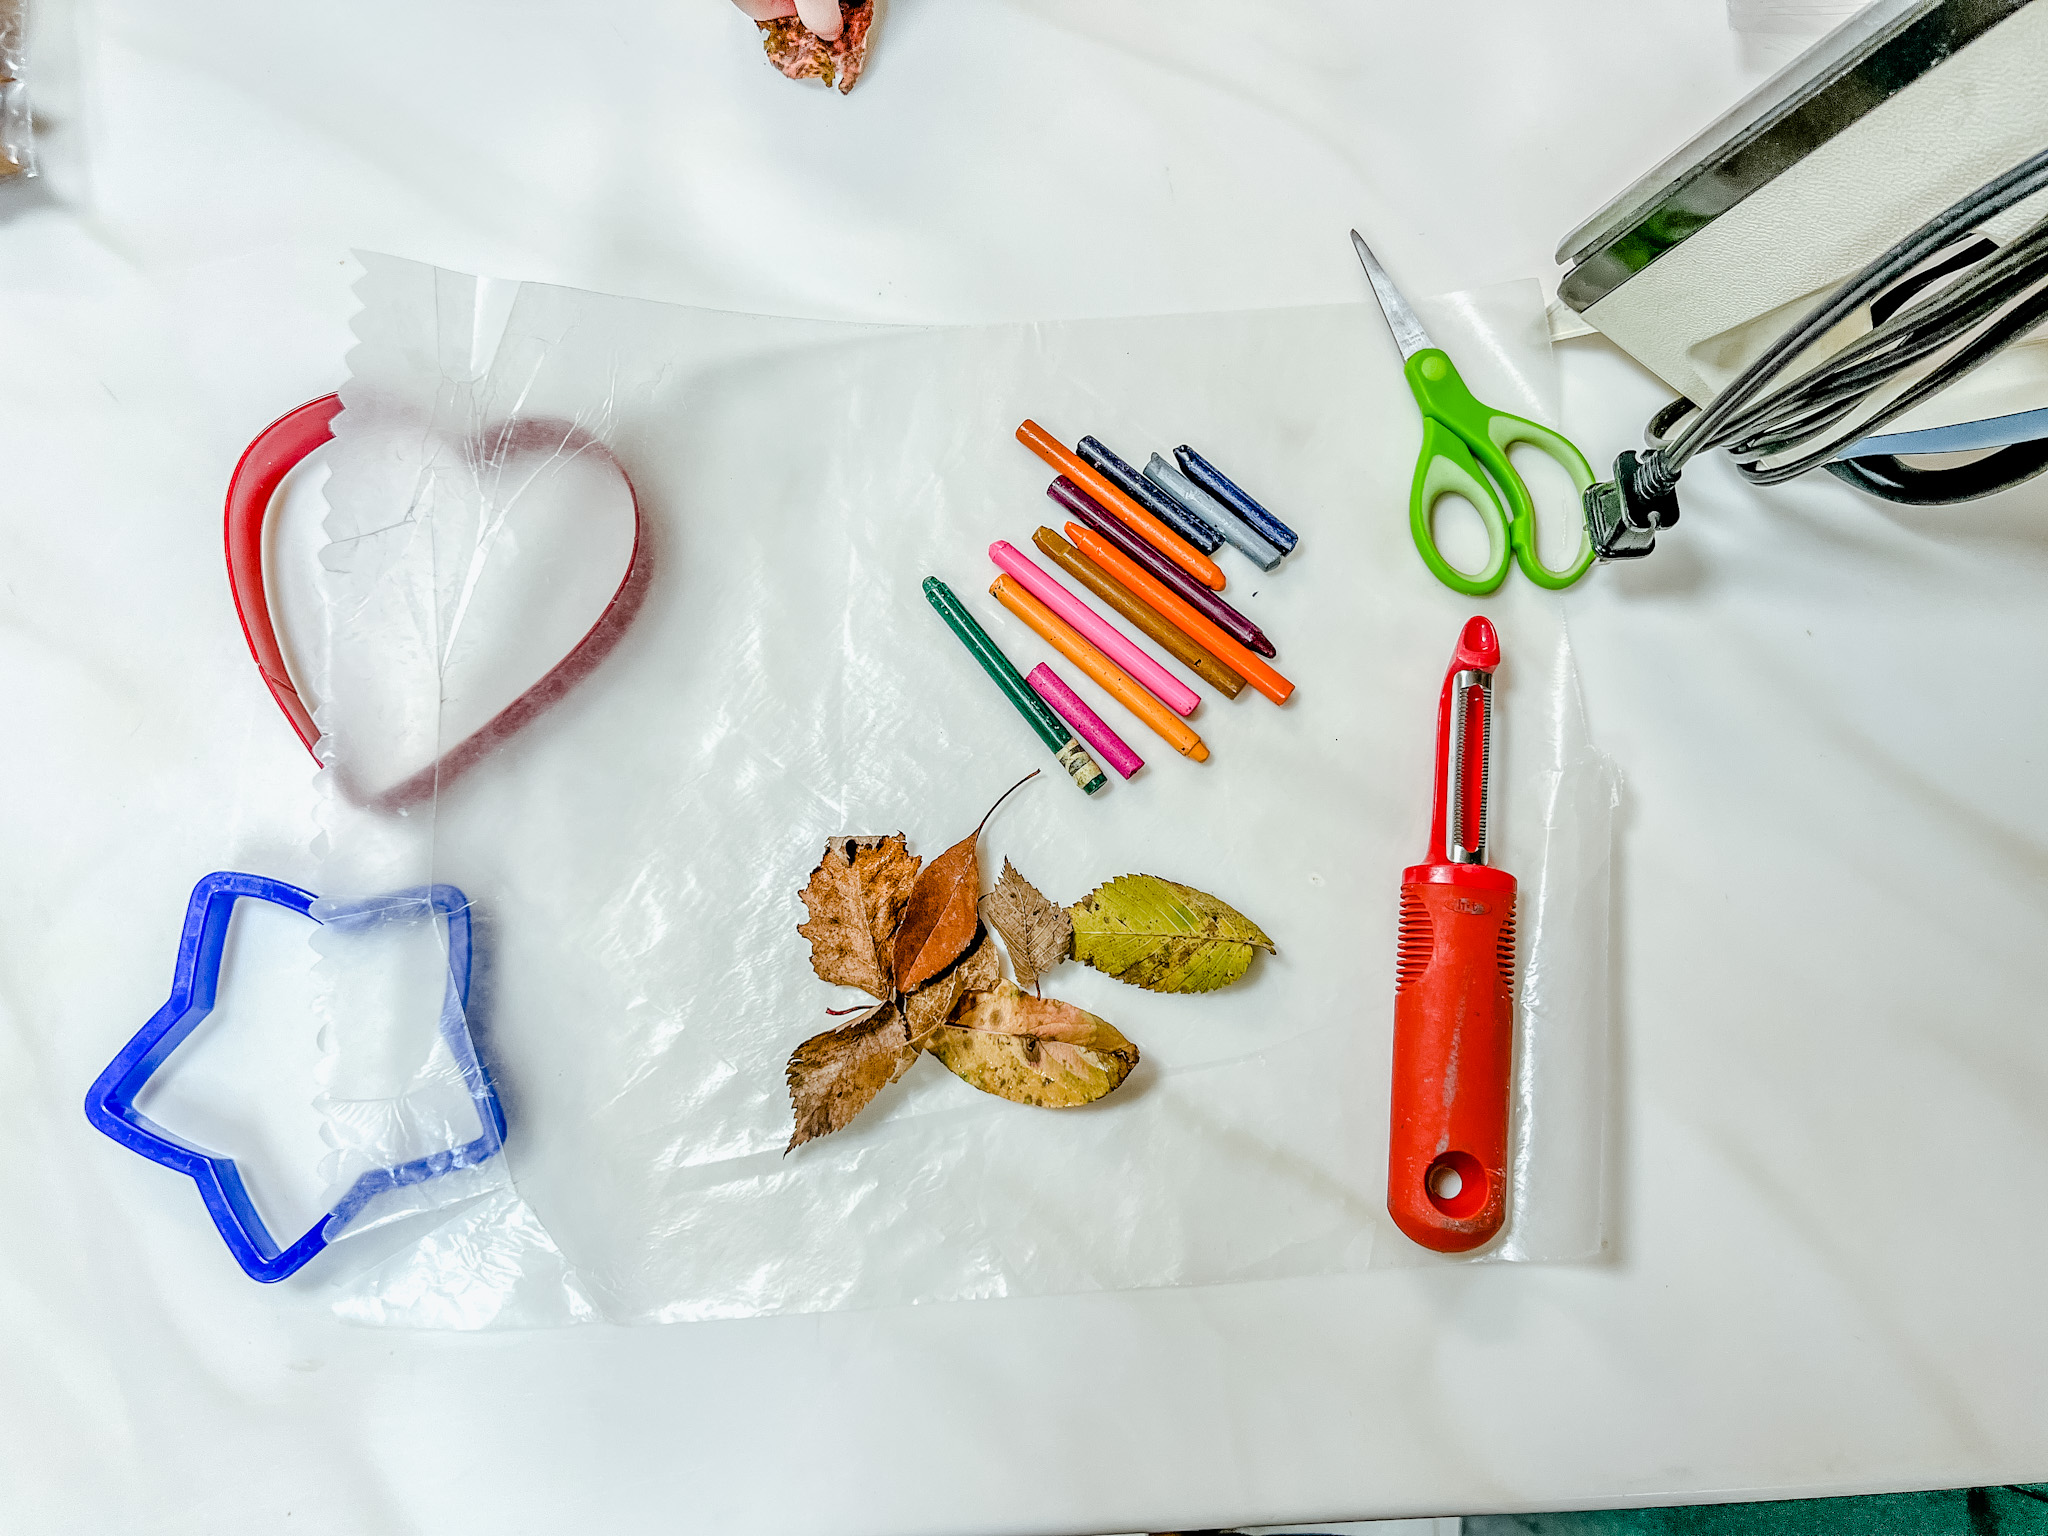
What You Need:
- An old towel or Ironing matte
- Single Hole Punch
- Ribbon
What You Need:

Reynolds Kitchens Cut-Rite Wax Paper
Buy Now →
Craytastic! Bulk Unwrapped Crayons
Buy Now → Buy Now →
  Buy Now →
  Buy Now →
Fall Thanksgiving Cookie Cutters Set
Buy Now →
Sharpie Retractable Permanent Marker
Buy Now →
Amazon Basics Stainless Steel Scissors
Buy Now →
Handy Laundry Magnetic Ironing Mat
Buy Now → Buy Now →
  Buy Now →
 Collecting Leaves
Start by collecting a few leaves outside. I always have the kids pick different sizes and colors. We even try to identify what type of tree the leaf may have come from.


Next, you’ll take the leaves inside grab all your other items and start making your DIY fall suncatcher craft!
Start making the suncatchers.
Cut the shapes
This time around, I cut the shapes first, but you can also do this step last if you prefer.
- Trace the cookie cutters with the Marker onto the wax paper. You need to have 2 of the same shape (one will be the bottom and the other will be the top).
- Then cut the shapes out. Again you need two of each shape to make 1 suncatcher.


Lay the first sheet/shape of wax paper onto your counter/table. Or make it a little easier and lay it directly onto the old towel or ironing matte right away
Next, You Need to get crayon shavings.
There are a couple of ways you can do this. I’ve always done this with an old vegetable Peeler, but you could always just use a pencil or crayon sharpener and dump the crayon shavings onto the wax paper. I will say… if you use a sharpener, make sure the sharpener is clean/empty before you start this project. Use different colors to get a fun stained glass look.


As you can see, this makes a bit of a mess, that’s why you’re using an old towel or ironing matte, not a new one.
Time for Leaves
- Next, you’ll place however many leaves will fit well onto the first wax paper sheet/shape. I like to make sure the edges have no leaf coverage.
- then you’ll shave more crayon shavings onto the leaves to ensure everything sticks.
- lay the second piece of wax paper down. Basically… you’re making a DIY fall suncatcher “sandwich”.


Ironing is Next
This part should ABSOLUTELY be done by an Adult!
- Now, you’ll carefully lay your layers (try not to lose any of the crayon shavings or leaves), onto an old towel or iron matte. Unless of course, you did my suggestion earlier and started on the towel/matte.
- Set your iron to the lowest setting, no water-we’re not steaming-we’re using the heat from the iron ONLY.
- Carefully set your iron down. I like to start from the outside and work my way in to help keep the pieces together.
- once all of the crayon shavings are melted turn your DIY fall suncatcher over and do the same. This ensures that the crayon shavings on both sides are melted.


Now we need to make them into window catchers!
I mean these DIY fall suncatchers are far less fun if they can’t hang on a window! But if you’re feeling lazy… you could just tape them on. I don’t like to do that because the tape tends to stick onto the window after some time and leave a residue that requires scrubbing, and who has time for that?
To make able to hang:
- take a Single Hole Punch and punch a hole at least 1/4 of an inch in from where ever makes sense on your suncatcher (depending on shape and size).
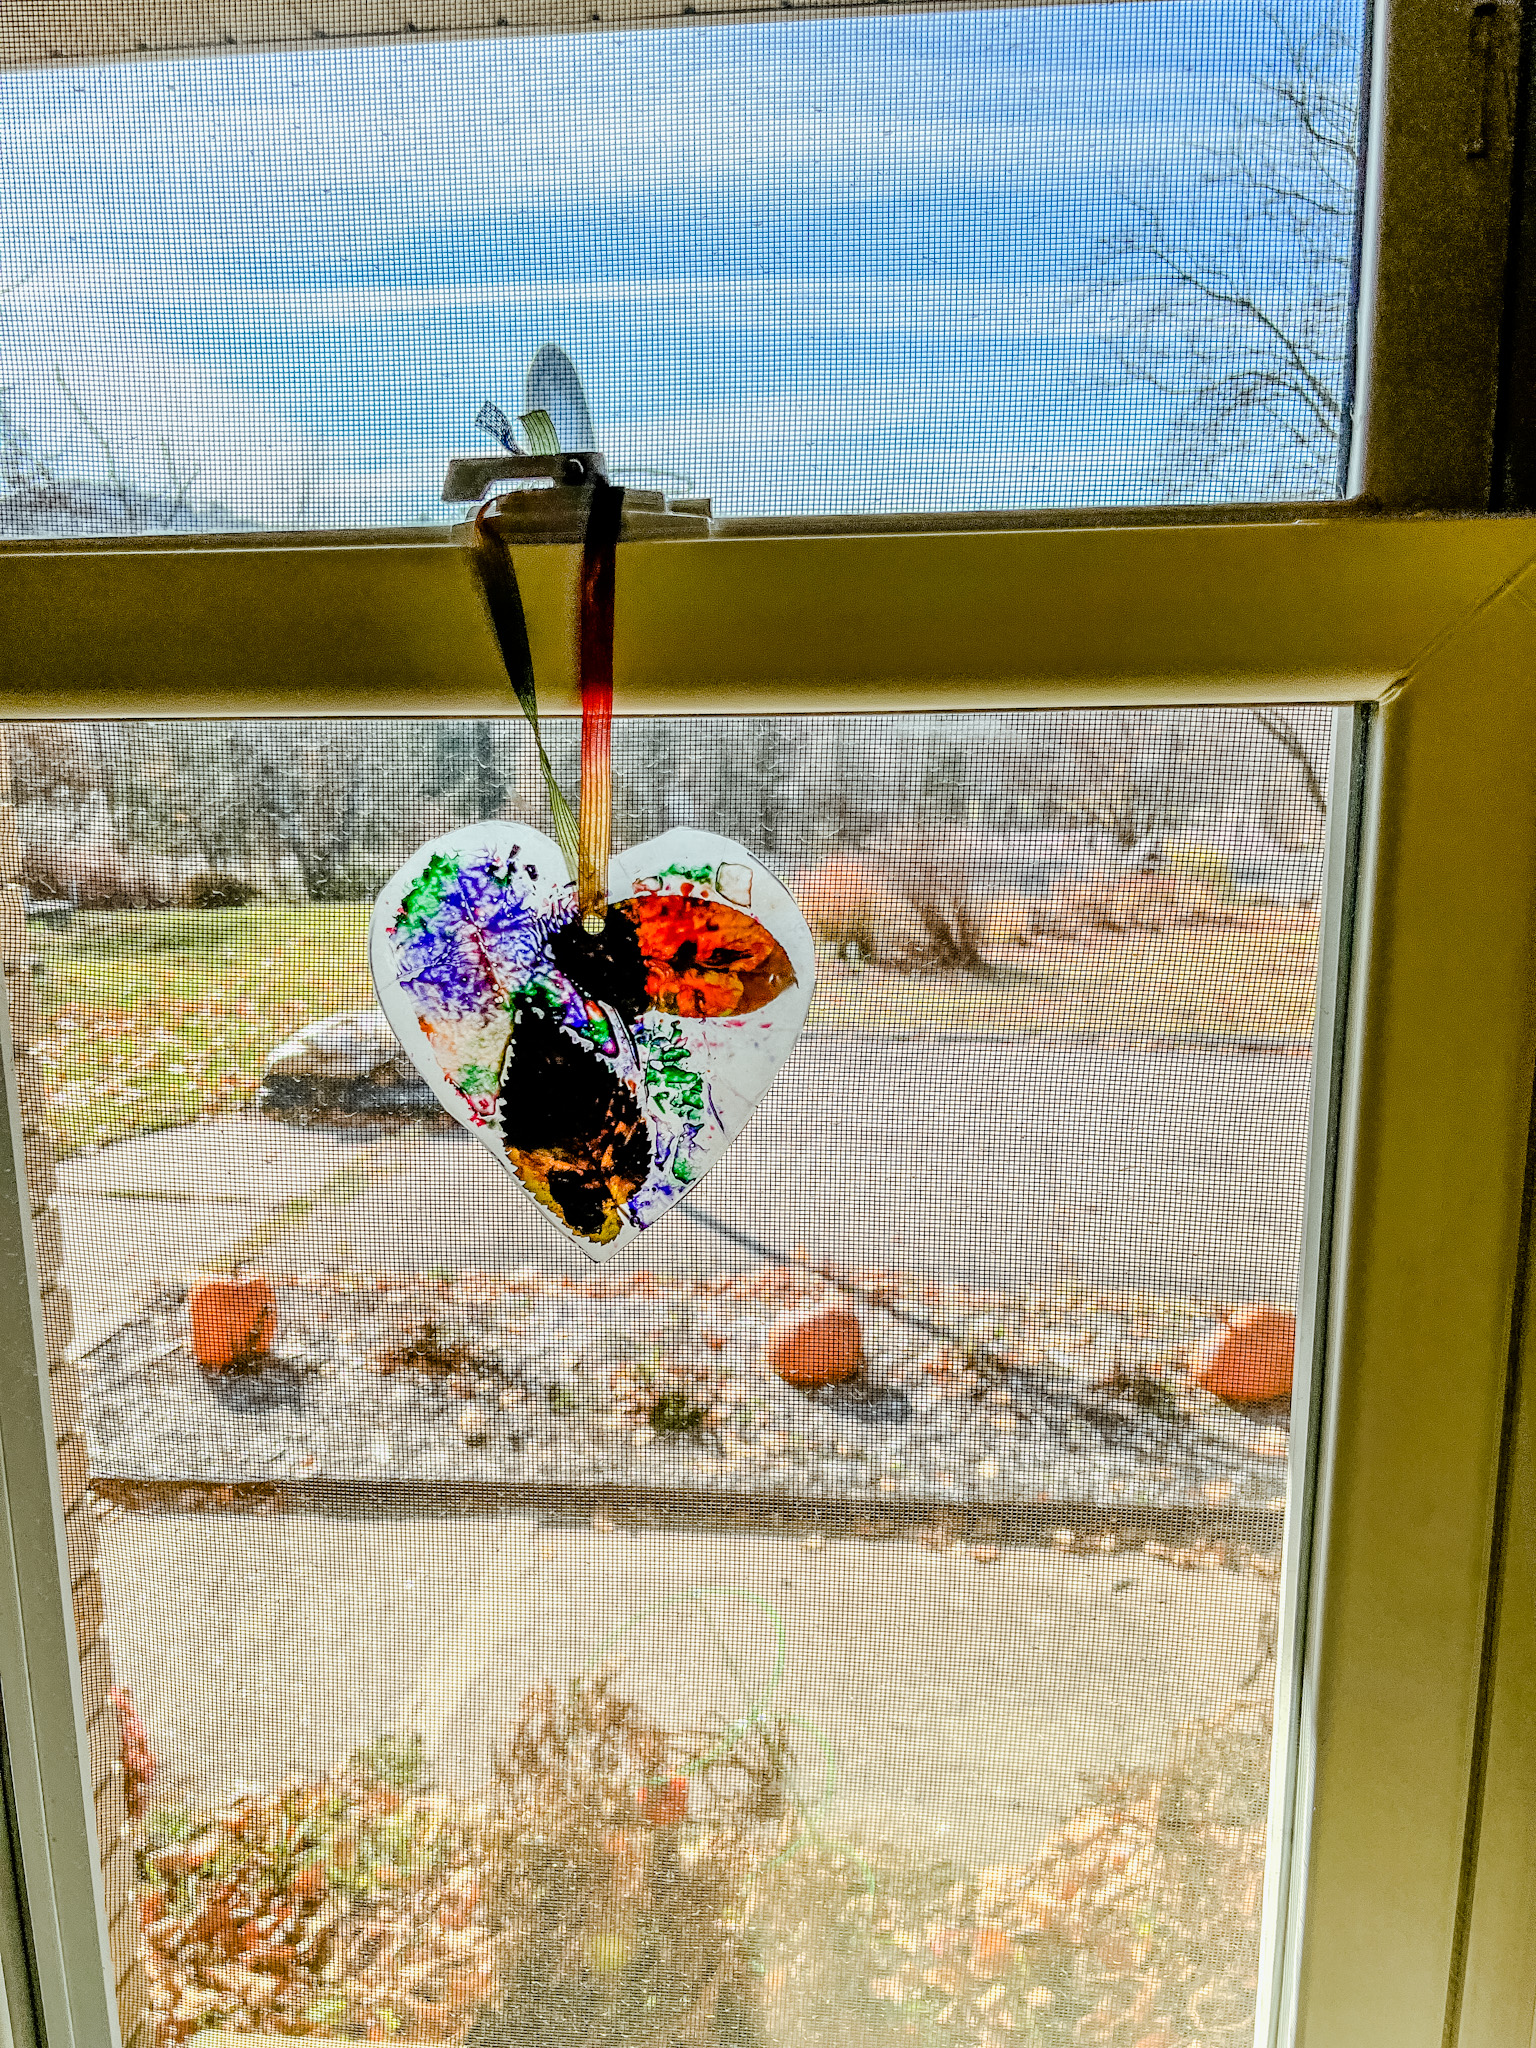
- String a Ribbon carefully through the hole, and tie a knot with both ends at the top creating a loop.


That’s it! Hang it in any window that gets lots of sunlight!
This DIY fall suncatcher craft makes fun gifts from the kids to house party guests or include them in your thanksgiving guest gifts.
Making it as a gift?
Don’t forget the gift tag! If you share it on Social Media, make sure you tag me on Instagram or Facebook using #alwaysjennsmith or @alwaysjennsmith! I LOVE seeing your makes!
Feel free to comment with any questions or suggestions

Need some more DIY ideas? Try these fun projects:
- DIY Cookbook – Getting Started
- DIY Terrarium (You don’t have to water)
- Tips for Throwing a Simple Kid’s Birthday Party
Want to remember this post?
Pin it to your favorite Pinterest Board!


©Photo, Prop Styling, and Styling by Jenn Giam Smith