Easy One-Bowl Pizza Dough
This post may contain affiliate links, which means that I make a small commission off…
This post may contain affiliate links, which means that I make a small commission off items you purchase at no additional cost to you. Please read my Affiliate Disclosure
Pizza night in our house has evolved a lot over the years. We went from frozen pizzas to jarred sauce and store-bought dough, and eventually I started making everything from scratch — not because I needed another thing to do, but because it actually became easier once I had a system.
This pizza dough is the foundation of that system. It mixes together in one bowl, needs just 30 minutes to rest, and works for both a thin, crispy pizzeria-style pizza and a softer American-style pan pizza. No stand mixer, no overnight rise, no fuss.
If you’ve been buying the refrigerated dough from the store, I’m not here to shame you — I did it for years. But this version takes about ten minutes of actual hands-on time and the difference in flavor and texture is genuinely worth it.
Why You’ll Love This Recipe
About the Ingredients
Which Flour Should You Use?
Flour: You’ve got three good options here. All-purpose flour is the most forgiving and gives you a soft, flexible crust — great for family-style pizza. Bread flour has more protein, which creates more gluten and gives you a chewier, more structured dough with that satisfying pull. Pizza flour (like Caputo “00”) is finely milled and produces a silky, extensible dough that stretches beautifully and bakes up with a delicate, slightly crispy crust — closest to what you’d get in a proper pizzeria. Any of the three will work in this recipe. Use what you have, or use what matches the pizza you’re going for.
Instant yeast: This recipe uses instant yeast (also sold as rapid-rise or quick-rise), not active dry yeast. Instant yeast goes straight into the dry ingredients — no proofing in water needed. One standard packet is exactly what you need.
Olive oil: It goes into the dough and gets brushed on top before baking (if you’re going American-style). Don’t skip it — it adds flavor and helps you get a golden, slightly crispy crust.
Warm water: This is the one thing to pay attention to. You want water that’s warm to the touch but not hot — around 110°F is the sweet spot. Too hot and it kills the yeast. Too cold and the dough won’t rise properly. When in doubt, err on the side of warm-bath comfortable.
How to Make Easy Pizza Dough
Mix the dough. Combine 1 cup of flour with the yeast, sugar, and salt in a large bowl and stir to combine. Add the olive oil and warm water and mix with a sturdy spatula until a shaggy dough forms. Add flour a little at a time, mixing as you go, until the dough pulls together into a rough ball. You may not need the full amount — stop when it comes together and isn’t sticking to the bowl.
Knead it. Turn the dough out onto a lightly floured surface and knead until it’s smooth, elastic, and bounces back when you poke it — about 5 to 7 minutes by hand. You’re not trying to tire yourself out here. Just work it until it feels cohesive and silky. If it’s still tacky, add a little more flour a tablespoon at a time.
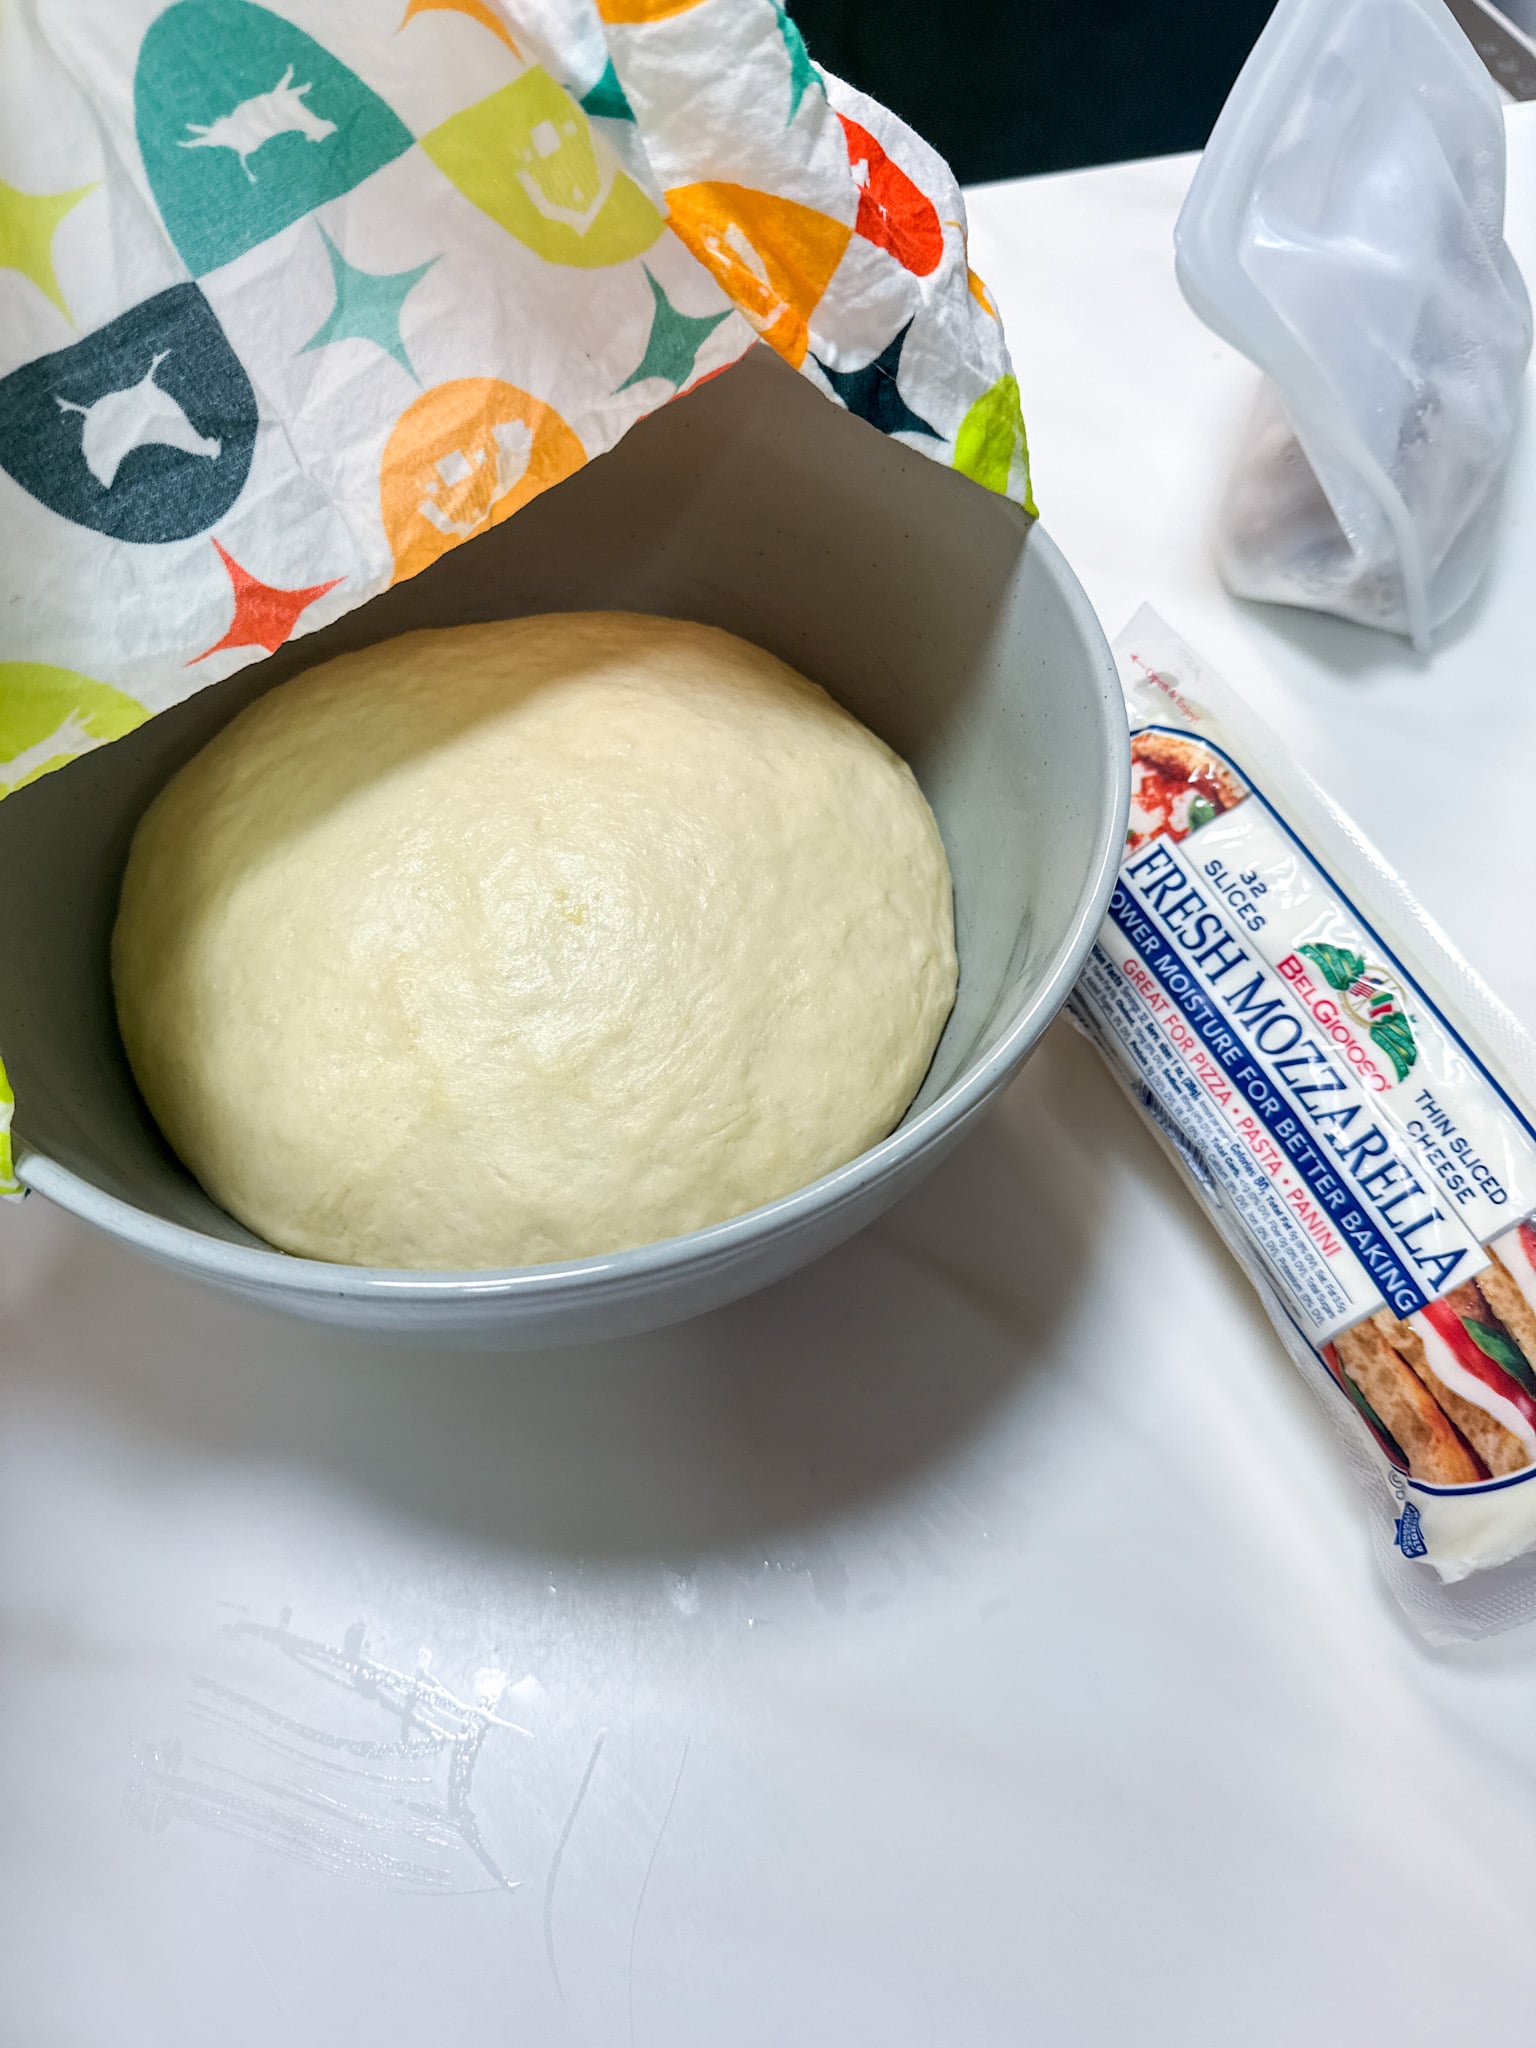
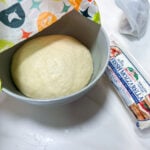
Let it rest. Coat the dough lightly in olive oil, place it back in the bowl, cover with a warm towel, and let it rise for 30 minutes. It won’t double dramatically the way a long-rise dough does, but it should puff up noticeably.
Shape it. Gently punch the dough down and transfer to a floured surface. Knead it a few times just to smooth it out, then shape it into your pizza.

Pizzeria-Style vs. American-Style
This dough does both well, but the method is a little different depending on which direction you’re going.
For pizzeria-style: Work the dough with your hands into a 12-inch circle, stretching from the center outward. Dust a pizza paddle generously with semolina flour (this is what keeps it from sticking), lay the dough out on the paddle, top it, and slide it straight onto a preheated pizza stone, grill, or pizza oven. High heat, fast bake, crispy bottom.
For American-style: Use your hands or a rolling pin to get to a 12-inch circle, transfer it to a parchment-lined pan, and either pinch or fold the edges to form a crust. Brush the entire surface — including the crust — with olive oil, then use a fork to dock the center. That just means poking holes all over the middle so the dough doesn’t bubble up in the oven. Bake at 425°F for 13 to 15 minutes until everything is golden.
Cooking With Kids
Pizza dough is one of the best recipes to make with kids because there’s something for every age. Little ones can help pour and stir in the mixing stage — just hand over the spatula. Older kids can handle the kneading (and usually love it). And everyone gets to shape their own personal pizza, which means less argument over toppings.
If you’ve got a kid who’s hesitant in the kitchen, start here. Dough is forgiving, it’s hands-on, and there’s a pizza at the end of it. That’s a pretty good deal.
Jenn’s Kitchen Tip
Semolina flour for the paddle: If you’re going pizzeria-style, semolina is not optional. It acts like little ball bearings and lets the pizza slide off cleanly. Cornmeal works in a pinch but semolina is better.
Fork docking matters for some pizzas: For American-style, don’t skip the fork step. Undocked dough puffs up in the center and gives you an uneven bake.
Freeze it: This dough freezes well. After the rise, wrap individual portions tightly in plastic wrap, put them in a freezer bag, and freeze for up to 3 months. Thaw overnight in the fridge or on the counter for a couple of hours.
Which flour to use: All-purpose is soft and forgiving. Bread flour is chewier and more structured. Pizza flour (“00”) is silky, extensible, and the closest you’ll get to a real pizzeria crust at home. All three work here — use what you have, or match it to the pizza you’re making.
Don’t rush the preheat: Whether you’re using a stone, pan, or grill, make sure everything is hot before the pizza goes in. A cold surface is why home pizza gets soggy.
Frequently Asked Questions
Yes, but you’ll need to proof it first. Dissolve it in the warm water with the sugar and let it sit for about 5–10 minutes until foamy, then proceed with the recipe. You may also need a slightly longer rise time — closer to 45 minutes to an hour.
Absolutely. After the rise, wrap the dough tightly and refrigerate for up to 24 hours. Let it come to room temperature for 30 minutes before shaping. The cold, slow rise actually improves the flavor.
Yes — it freezes great. After the rise, portion it, wrap each piece tightly in plastic wrap, and store in a zip-top freezer bag for up to 3 months. Thaw overnight in the fridge or at room temperature for 2 hours before using.
The most common culprit is water that was too hot and killed the yeast, or yeast that was past its prime. Check the expiration date on your yeast packet, and make sure your water is warm but not hot — around 105–110°F is ideal.
Yes, it doubles well. Same process — just knead in two batches or with a stand mixer if you have one. Great for a pizza party or to freeze extra portions for later.
Once you’ve got this dough down, the whole pizza night system clicks into place. I’ve got a homemade pizza sausage that takes about ten minutes to make and freezes like a dream — highly recommend keeping a batch in the freezer so pizza night is always within reach. And if you need a sauce to go with it, my classic red pizza sauce and creamy white pizza sauce are both coming to the blog soon. Between the dough, the sausage, and the sauce, you’ve got a completely from-scratch pizza night that doesn’t actually take all night.
This is one of those recipes that becomes a reflex — you’ll stop thinking about it and just start doing it.
PrintEasy One-Bowl Pizza Dough
- Total Time~45 min (not counting baking)
- Yield1 pizza (12″) 1x
A simple, no-fuss pizza dough that comes together in one bowl with pantry staples and a 30-minute rest. Works for both pizzeria-style and American-style pizza — no stand mixer, no overnight rise, no special equipment required.
Ingredients
- 2–2 1/3 cups all-purpose flour, bread flour, or pizza flour (Caputo “00”), divided
- 1 packet (2 1/4 tsp) Instant Dry Yeast
- 1 1/2 tsp cane sugar
- 3/4 tsp kosher salt
- 2 Tbsp extra virgin olive oil, plus additional for coating bowl and brushing
- 3/4 cup warm water
- For pizzeria-style: semolina flour for dusting paddle
Instructions
- Mix the dough. In a large bowl, whisk together 1 cup of flour with the instant yeast, sugar, and salt. Add the olive oil and warm water and mix with a sturdy spatula until combined. Continue adding flour a little at a time, mixing as you go, until the dough forms a rough ball that pulls away from the sides of the bowl.
- Knead. Turn dough out onto a lightly floured surface and knead until smooth, elastic, and springy — about 5 to 7 minutes. It should bounce back when you poke it and not stick to your hands. Add flour a tablespoon at a time if needed.
- Rise. Coat the dough lightly in olive oil, return it to the bowl, and cover with a warm towel. Let rest for 30 minutes until slightly puffed.
- Shape. Gently punch down the dough and transfer to a lightly floured surface. Knead briefly (3–5 times) until smooth, then shape for your pizza style.
For Pizzeria-Style:
- Stretch dough by hand into a 12-inch circle.
- Dust pizza paddle generously with semolina flour and lay dough out on paddle.
- Top with sauce and toppings and cook on a preheated pizza stone, grill, or pizza oven.
For American-Style:
- Use hands or rolling pin to work dough into a 12-inch circle.
- Transfer to a parchment-lined pizza pan and pinch or fold edges to form a crust.
- Drizzle about 1 Tbsp olive oil over the top and brush the entire surface, including the crust.
- Use a fork to poke holes all over the center of the dough to prevent bubbling.
- Add desired toppings and bake at 425°F (215°C) for 13–15 minutes until golden brown. Slice and serve.
Notes
- Flour choice: All-purpose gives a soft, flexible crust. Bread flour gives a chewier, more structured result with more pull. Pizza flour (Caputo “00”) is finely milled and produces the most extensible, delicate dough — closest to a true pizzeria crust. All three work in this recipe.
- Yeast: Use instant dry yeast (also labeled rapid-rise or quick-rise) — it goes straight in without proofing. Active dry yeast requires proofing in warm water first and may need a longer rise.
- Water temperature: Aim for 105–110°F — warm to the touch but not hot. Too hot kills the yeast.
- Semolina Flour: Essential for pizzeria-style to prevent sticking on the paddle. Cornmeal works as a substitute.
- Freezing: After the rise, divide into portions, wrap tightly in plastic wrap, and freeze up to 3 months. Thaw overnight in the refrigerator or 2 hours at room temperature before using.
- Sauce: I have two sauce recipes coming soon!
- Prep Time: 10 minutes
- Rise Time: 30 minutes
- Category: Bread / Pizza Dough
- Method: No-cook, oven baked
- Cuisine: American, Italian American
Recipe & Photo Credit
This recipe and all images are original content created by Jenn Giam Smith for Cheers, Jenn.
You’re welcome to link to this recipe using one photo with proper credit. Please do not copy, republish, or redistribute this recipe or images without permission.
Have a question or want to share how it turned out?
Leave a comment below — I love hearing from you. 💛
MAKE MID-WEEK A LITTLE EASIER
Sign up below, and I’ll send you a FREE E-BOOK featuring six of my all-time favorite mid-week recipes!