The Ultimate Guide to Freezing Cookie Dough (for Fresh Cookies Anytime)
Did you know you can make them yourself? Because you can!
I’m going to cover exactly what to do, so the next time you feel like baking cookies, you don’t have to feel like you need to bake the entire batch, and then you can have cookies whenever you’re in the mood!
This post may contain affiliate links, which means that I make a small commission off items you purchase at no additional cost to you. Please read my Affiliate Disclosure
Why Freeze Cookie Dough? Because sometimes life gets busy (hey, I’m a food blogger and influencer, I get it)—and when you want warm, comforting cookies without the fuss, having ready-to-bake dough in the freezer is a total lifesaver. Plus, it lets flavors mingle while you’re living your best life. Most classic doughs freeze beautifully—just prep, wrap/bag, label, and bake later for joy on demand.
Step-by-Step: How to Freeze Cookie Dough (Two Methods!)
I’m going to show you 2 different methods to freeze cookies (pst… Method 2 is my preferred way!)
JENN’S KITCHEN TIPS:
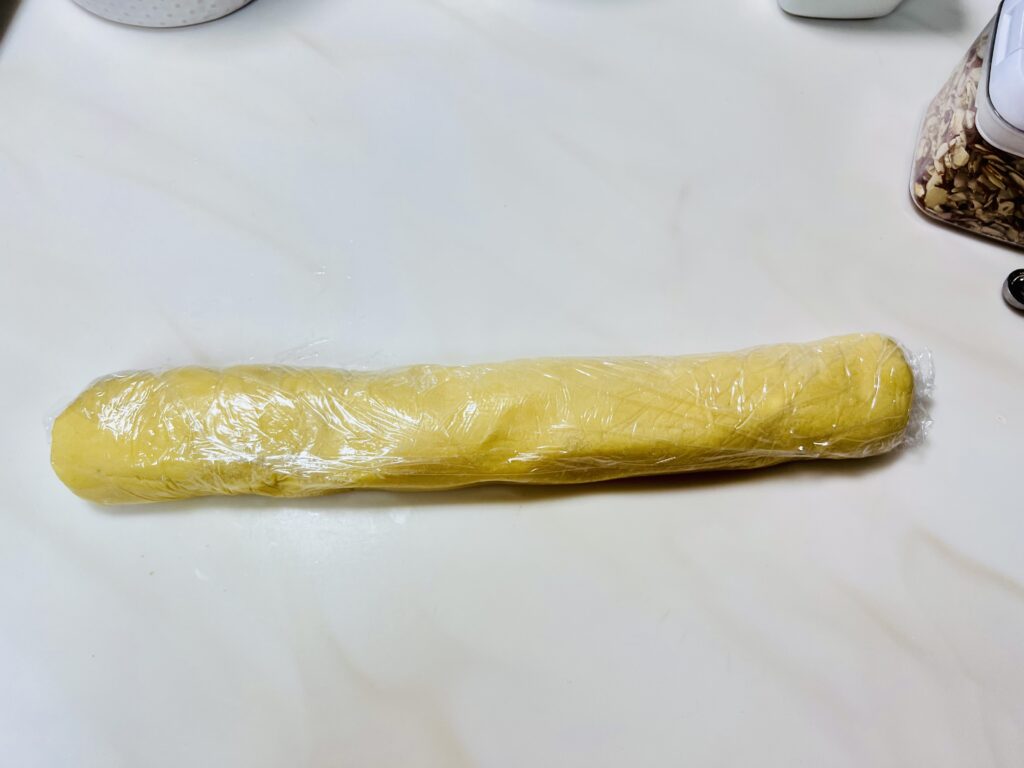
Method #1 – The Roll, Freeze Cut
This method consists of taking your dough, scraping it out of the bowl onto freezer cling wrap, rolling it into a log, and freezing the log.
Before we get started… here’s what you’ll need:
What You Need
Shop This Post
Method One Freezer Instructions
Step 1: Scrape the dough onto freezer cling wrap.
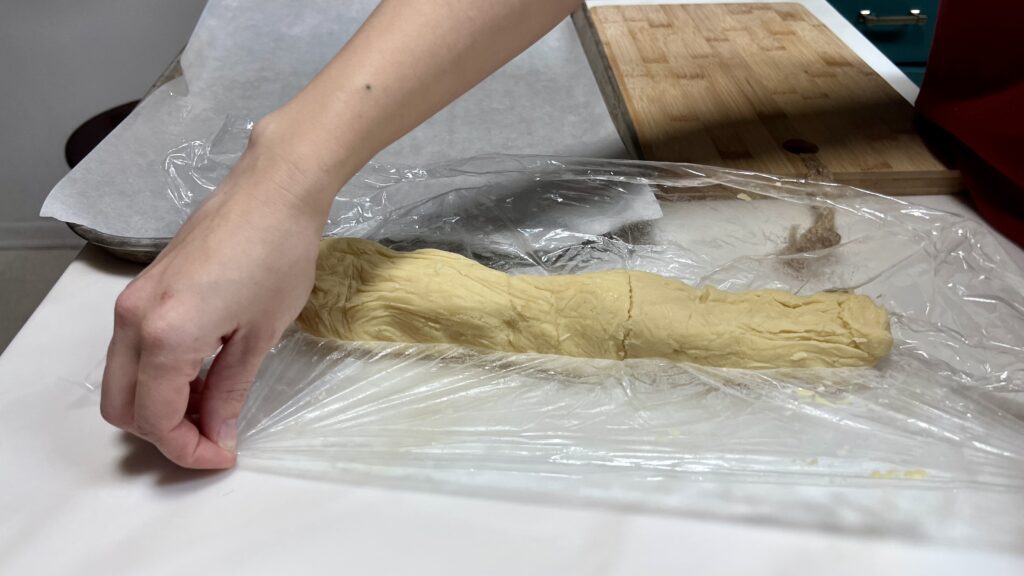
Step 2: Shape the dough with the wrap into a log shape.
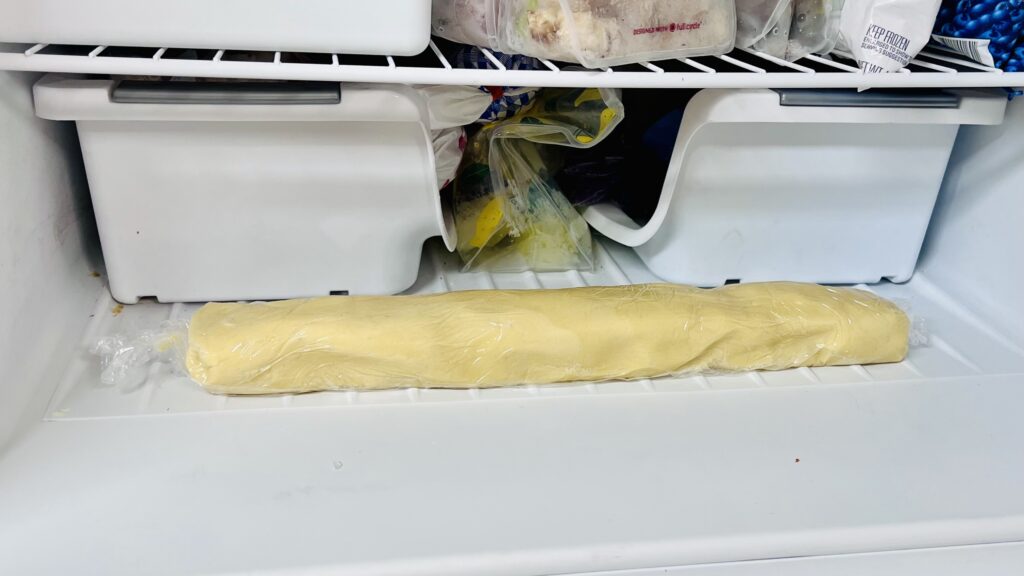
Step 3: Wrap it tightly again and pop it into the freezer.

When you’re ready to bake:
Step 1: Preheat your oven (for Chinese Almond Cookies, it’s 325℉).
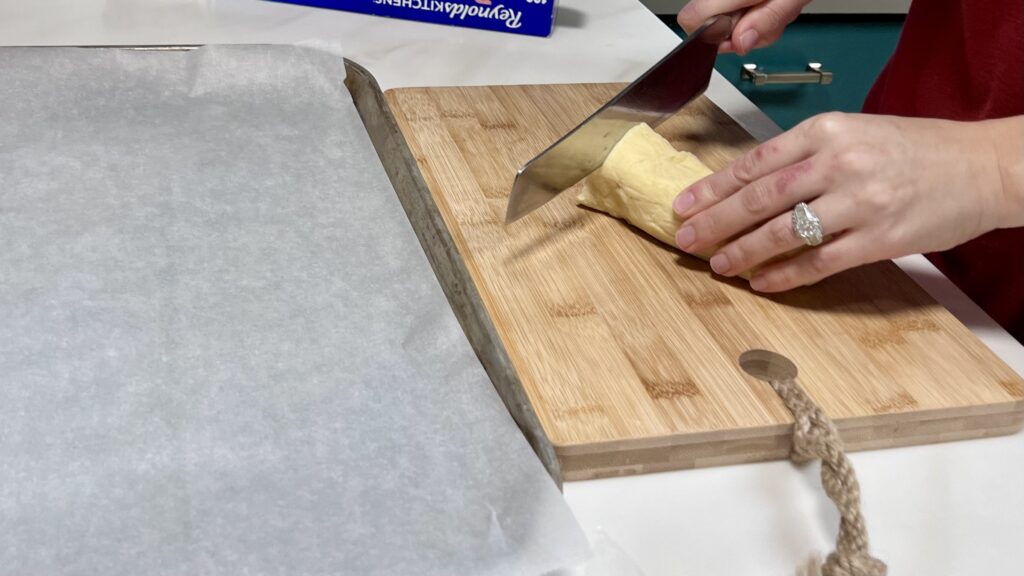
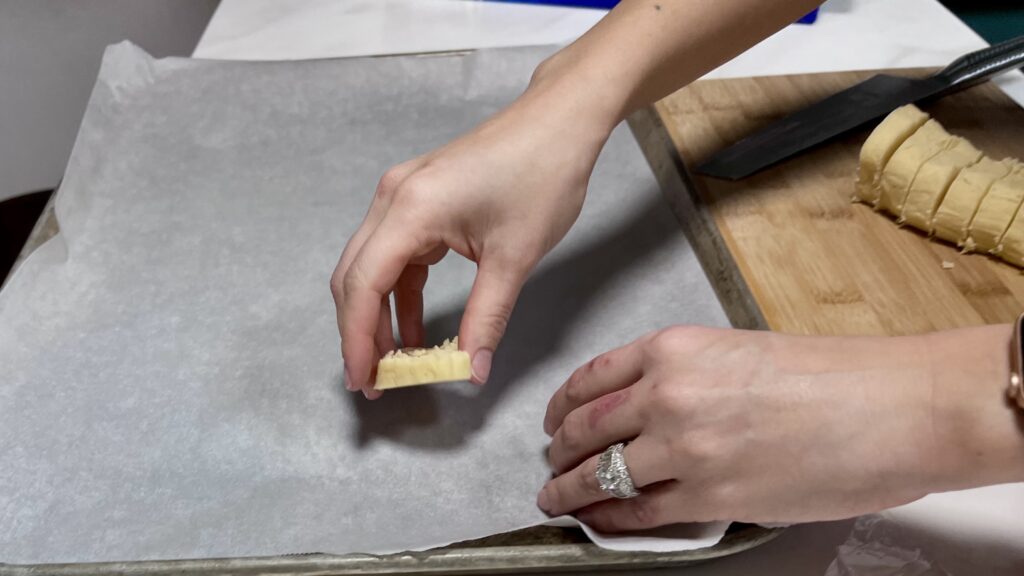
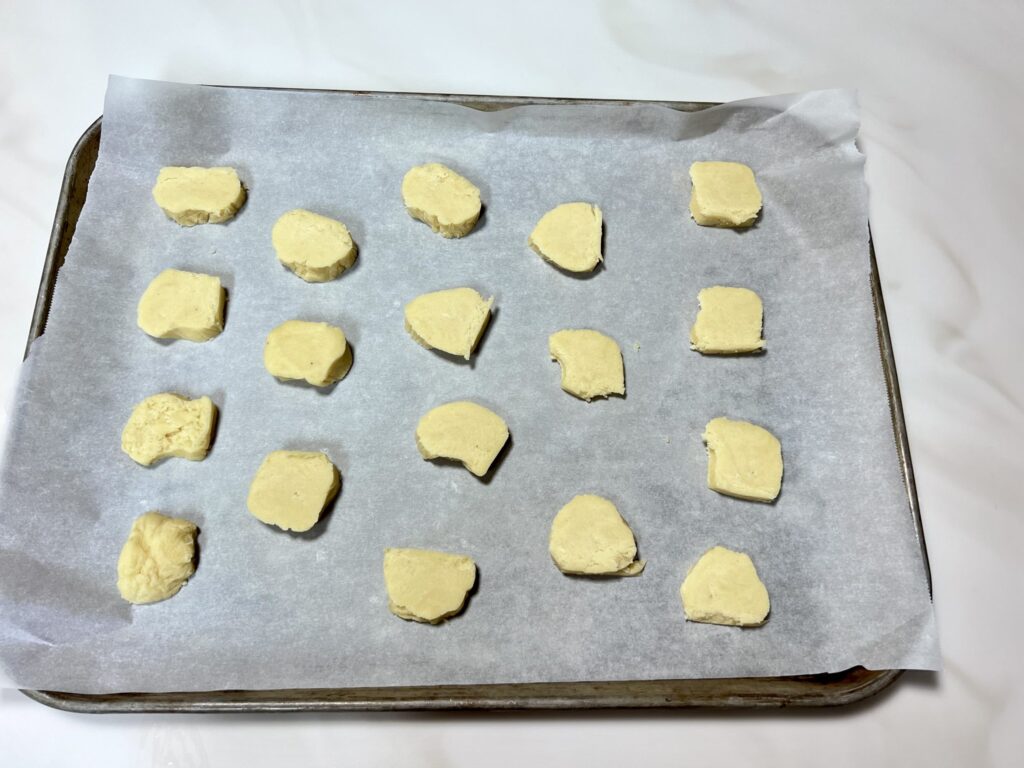
Step 2: While the oven heats, slice the dough log into 1-inch discs and place them on a lined baking sheet.
Step 3: Bake according to your recipe’s directions.
Tips For Success
Pros:
- Less work upfront. Roll and freeze. Done!
Cons:
- A bit messy the first time.
- Cutting frozen dough logs with chunky mix-ins can be tricky (and occasionally feels like a culinary CrossFit workout).
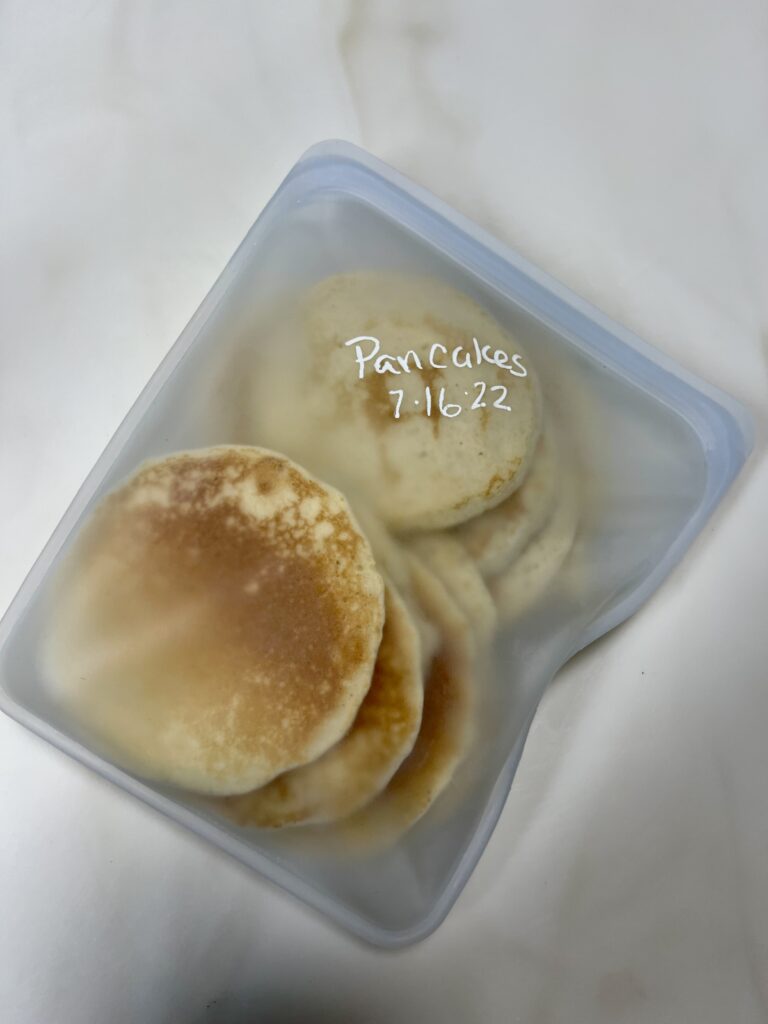
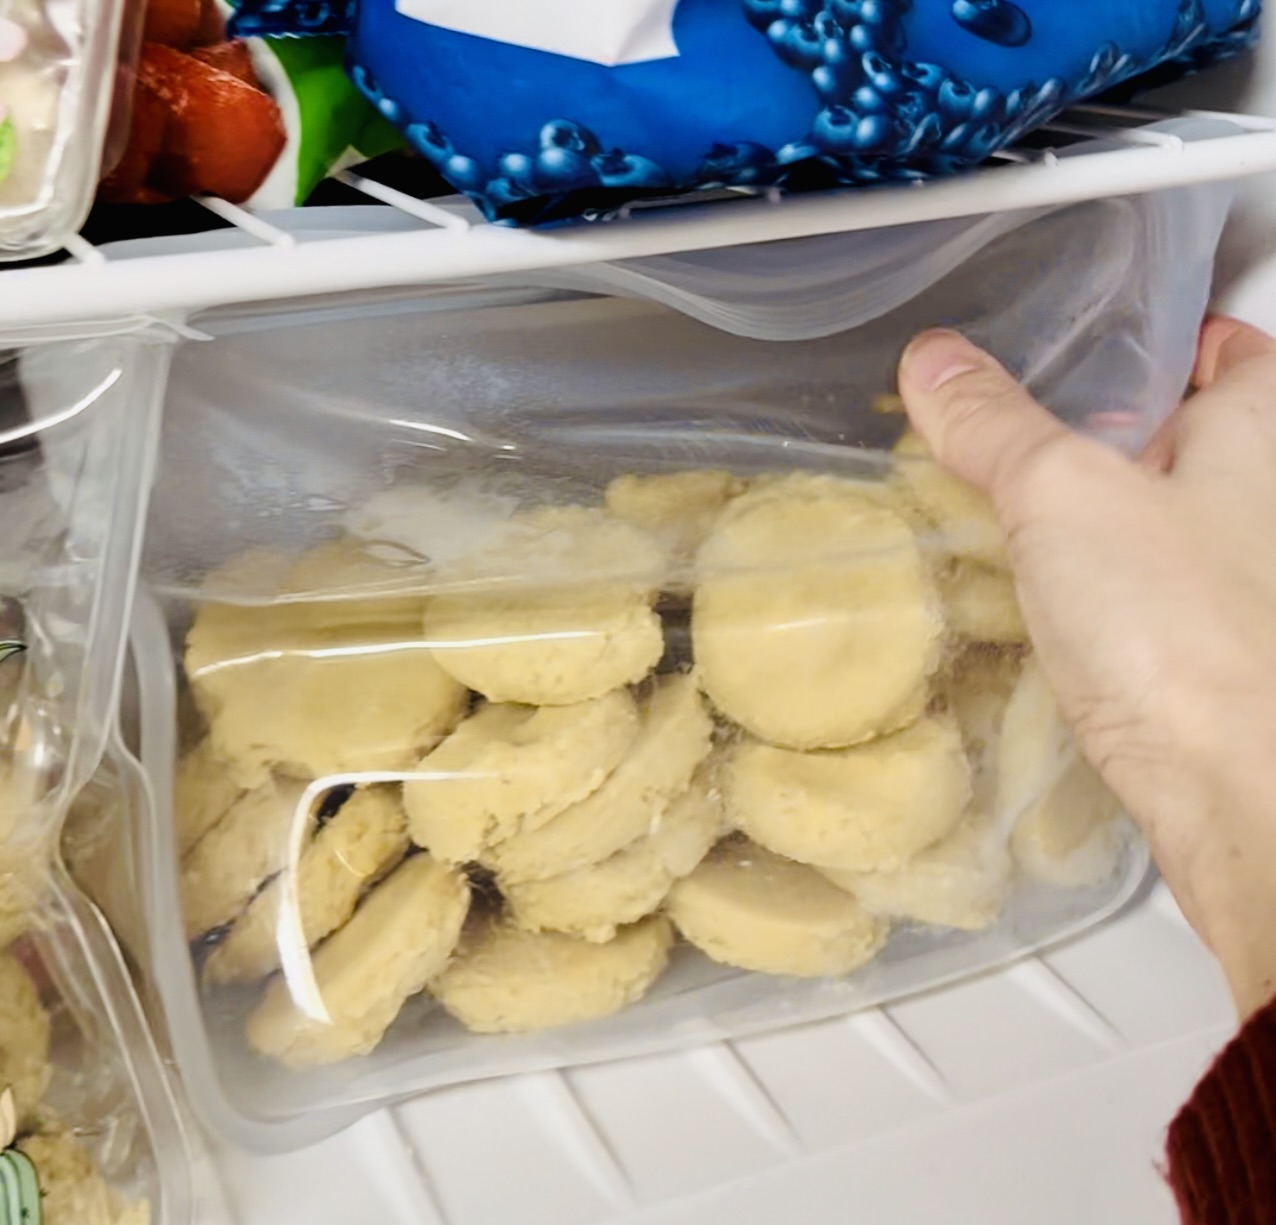
Method #2 (My Fave!) – Scoop, Freeze, and Stash
Before we get started… there are a few things you need (and you probably have them in your kitchen.
What You Need
- Baking sheet
- Parchment paper or silicone baking mat (Seriously, silicone mats are a gift from the baking gods. My dad passed some down to me, and I’m obsessed.)
- 1.5 tablespoon cookie scoop (or size according to recipe)
- Stasher Stand-Up Bags (My go-to! Bonus: they’re reusable, eco-friendly, and cute.)
Here We Go:
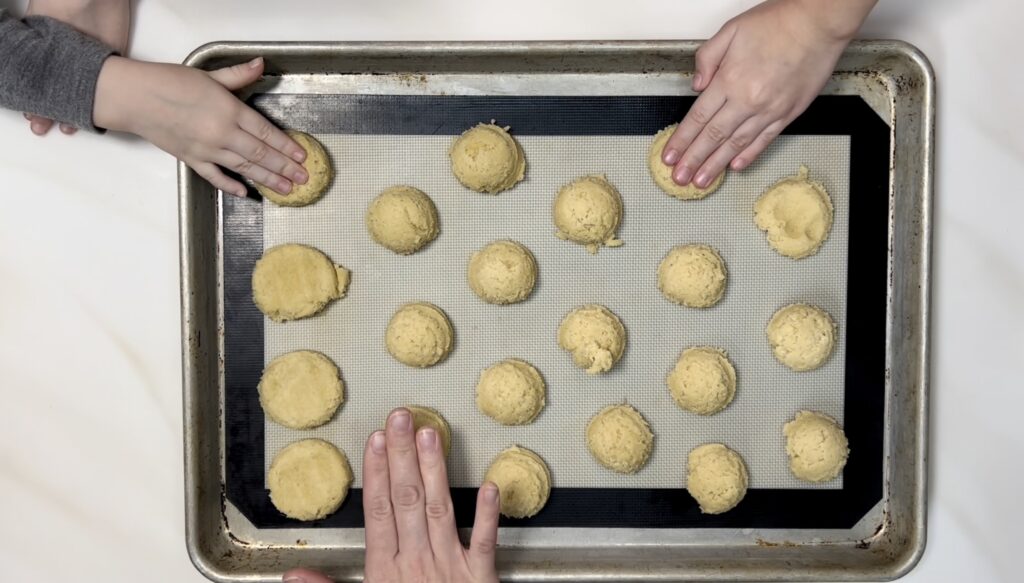
Step 1: Scoop your dough into individual cookie portions onto a lined baking sheet.
JENN’S KITCHEN TIPS:
Step 2: Freeze for at least 2 hours (no more than 24).

When you’re ready to bake:
Step 1: Preheat oven (again, 325℉ for Chinese Almond Cookies).
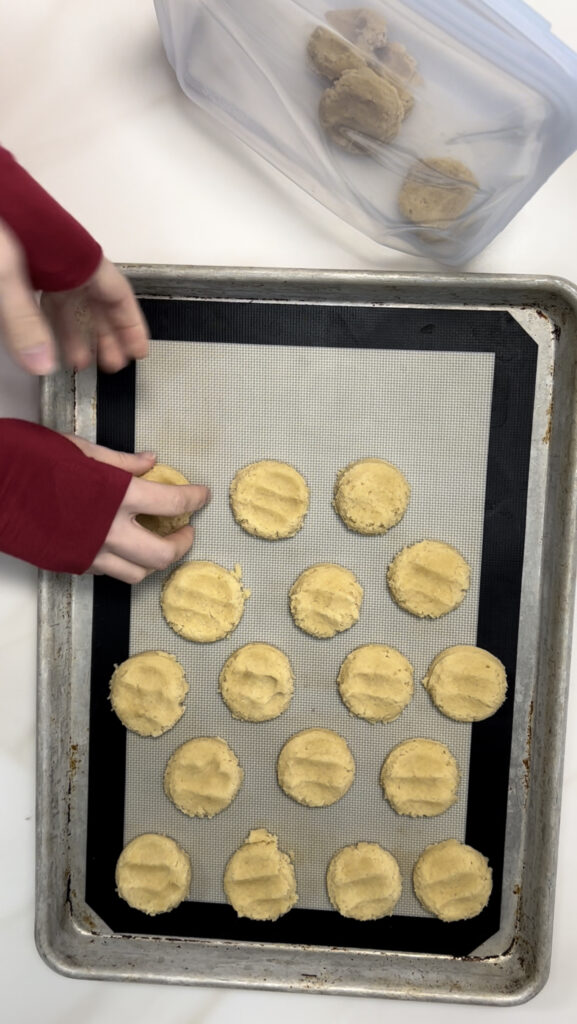
Step 2: Place frozen dough onto a lined baking sheet and bake per the original recipe.
Tips For Success
Pros:
- So easy to bake later. Portion-controlled and prepped—just pop ’em on a tray and go!
- Safer for mix-in heavy doughs. No slicing required (and no risk of launching a rogue frozen chocolate chunk across the kitchen).
- Perfect for baking small batches whenever the craving hits—even if it’s just one cookie. Yes, just one. We believe in cookie self-care here.
Cons:
Slightly more prep upfront. But totally worth it.
- It’s the easiest end result. You prep the cookies completely before freezing them. So all you do is take out and bake (no guesswork, everything is all portioned)!
- It’s the safest with cookies that contain items that will be incredibly hard frozen (like chocolate chips, nuts, or fruit
Cooking with Kids
DISCLOSURE: Please keep in mind that the following tips are general and are meant to be suggestive. I personally use these strategies with my own kids, who are all unique even within my own family of five. Therefore, please regard these as suggestions or ideas. If you feel that your child requires more or less assistance, then go with what you and your child are comfortable with. Ultimately, you know your child best.
Freezing cookie dough is more than just a timesaver—it’s a sweet moment waiting to happen! Let your kids scoop the dough, count the portions, or help label the bags. They get hands-on practice (math, motor skills, and patience—ha!) and a whole lot of joy.
Some fun ideas:
Bonus: When they help freeze ’em, they’ll definitely be around when it’s time to bake (and taste-test)!
No Matter Which Method You Choose Having frozen cookie dough on hand gives you instant access to homemade joy. Portion control? Check. Quality ingredients? Yup. Ready to bake a surprise treat for the kids, a late-night snack, or a spontaneous cookie delivery to your neighbor? Absolutely.
Happy freezing, happy baking, and happiest cookie sharing.
Cheers 🥂,

What did you think?
Please take a moment to leave a comment. If you share a picture on Instagram don’t forget to tag me @jenngiamsmith! I always share your posts on my story and tag you!
Share or save it:
©Photo, Prop Styling, and Food Styling by Jenn Giam Smith
This Blog Post is ©2022 Jenn Giam Smith™; Jenn Smith, LLC (FKA Smith Country, LLC) See below for details
Please Be Respectful
All rights reserved. You may NOT sell, trade, share or redistribute this recipe in any way or use any of my photographs for your site. If you are linking back to this post to a list of recipes, giving credit for the recipe to myself and my site, you may use ONE photo. You must site me and my blog as the creators of the recipe and give credit for the photo. ©2022 Jenn Giam Smith; Jenn Smith, LLC
Jenn Giam Smith™; Jenn Smith, LLC is a participant in the Amazon Services LLC Associates Program, an affiliate advertising program designed to provide a means for sites to earn advertising fees by advertising and linking to amazon.com. As well as the Apple affiliate program now called the Performance Partners Program.
This site displays third-party ads and contains affiliate links, See terms and conditions for ALL affiliates.
If you have any questions feel free to comment below or e-mail me directly.
Thank you for visiting!