How to Roast Squash Seeds: Crunchy, Healthy, and Delicious
Learn how to roast squash seeds to crispy perfection! Healthy, crunchy, and family-friendly, this snack is perfect for fall.

This post may contain affiliate links, which means that I make a small commission off items you purchase at no additional cost to you. Please read my Affiliate Disclosure
Roasting squash seeds is one of those little kitchen secrets that feels almost too good to be true. Instead of tossing them in the compost or trash, you can turn them into a crispy, golden snack that the whole family will love.
And here’s the best part—you’re not just saving food waste, you’re also gaining a powerhouse of nutrition. Squash seeds may be small, but they pack in plant-based protein, healthy fats, fiber, and key minerals like magnesium and zinc. That means they’re not only crunchy and delicious, they’re also a smart snack that supports everything from digestion to heart health. Think of them as nature’s tiny snack packs, tucked right inside your squash!
With that in mind, let’s get into exactly how to roast squash seeds at home, so you can enjoy every last bit of goodness your squash has to offer.
Roasted Winter Squash Seed Tips & Tricks
These simple tips will help you yield delicious roasted seeds with minimal fuss.
Cut your squash in half
Handle the squash you’re cutting carefully. I recommend cutting a small spot on the bottom to create a flat surface for stability.
Scrape the seeds out with a spoon.
It’s fairly easy to use a larger soup spoon to scrape the seeds out. pull as many seeds out as possible, place the seeds in a bowl, then throw away the stringy flesh.

How to Clean Your Seeds
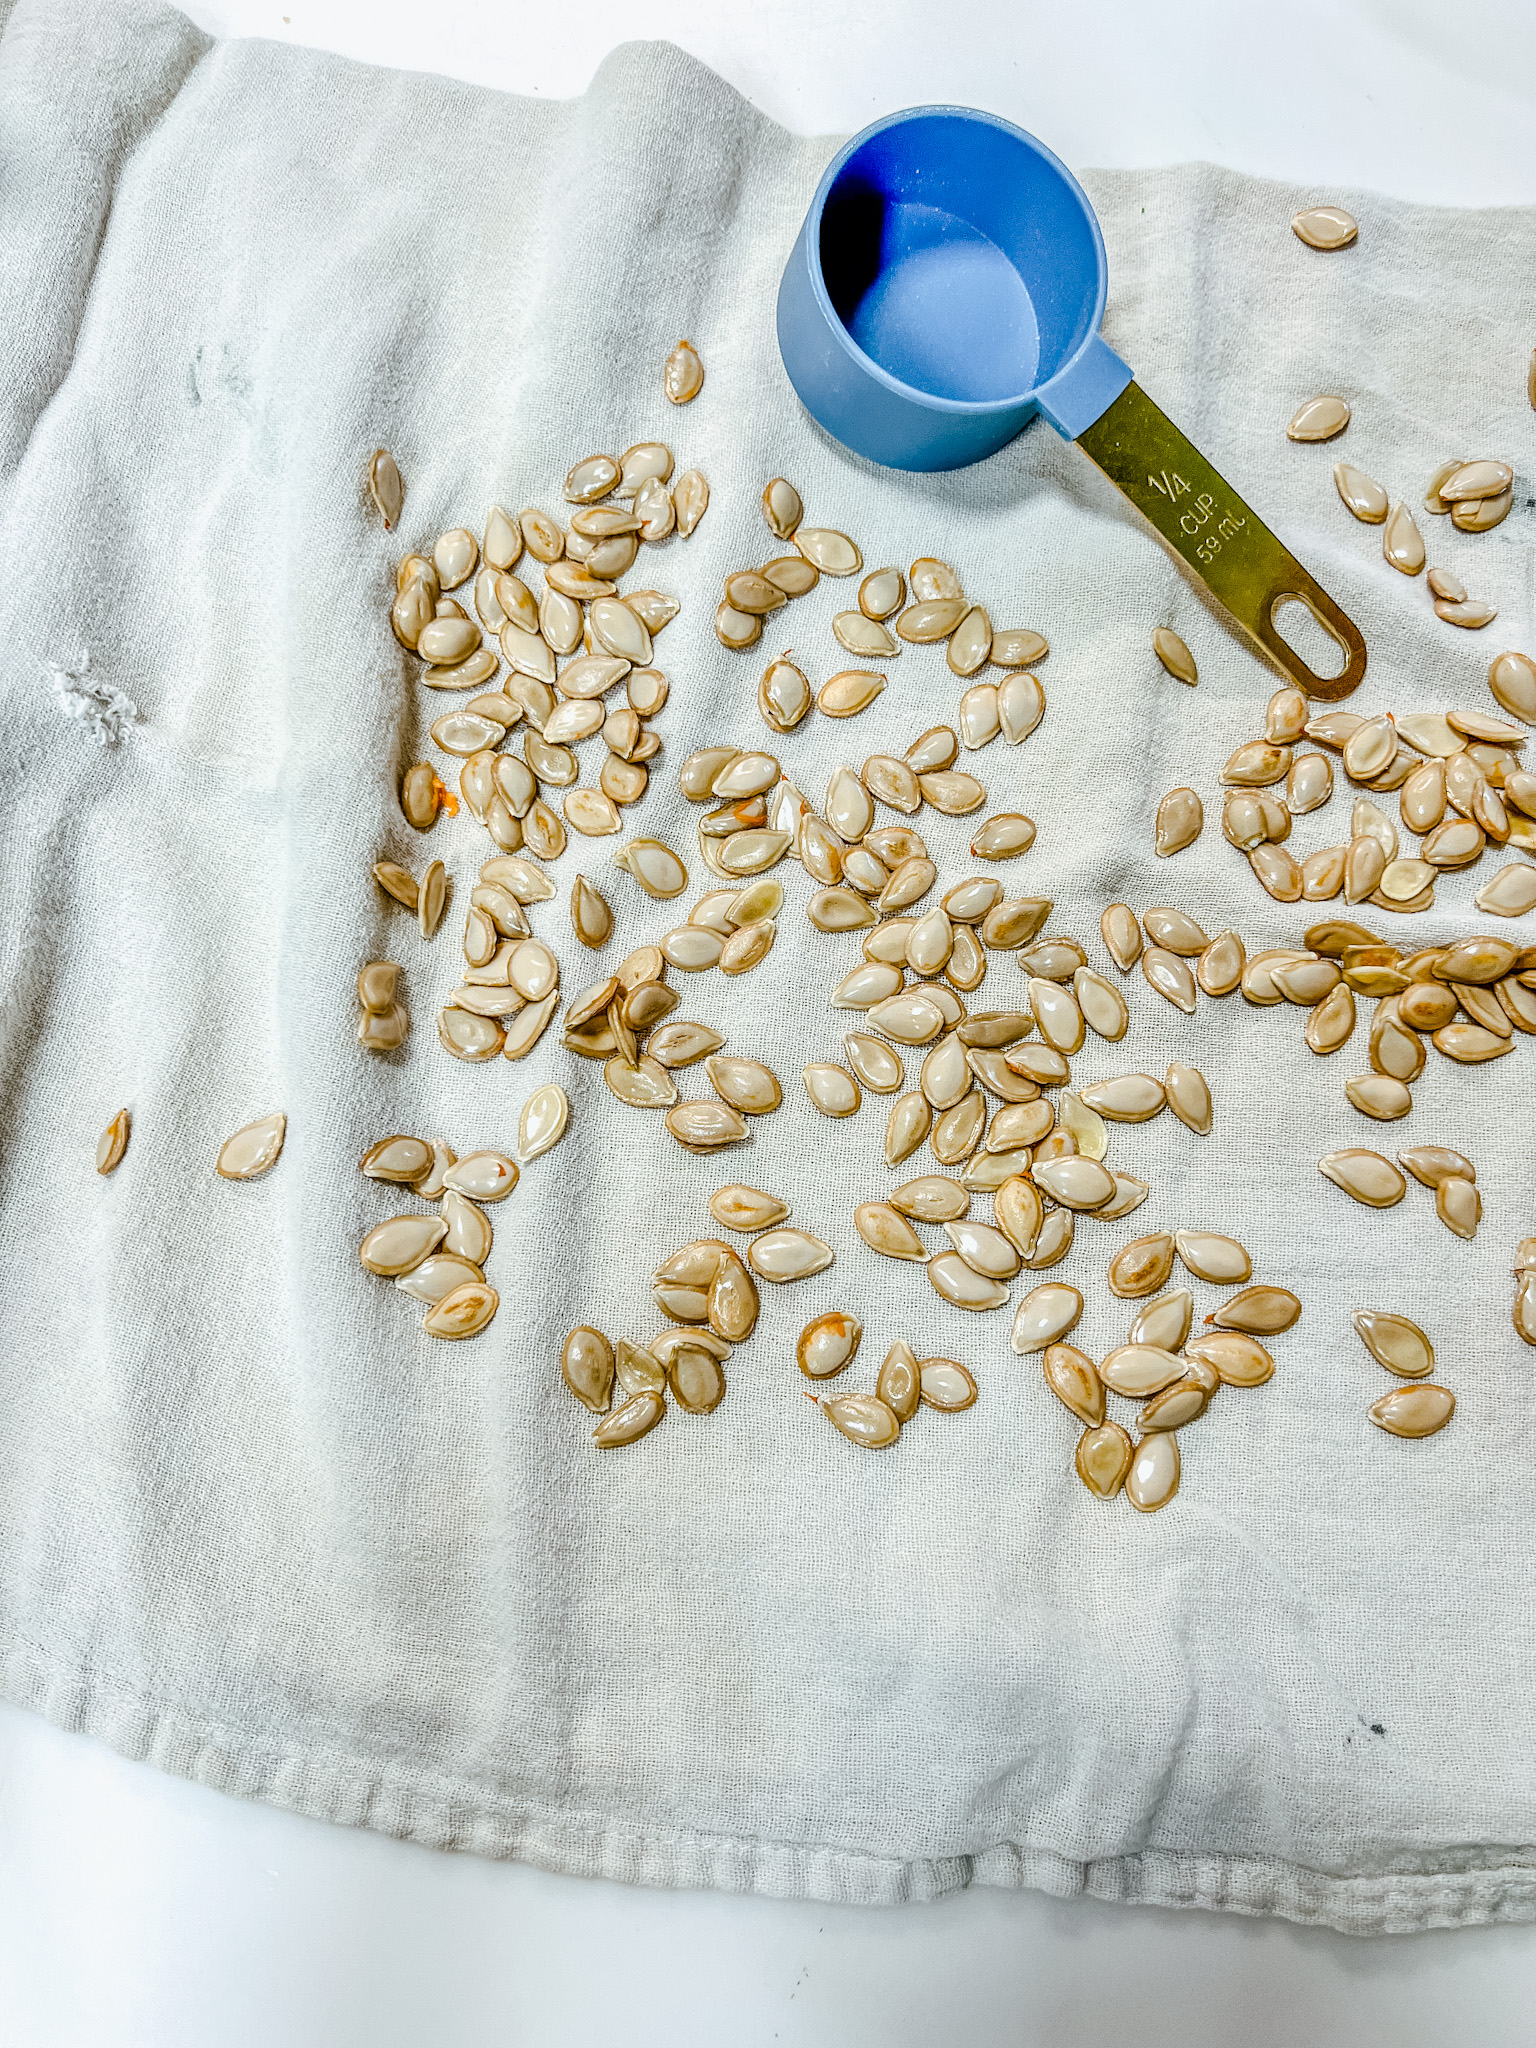
I’ve tried several techniques, and I found this to be the best way. Run water over the seeds and swish them around, removing any obvious bits of pumpkin flesh along the way. Drain off the excess water.
Next, lay them out in one layer onto a lint-free, clean towel, such as a flour sack towel. With a different lint-free, clean towel, lightly pat them dry. They don’t have to be “bone” dry, just dry to the touch. Once they’re dry, place them into your mixing bowl. Some seeds will stick to the towel, but just pick the seeds off (this is why it’s important to use a lint-free towel), and put them in the bowl.
Prepping Seeds
Toss the seeds with a few basic ingredients: Oil and salt. If you want to add spices, do that later. They tend to burn during baking.
How to Roast Seeds in the Oven
Spread the seeds onto a large, rimmed baking sheet lined with parchment paper for easy cleanup or a silicone mat (it will also prevent the seeds from sticking to the pan). Pour the seeds onto the pan, and make sure it’s one thin layer.
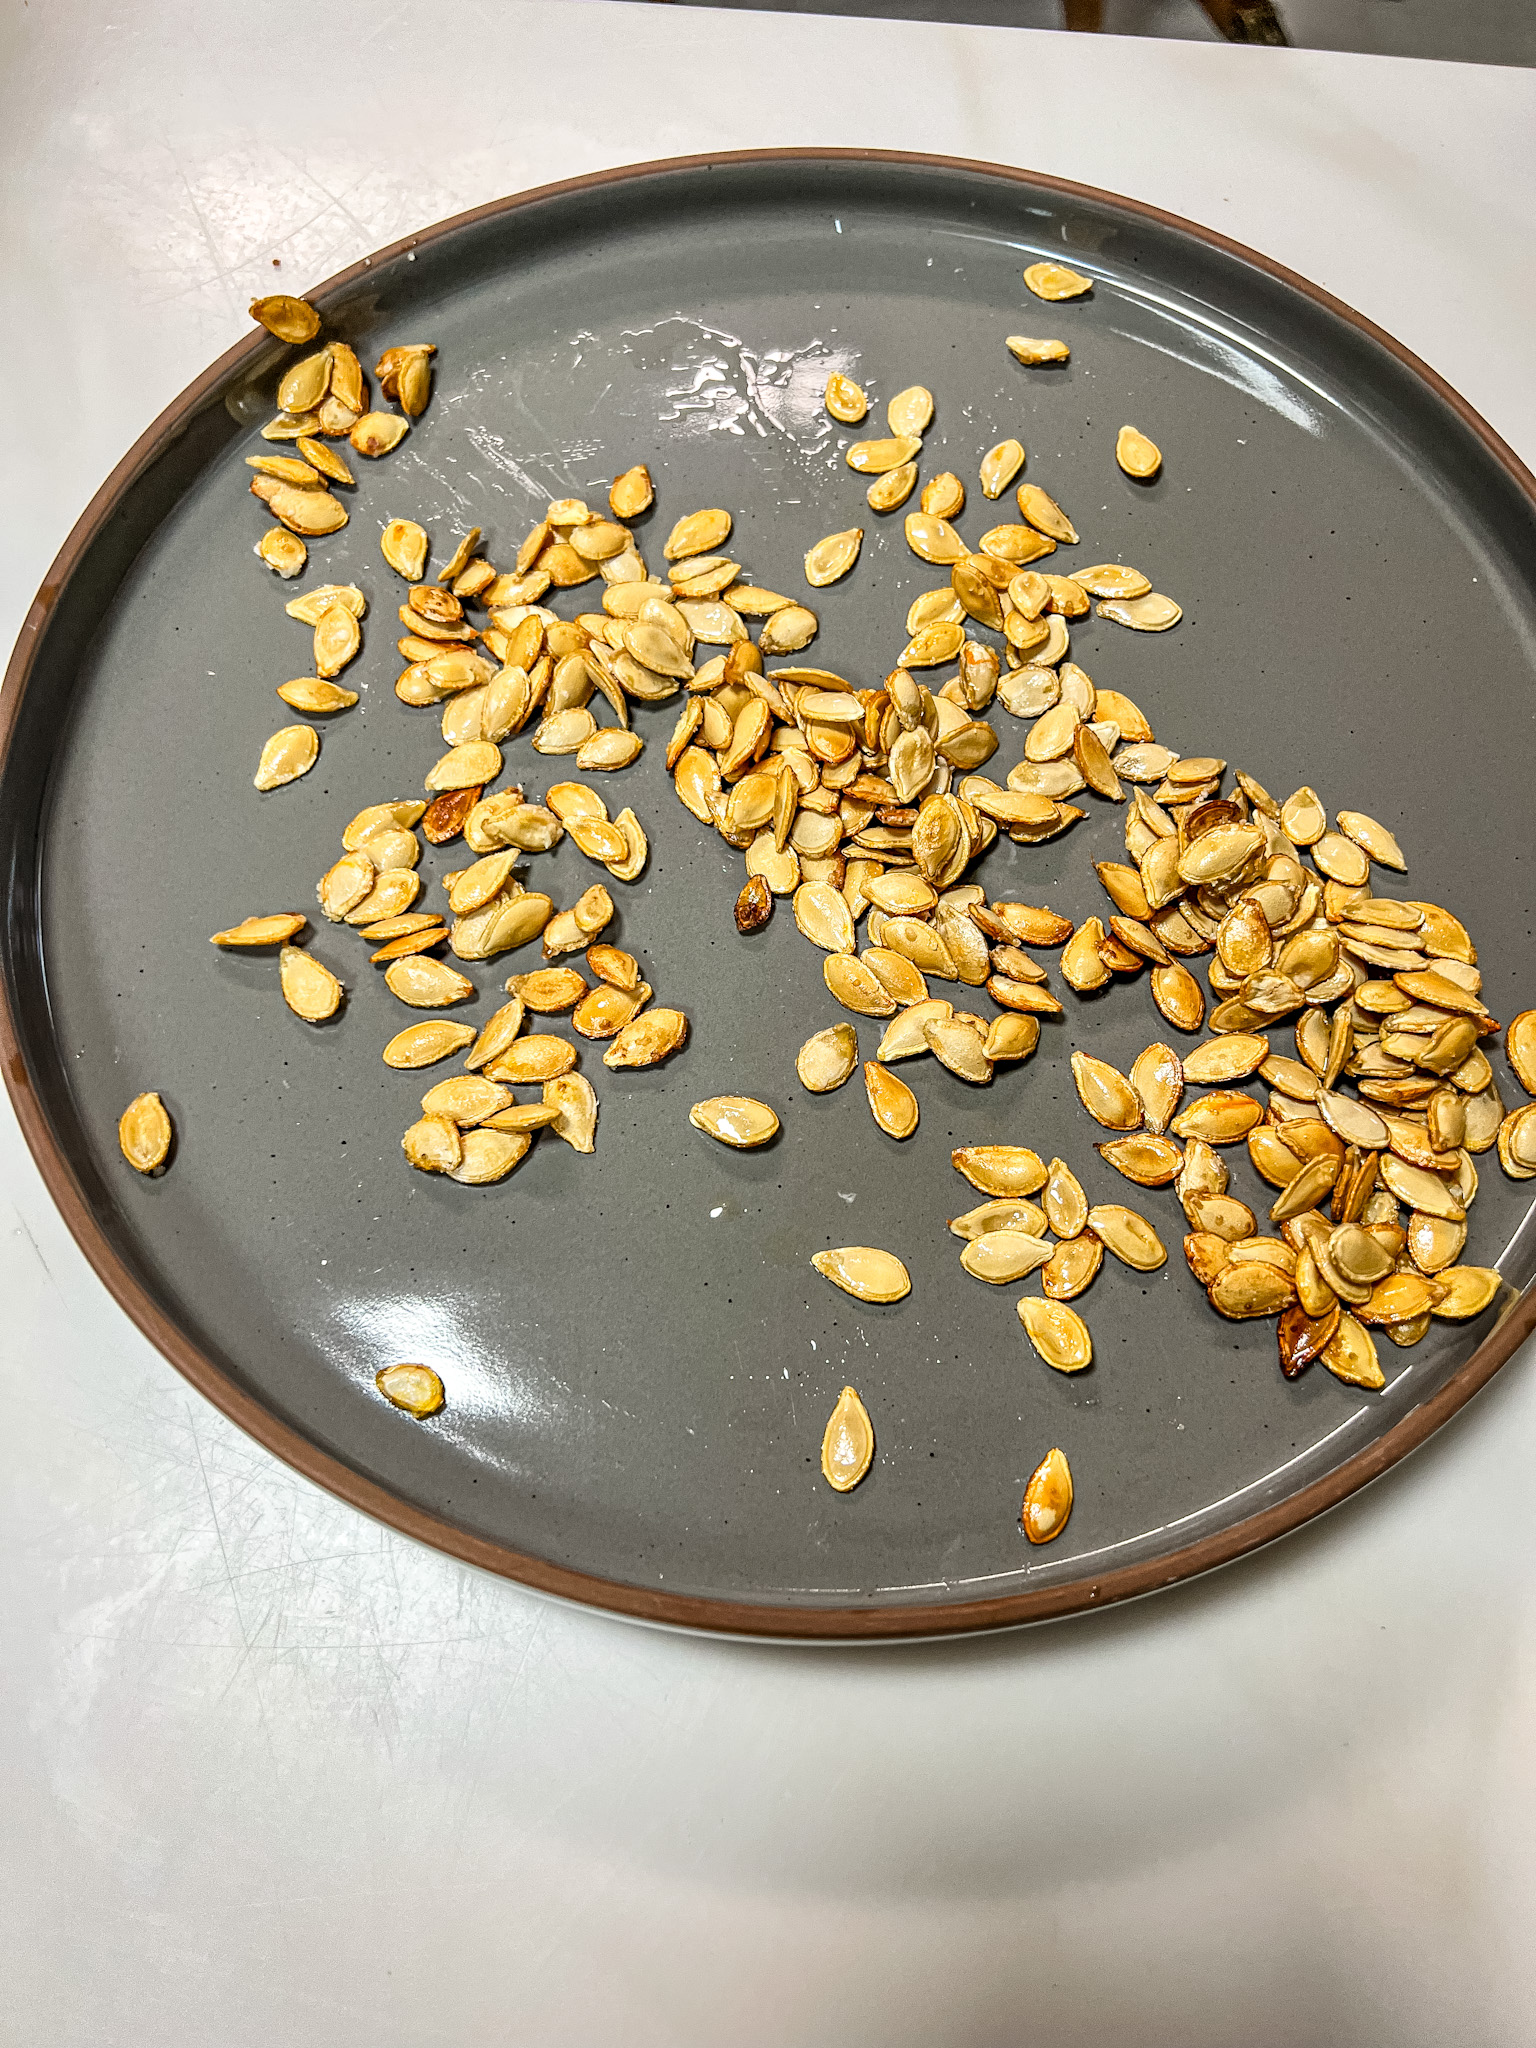
Bake at 325 degrees Fahrenheit. I found this to yield a toasty result without burning them, and without needing to babysit and stir them every 5 minutes. Bake them for 20 minutes, then stir them about. Bake again for another 20 minutes. You’ll know the seeds are done when they’re fragrant and lightly golden, as you see in the photo below.
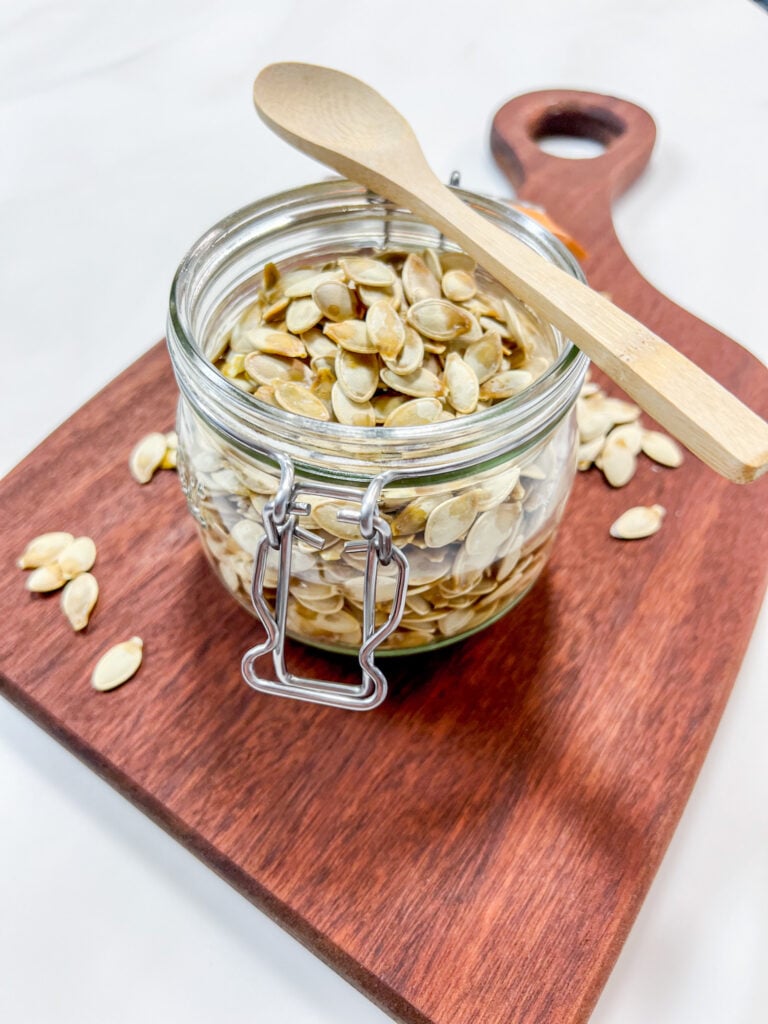
Directly after taking them out of the oven, you can add and stir in spices if you’d like. Let cool for 15-20 minutes, and ENJOY! I like to store mine in a mason jar, but you could also divide them into little snack bags.
Cooled, leftover seeds will should be kept at room temperature for up to 2 weeks.
Squash Seed Flavor Variations
Salt should be added, no matter what, but you can choose other ingredients to create your own fun flavor variations. Here are some ideas:
- Olive or Avocado oil: I use peanut oil, but maybe you have an allergy, if that’s the case, olive or avocado oil provides a nice neutral backdrop for your seeds.
- Freshly ground black pepper: Pepper is an easy way to add an irresistible, savory note and a little spice.
- Ground spices: For even more flavor, stir in some warming spices once the seeds are out of the oven. You could do a pumpkin spice blend, or use golden curry powder (just beware that curry powder will tint your fingers yellow). Have fun and experiment with different flavors! I’ll try some different ones and share the mixes as I create them. If you have one and are willing to share it, comment below!
Air Fryer Option:
This is my personal preference when I’m doing most winter squash. Pumpkins, on the other hand, I personally wouldn’t do this.
Only because we usually carve 4-5 pumpkins and usually end up with about four to five cups of seeds. If you’re only doing 1 or 2 pumpkins, this is still a great option.
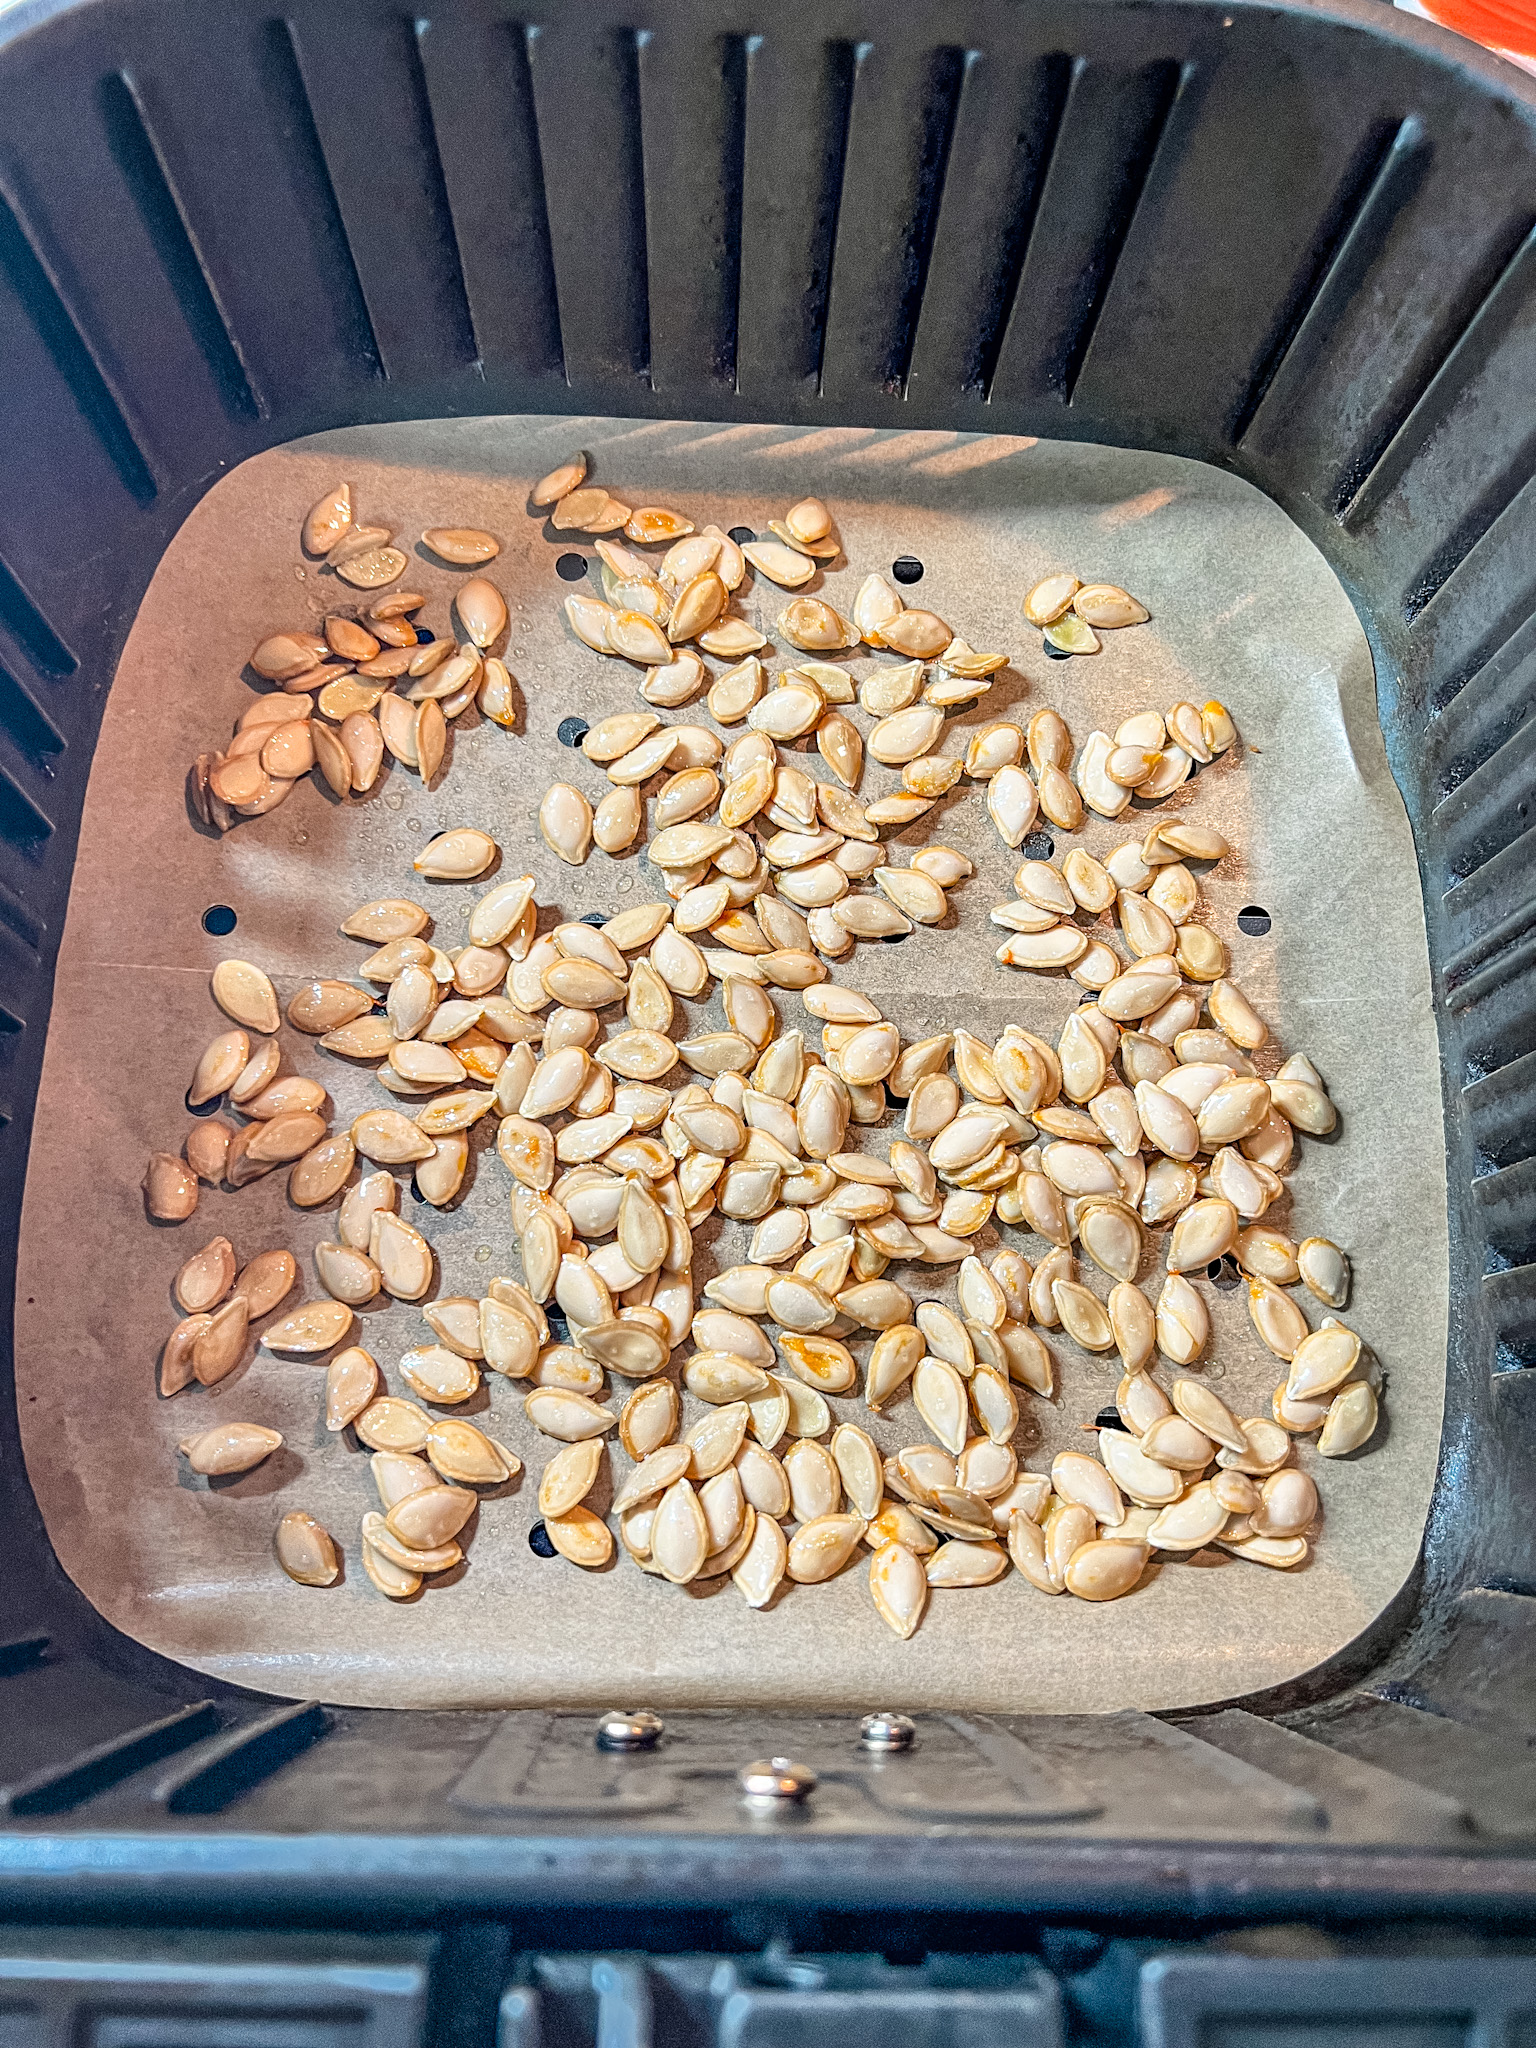
You do everything the same, clean, oil, and salt, but you put them in your Air fryer instead. I have an Insignia Digital Air Fryer with a basket that goes into the fryer. As pictured above, I used a tray liner so my seeds didn’t fall to the bottom.
I recommend doing it one cup at a time to ensure a single layer, but if you can fit 2 cups and still have a single layer, then I say go for it.
Set your Air Fryer to 325 degrees Fahrenheit and bake for about 15-20 minutes (depending on your air fryer).
That’s It!
Cooking with Kids
DISCLOSURE: Please keep in mind that the following tips are general and are meant to be suggestive. I personally use these strategies with my own kids, who are all unique even within my own family of five. Therefore, please regard these as suggestions or ideas. If you feel that your child requires more or less assistance, then go with what you and your child are comfortable with. Ultimately, you know your child best.
If you’re looking for a simple kitchen project with little hands, roasting squash seeds is a winner. Not only does it cut down on food waste, but it also gives kids a chance to get hands-on in the kitchen (and let’s be honest, they love anything crunchy they can snack on right away).
Here are a few kid-friendly ways to get them involved:
It’s a simple, budget-friendly way to get kids excited about cooking, teach them how to use every part of a vegetable, and sneak in some nutrition along the way. Plus, these seeds are ready in under an hour—perfect for short attention spans!
Seed Flavor Variations
Salt should be added, no matter what, but you can choose other ingredients to create your own fun flavor variations. Here are some ideas:
- Olive or Avocado oil: I use peanut oil, but maybe you have an allergy, if that’s the case, olive or avocado oil provides a nice neutral backdrop for your seeds.
- Freshly ground black pepper: Pepper is an easy way to add an irresistible, savory note and a little spice.
- Ground spices: For even more flavor, stir in some warming spices once the seeds are out of the oven. You could do a pumpkin spice blend, or use golden curry powder (just beware that curry powder will tint your fingers yellow). Have fun and experiment with this! I’ll try some different ones and share the mixes as I create them. If you have one and are willing to share it, comment below!
Now that you’ve roasted your squash seeds to crispy perfection, you’ve got more than just a tasty snack on your hands—you’ve got little nutrient-packed bites full of protein, healthy fats, fiber, and essential minerals. Perfect for munching solo, sprinkling over salads, or adding a crunchy finish to soups, these seeds make it easy to enjoy a healthy treat the whole family can love. And the best part? You’re using every bit of your squash, creating less waste and more kitchen magic.
Did You Make This Recipe?
I’d love to hear how it turned out for you! Leave a comment below and give it a ⭐⭐⭐⭐⭐ rating if you loved it. If you share on Instagram, tag me @jenngiamsmith—I’ll feature your creations in my stories!
Share or save it:
Roasted Squash Seeds
- Total Time: 1 hour 30 minutes
- Yield: 0.5 cup 1x
Description
You may be familiar with roasted pumpkin seeds, but when a recipe calls for any other kind of winter squash, be sure to save those seeds! This recipe is simple, and easy and will give you a delicious and nutrient-filled snack!
Instructions
Conventional Oven
- To Clean Your Seeds: Place Seeds in a colander. Run water over the seeds and swish them around, removing any obvious bits of pumpkin flesh along the way. Drain off the excess water. Next lay them out as one layer onto a lint-free flour sack towel, nothing fluffy or that has pills. With a different flour sack towel, lightly pat them dry. They don’t have to be bone dry, just dry to the touch. Once they're dry, place them into your mixing bowl. Some seeds will stick to the towel, but I just pick the seeds off (this is why it's important to use a lint-free towel) and put them in the bowl.
- Prep your seeds: Add the oil and salt. Stir until all of the seeds are coated
- To toast your seeds: Preheat the oven to 325 degrees Fahrenheit. Line a large, rimmed baking sheet with parchment paper for easy cleanup or a silicone mat.
- Spread them in an even layer across the prepared baking sheet.
- Bake them for 20 minutes, then stir them about. Bake again for another 20 minutes or until the seeds are fragrant and turning golden. Season them with additional salt, to taste. If desired, season with black pepper, to taste, or stir in the pumpkin spice blend or curry powder, or whatever else you want.
- Let cool for 15-20 minutes. Enjoy.
- Cooled, leftover seeds will keep well in a mason jar or snack bags at room temperature for up to 2 weeks.
Air Fryer
- cleaning is the same as with the conventional oven.
- Prep your seeds: Add the oil and salt. Stir until all of the seeds are coated
- To toast your seeds: Set your Air Fryer to 325 degrees Fahrenheit. Line the tray with a tray liner so your seeds don’t fall to the bottom.
- Spread the seeds in an even layer across the lined Air Fryer tray.
- Bake them for 10 minutes, then stir them about. Bake again for another 10 minutes or until the seeds are fragrant and turning golden. Season them with additional salt, to taste. If desired, season with black pepper, to taste, or stir in the pumpkin spice blend or curry powder, or whatever else you want.
- Let cool for 15-20 minutes. Enjoy.
- Cooled, leftover seeds will keep well in a mason jar or snack bags at room temperature for up to 2 weeks.
Notes
Seed Flavor Variations
Salt should be added, no matter what, but you can choose other ingredients to create your own fun flavor variations. Here are some ideas:
- Olive or Avocado oil: I use peanut oil, but maybe you have an allergy, if that’s the case, olive or avocado oil provides a nice neutral backdrop for your seeds.
- Freshly ground black pepper: Pepper is an easy way to add an irresistible, savory note and a little spice.
- Ground spices: For even more flavor, stir in some warming spices once the seeds are out of the oven. You could do a pumpkin spice blend, or use golden curry powder (just beware that curry powder will tint your fingers yellow). Have fun and experiment with this! I’ll try some different ones and share the mixes as I create them.
- Prep Time: 30 minutes
- Cook Time: 40 minutes
- Category: Snacks
- Cuisine: American
Nutrition
- Calories: 393
- Sugar: 1
- Sodium: 1167
- Fat: 35
- Saturated Fat: 6
- Carbohydrates: 7
- Fiber: 4
- Protein: 19
©Photo, Prop Styling, and Food Styling by Jenn Smith
This Blog Post is ©2022 Always Jenn Smith™; Jenn Smith, LLC (FKA Smith Country, LLC) See below for details
Please Be Respectful
All rights reserved. You may NOT sell, trade, share, or redistribute this recipe in any way or use any of my photographs for your site. If you are linking back to this post to a list of recipes, giving credit for the recipe to myself and my site, you may use ONE photo. You must site me and my blog as the creators of the recipe and give credit for the photo. ©2022 Always Jenn Smith; Jenn Smith, LLC
Jenn Smith of Always Jenn Smith™; Jenn Smith, LLC is a participant in the Amazon Services LLC Associates Program, an affiliate advertising program designed to provide a means for sites to earn advertising fees by advertising and linking to amazon.com. As well as the Apple affiliate program now called the Performance Partners Program.
This site displays third-party ads and contains affiliate links, See terms and conditions for ALL affiliates.
If you have any questions feel free to comment below or e-mail me directly.
Thank you for visiting!