Crispy Homemade Waffles (Freezer-Friendly & Family-Approved)
Discover the secret to making the best homemade waffles. Crispy on the outside, fluffy on the inside, and perfect for freezing.
This post may contain affiliate links, which means that I make a small commission off items you purchase at no additional cost to you. Please read my Affiliate Disclosure
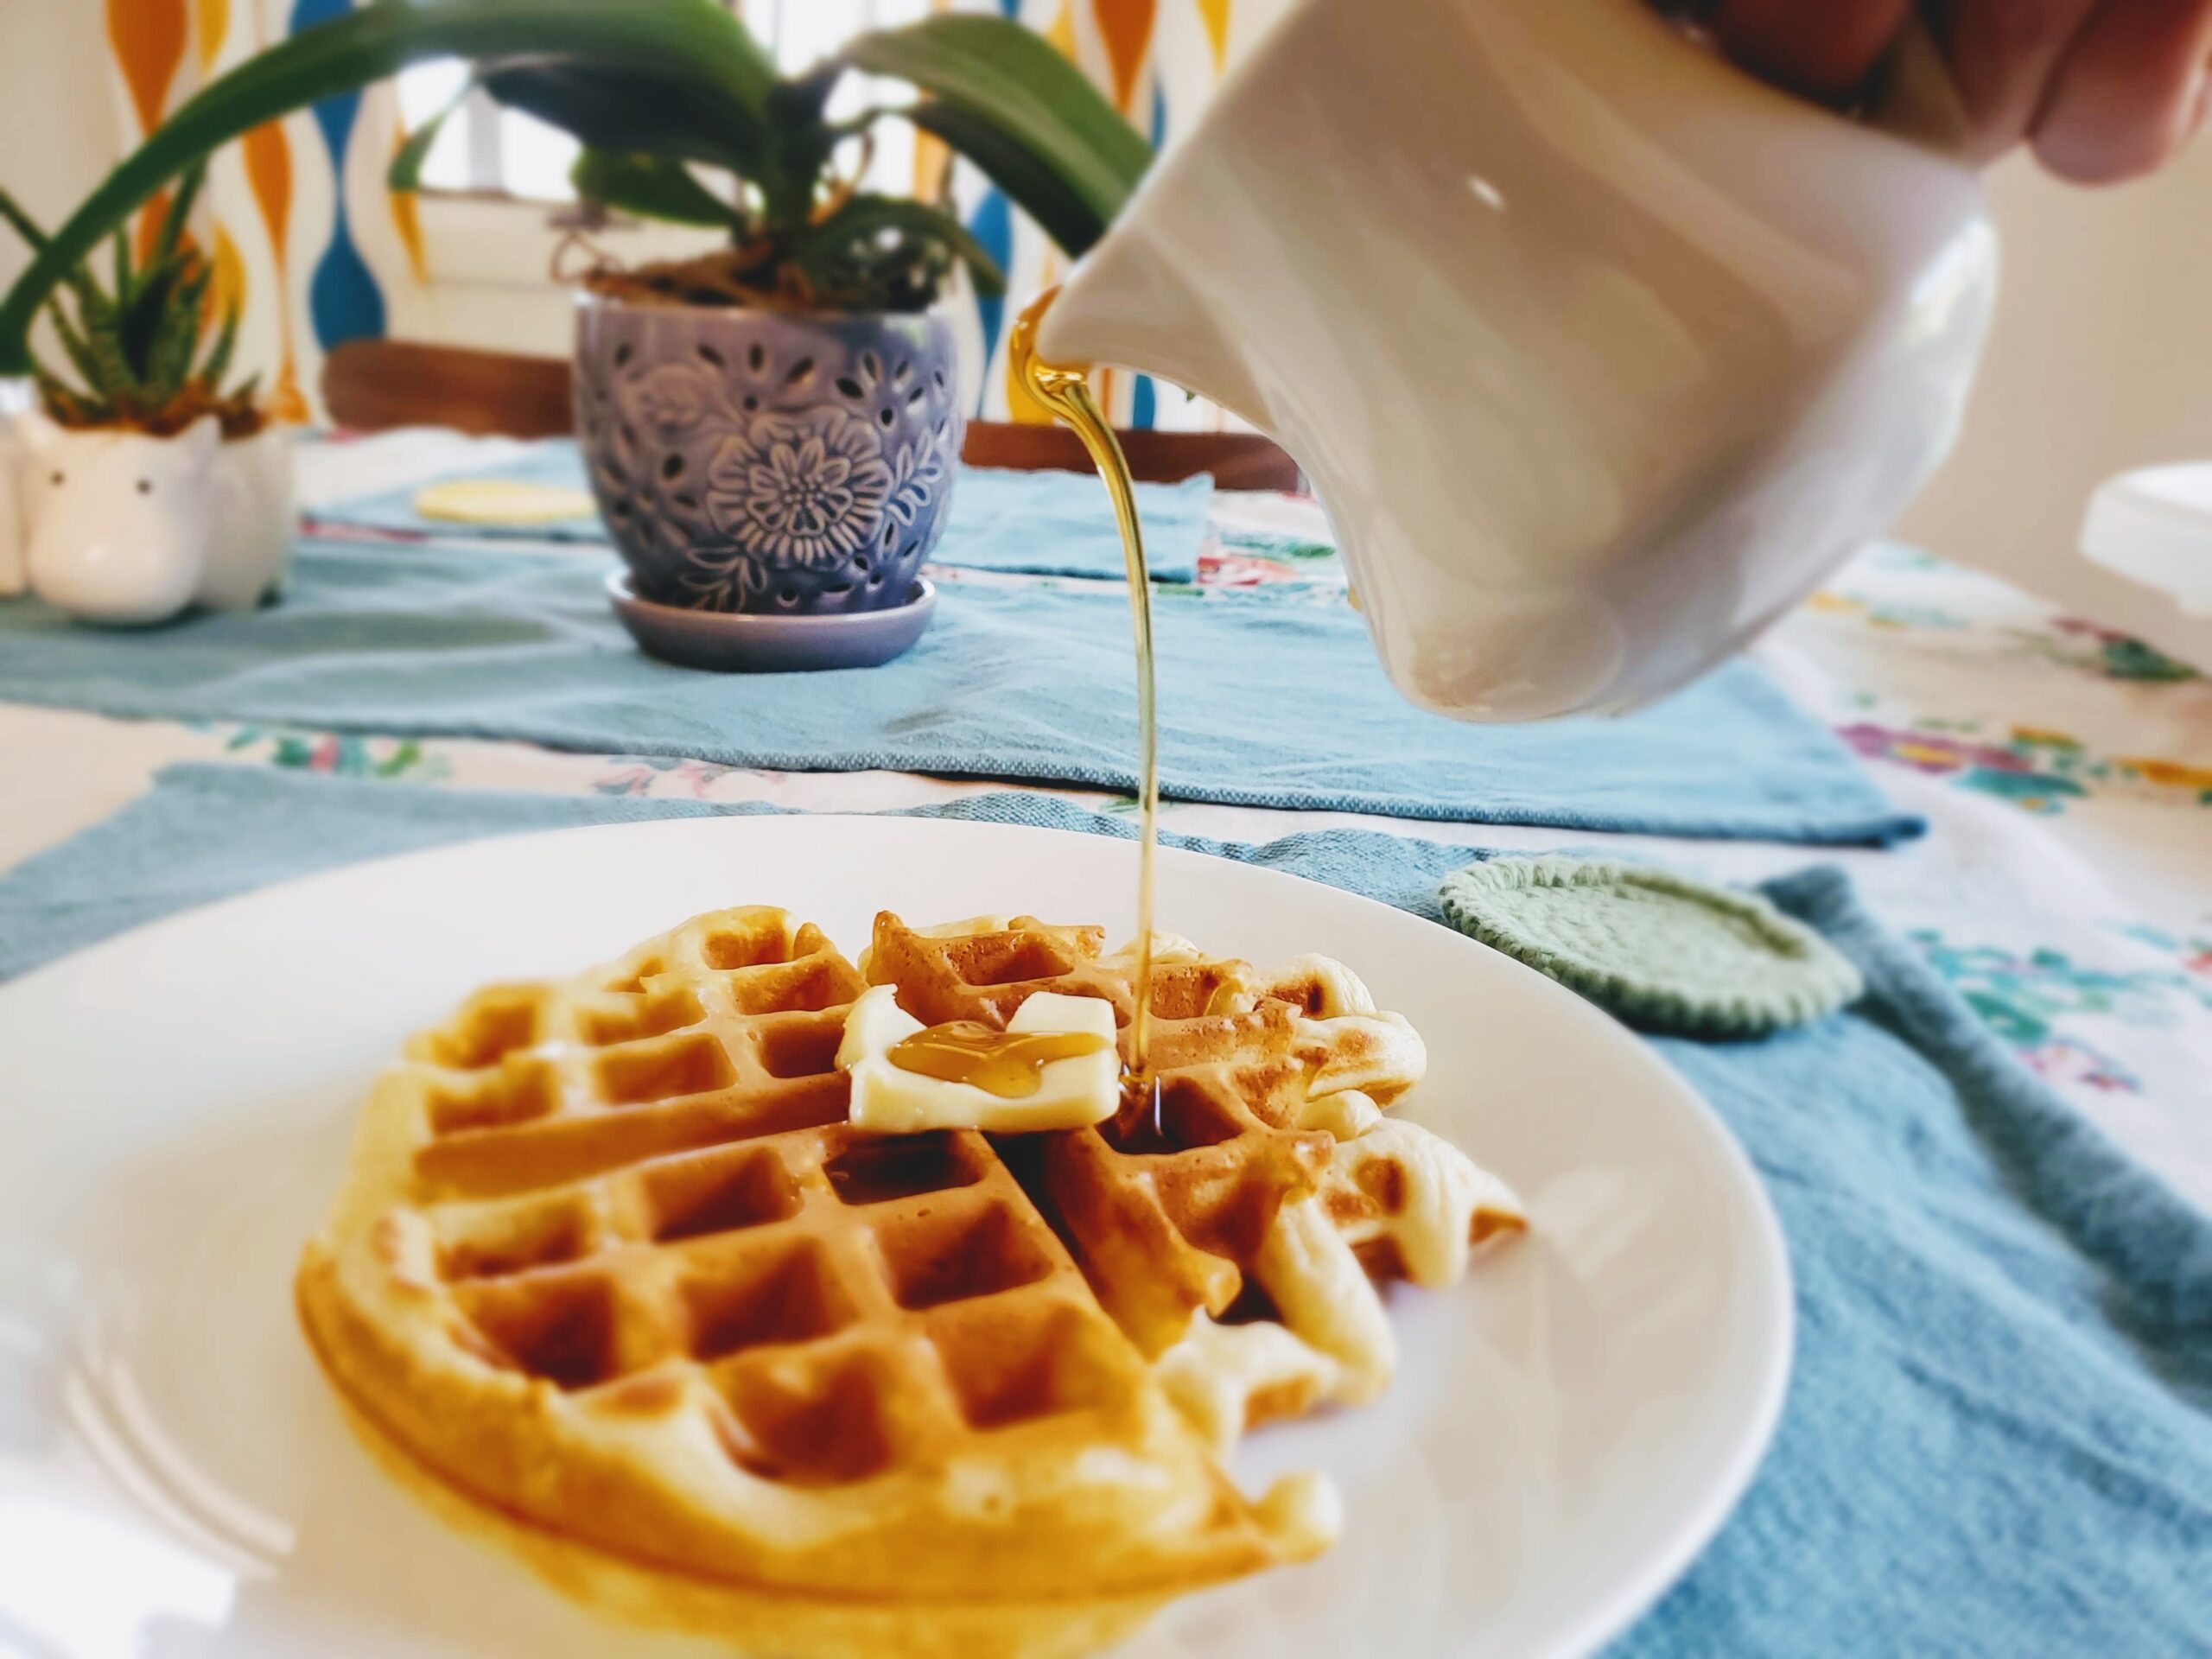
There’s something special about having homemade waffles ready to go — whether it’s a slow weekend morning or a busy school day when everyone needs breakfast fast.
These waffles are crispy on the outside, fluffy on the inside, and built for real life. They use a simple technique — whisking baking powder directly into the eggs — that creates extra lift and structure without extra effort. The result is waffles with deep pockets, crisp edges, and soft, fluffy centers.
Even better? They freeze beautifully and reheat perfectly in the toaster, which makes them one of the most practical breakfasts you can keep on hand.
Once you start making these, boxed mixes just won’t compare.
Why You’ll Love This Recipe
Ingredient Notes & Why They Matter
Eggs
Whisking the baking powder directly into the eggs creates structure and lift, giving these waffles their signature fluffy texture.
Baking Powder
Provides the rise and helps create the light, airy interior.
Flour
Forms the structure of the waffle while keeping it tender.
Sugar
Adds light sweetness and helps the waffles brown and crisp properly.
Butter
Adds richness and creates crisp edges.
Milk
Hydrates the batter and creates a smooth, pourable consistency.
Vanilla Extract
Adds warmth and rounds out the flavor.
Equipment You’ll Need
Jenn’s Pantry Picks
- Waffle iron
- Mixing bowls
- Whisk
- Cookie scoop or ¼ cup scoop
- Sheet pan (for freezing)
- Silicone Baking Mat
- Freezer bags
Using a scoop ensures evenly sized waffles that cook consistently.
Step-by-Step: How to Make Homemade Waffles
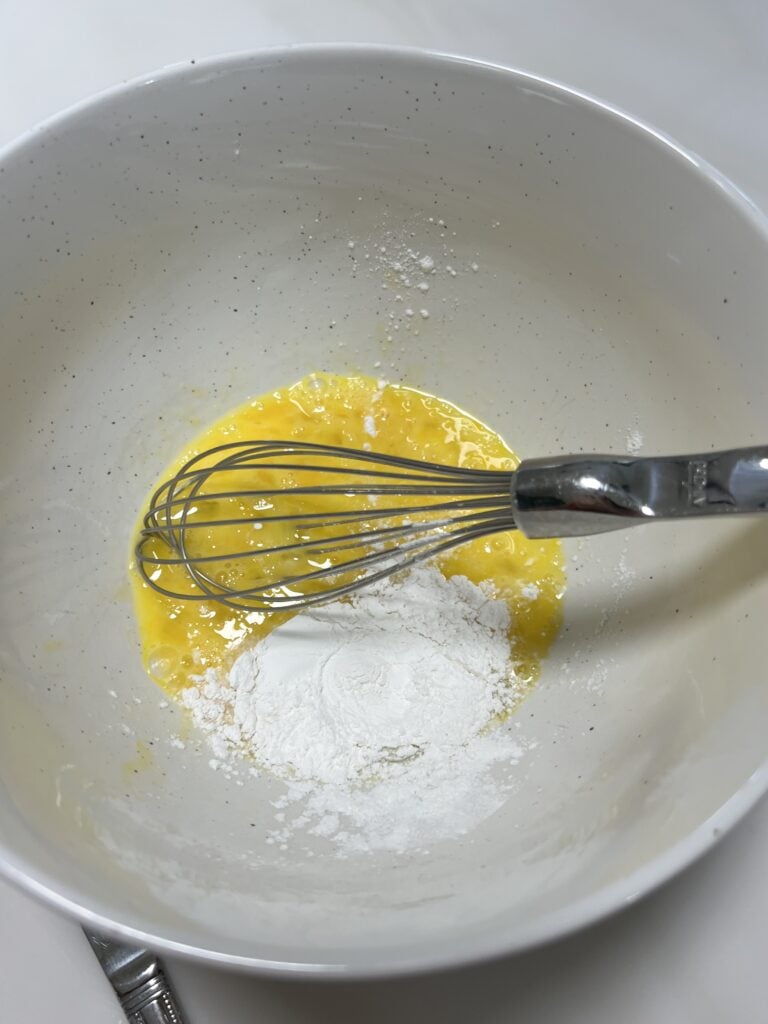
Step 1: Whisk Eggs and Baking Powder
In a large bowl, whisk the eggs. Add the baking powder and continue whisking until fully combined.
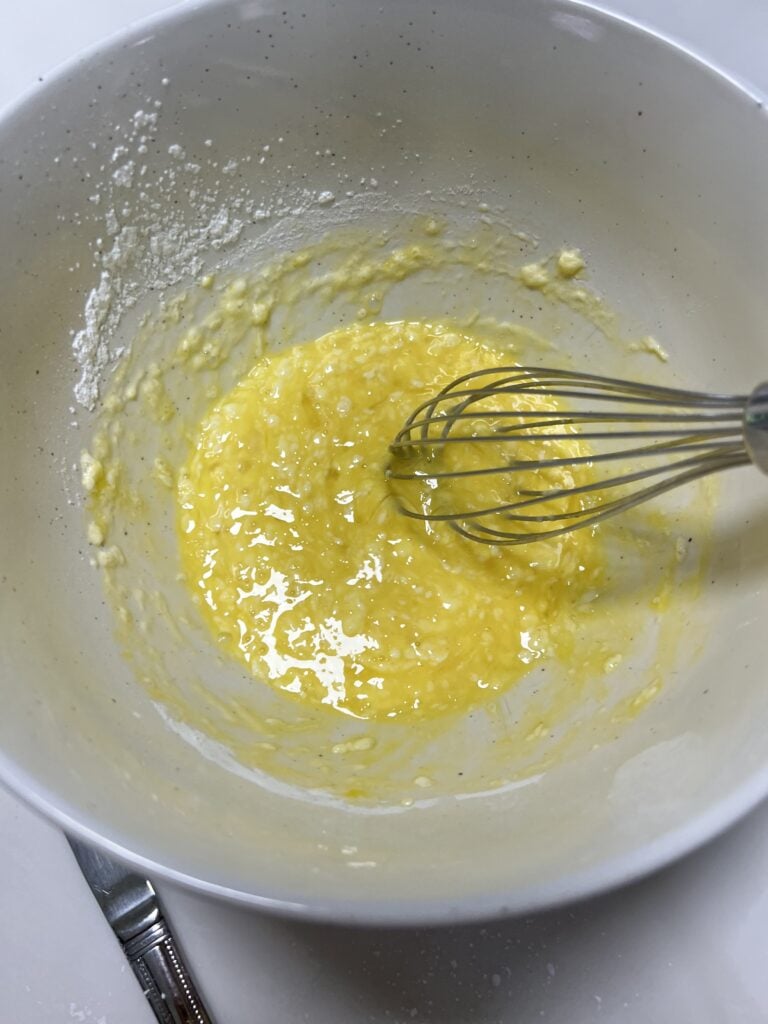
Let the mixture sit for a few minutes. It will become thick, frothy, and foamy — this is exactly what you want.
This step creates lift and structure in the waffles.
Step 2: Mix Dry Ingredients
In a separate bowl, whisk together:
- Flour
- Salt
- Sugar
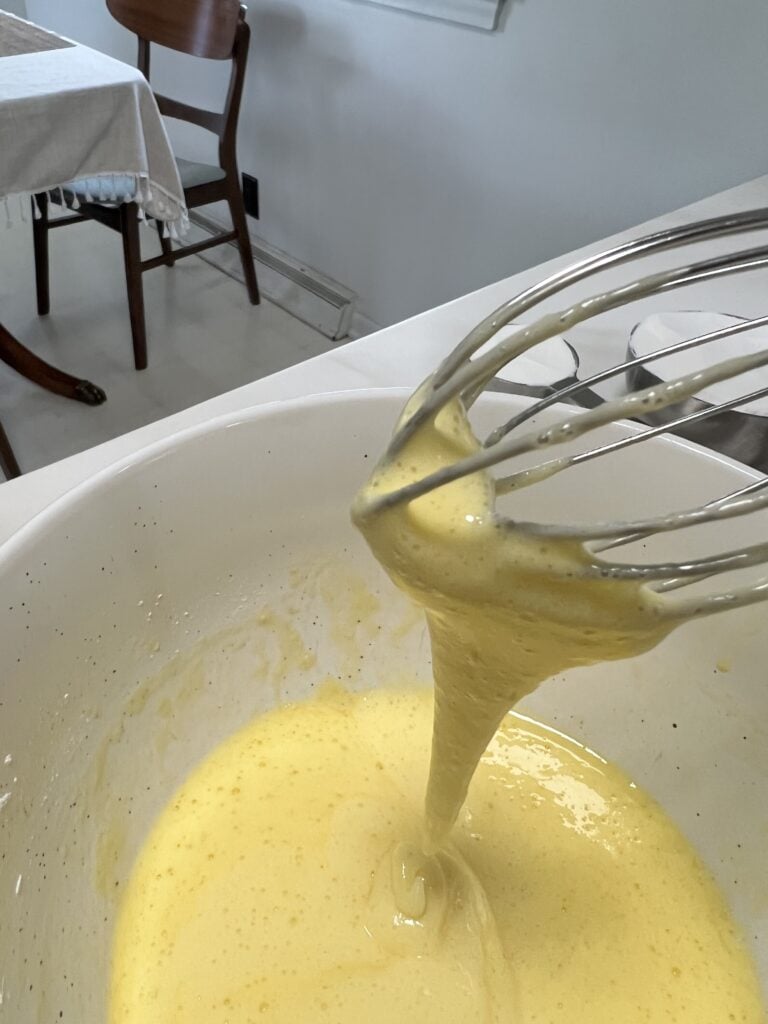
Step 3: Combine the Batter
Add the egg mixture, milk, melted butter, and vanilla extract to the dry ingredients.
Mix gently until just combined.
Do not overmix. The batter should be smooth but not overworked.
Step 4: Cook the Waffles
Preheat your waffle iron fully.
Using a scoop, add about ¼–⅓ cup batter per waffle (depending on your waffle iron size).
Cook until golden brown and crisp.
If you’re new to your waffle iron, do a test waffle first to determine ideal timing.

Jenn’s Kitchen Tip
Don’t overmix the batter.
Overmixing develops gluten, which can make waffles tough instead of fluffy. Mix just until combined.
Cooking with Kids
DISCLOSURE: Please keep in mind that the following tips are general and are meant to be suggestive. I personally use these strategies with my own kids, who are all unique even within my own family of five. Therefore, please regard these as suggestions or ideas. If you feel that your child requires more or less assistance, then go with what you and your child are comfortable with. Ultimately, you know your child best.
Cooking these waffles is a fun (and slightly messy) family activity — and a great chance to teach real kitchen skills.
Here’s how to get your little helpers involved:
Cooking together not only teaches kitchen skills but makes the final waffles taste even sweeter.
Storage & Freezing Instructions
These waffles freeze beautifully and are perfect for busy mornings.
To Freeze
- Let waffles cool completely.
- Place them in a single layer on a sheet pan.
- Freeze for 30–60 minutes until fully frozen.
- Transfer to freezer bags labeled with date.
This prevents sticking.
To Reheat
Place frozen waffles directly into the toaster and cook until hot and crisp.
If freezing, cook waffles slightly lighter initially so they don’t overbrown when reheated.
Easy Variations
Try adding to the batter:
- Chocolate chips
- Blueberries
- Cinnamon
- Mini chocolate chunks
- Sprinkles (great for birthdays)
FAQ
Why whisk baking powder into the eggs?
This creates extra lift and structure, resulting in fluffier waffles.
Can I make these ahead of time?
Yes. These waffles are designed for freezing and reheating.
Why are my waffles not crispy?
Make sure your waffle iron is fully preheated before cooking.
How long do waffles last in the freezer?
Up to 3 months when stored properly..
Need more breakfast ideas?

Crispy Homemade Waffles
- Total Time: 35 minutes
- Yield: 12 waffles 1x
- Diet: Vegetarian
Description
Crispy homemade waffles that are fluffy inside and freezer-friendly. Perfect for batch cooking and busy mornings.
Ingredients
- 4 large eggs
- 2 Tbsp baking powder
- 4 cups all-purpose flour
- 1/2 tsp sea salt
- 1/2 cup cane sugar
(aka granulated or white sugar)
- 1/2 cup unsalted butter (melted)
- 2 cups milk (any fat content)
- 2 tsp vanilla extract
Instructions
- Whisk eggs in a large bowl. Add baking powder and whisk until fully combined. Let rest until thick and frothy.
- In a separate bowl, whisk together flour, salt, and sugar.
- Add egg mixture, milk, butter, and vanilla. Mix until just combined. Do not overmix.
- Scoop batter into preheated waffle iron.
- Cook until golden brown.
- Serve immediately or freeze for later.
Equipment

Cuisinart 4 Slice Belgian Waffle Maker – Square, WAF-150NAS
Buy Now →
Large Mixing Bowls Set of 2 – 5.5 & 3.6 Qt – Vanilla White
Buy Now →
OXO Good Grips 11-Inch Balloon Whisk
Buy Now → Buy Now →
 Notes
To freeze: freeze waffles on a sheet pan, then transfer to freezer bags.
Reheat directly in toaster.
Cook waffles slightly lighter if planning to freeze.
- Prep Time: 15 minutes
- Cook Time: 20 minutes
- Category: Breakfast, brunch
- Method: Waffle Iron
- Cuisine: American
Nutrition
- Calories: 232
- Sugar: 11
- Sodium: 346
- Fat: 3
- Saturated Fat: 1
- Carbohydrates: 43
- Fiber: 1
- Protein: 7
- Cholesterol: 60
©Photo, Prop Styling, and Food Styling by Jenn Smith
This Blog Post is ©2018 Always Jenn Smith™; Jenn Smith, LLC (FKA Smith Country, LLC) See below for details
Please Be Respectful
All rights reserved. You may NOT sell, trade, share or redistribute this recipe in any way or use any of my photographs for your site. If you are linking back to this post to a list of recipes, giving credit for the recipe to myself and my site, you may use ONE photo. You must site me and my blog as the recipe creator and give credit for the photo. ©2018 Always Jenn Smith; Jenn Smith, LLC
Jenn Smith of Always Jenn Smith™; Jenn Smith, LLC participates in the Amazon Services LLC Associates Program, an affiliate advertising program designed to provide a means for sites to earn advertising fees by advertising and linking to amazon.com. As well as the Apple affiliate program now called the Performance Partners Program.
This site displays third-party ads and contains affiliate links, See terms and conditions for ALL affiliates.
If you have any questions feel free to comment below or e-mail me directly.
Thank you for visiting!