Sheet Pan Grilled Cheese
This post may contain affiliate links, which means that I make a small commission off items you purchase at no additional cost to you. Please read my Affiliate Disclosure

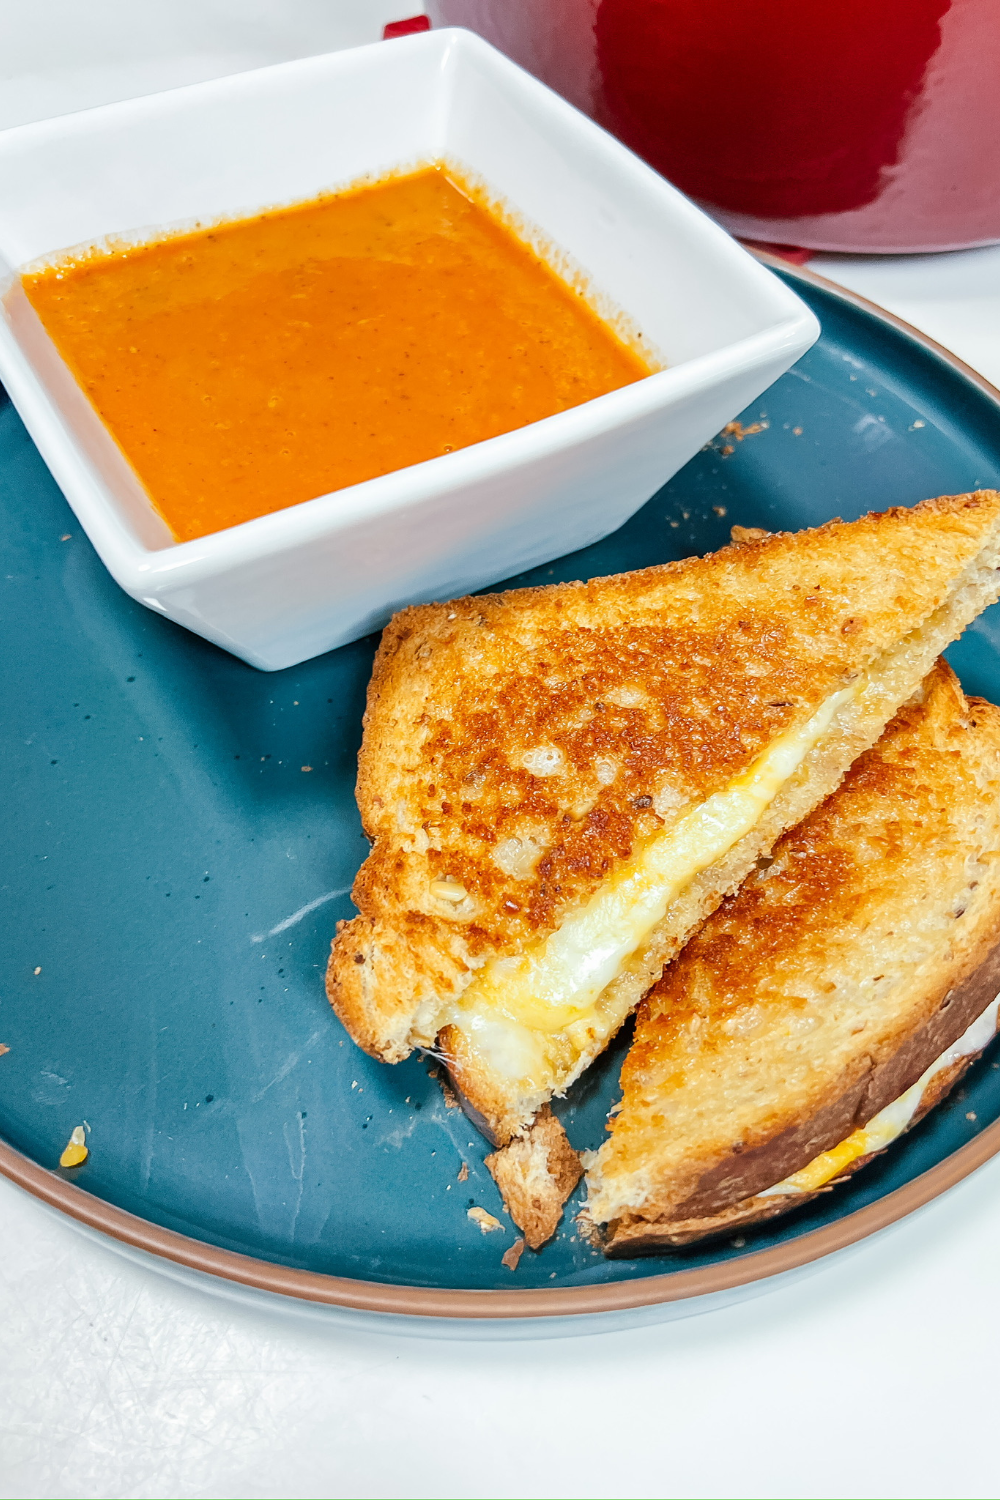
OK, I know grilled cheese is a pretty basic food and really doesn’t need a recipe. But just hear me out. This post is more about the technique, not the recipe itself, although, I’m also sharing my favorite cheeses I use to make the perfect cheese pull gooey grilled cheese.
PERFECT FOR A CROWD
This recipe ultimately came about because I have 7 people in my family, and making grilled cheese sandwiches one at a time has become a chore, even on the griddle. I set out to figure out a way to make enough grilled cheese for everyone in the family at once.
The griddle is the second-best option, but even then I can only make 4 at a time. Enter… my oven!
One thing I did figure out, is having a pizza stone on the bottom rack makes a HUGE difference. If you don’t have a pizza stone, it will still work out fine, but the pizza stone really helps with crisping the outside of the sandwich.
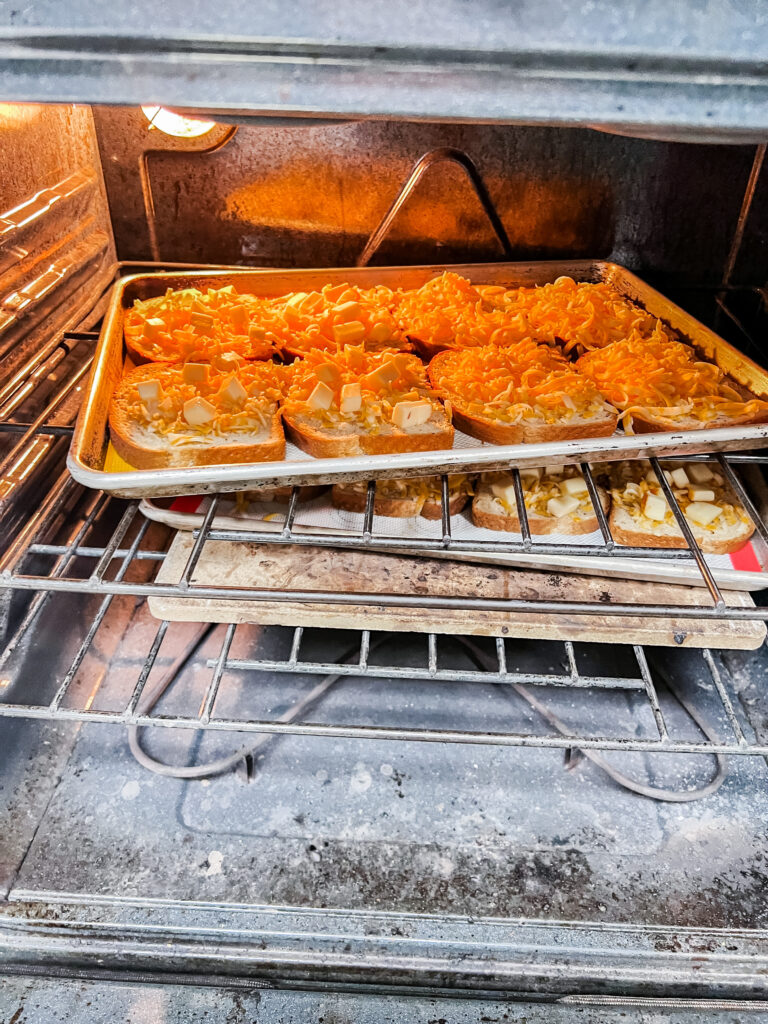
I cook one pan on the pizza stone for the first half, rotate them and then cook the second half.
The rest of my secrets to a perfect grilled cheese are next.
TIPS FOR SUCCESS
I’ve had many grilled cheese sandwiches in my time, a benefit of living in Wisconsin. Here are my tips for making the perfect ooey-gooey grilled cheese.
COOKING WITH KIDS
DISCLOSURE: Please keep in mind that the following tips are general and are meant to be suggestive. I personally use these strategies with my own kids, who are all unique even within my own family of five. Therefore, please regard these as suggestions or ideas. If you feel that your child requires more or less assistance, then go with what you and your child are comfortable with. Ultimately, you know your child best.
Older Kids
Younger Kids
DID YOU MAKE THIS GRILLED CHEESE RECIPE?
Please take a moment to leave a comment and provide a star rating below. If you share a picture on Instagram don’t forget to tag me @jenngiamsmith! I always share your posts on my story and tag you!
Share or save it:
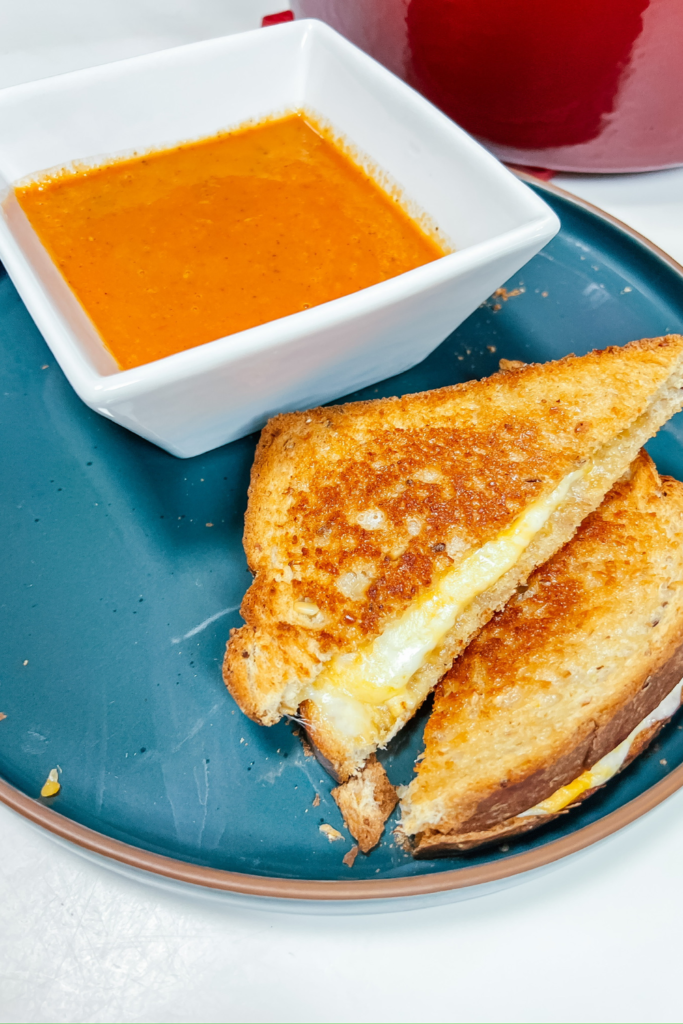
Sheet Pan Grilled Cheese
If you’re looking to make grilled cheeses for a group, this recipe is perfect for you! It makes it super easy by letting you make multiple sandwiches all at once!
- Total Time: 30 minutes
- Yield: 8 sandwiches 1x
Ingredients
- 8 tablespoons Mayonnaise
- 16 slices Sandwich Bread (I like a multigrain, but use whatever you like)
- 8 oz Marble Jack Cheese (grated)
- 8 oz Cheddar Cheese (grated)
- 3 oz Muenster Cheese (cut into small cubes)
- 1 teaspoon Kosher Salt
- 1 teaspoon Freshly Ground Black Pepper
Instructions
- Preheat the oven to 450°F.
- In a mixing bowl, mix together 8 oz Marble Jack Cheese, 8 oz Cheddar Cheese, and 3 oz Muenster Cheese along with and . Set aside.
- Spread about 1 1/2 teaspoons of mayonnaise on one side of each slice of bread. Arrange 8 slices, mayo side down, on a rimmed baking sheet. Mound about 1/2 cup of the cheese mixture in the center of each slice (leave the cheese exposed)
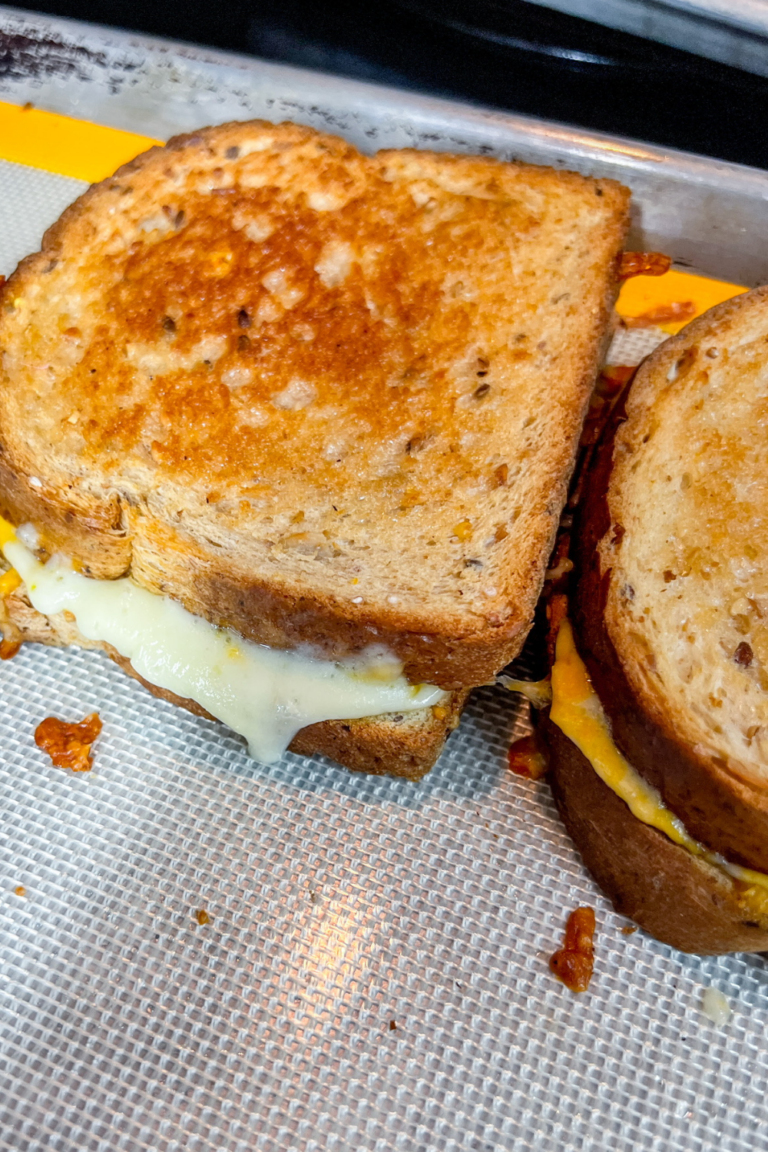
- Place the pans in the center racks of the oven (you will have to switch them during the 7-minute mark if you find that you need to place the pans on the top, and bottom rack due to space). Bake for about 15 minutes. The bread should be golden brown and the cheese should be nice and melty. Carefully remove the baking sheets from the oven, flip one cheesy bread to another, and transfer the sandwiches to a cutting board. Cut into pieces and serve.
- Prep Time: 15 minutes
- Cook Time: 15 minutes
- Category: Dinner, lunch
- Cuisine: American
MAKE MID-WEEK A LITTLE EASIER
Sign up below, and I’ll send you a FREE E-BOOK featuring six of my all-time favorite mid-week recipes!
©Photo, Prop Styling, and Food Styling by Jenn Smith owner of Jenn Giam Smith; Jenn Smith, LLC