Fun & Easy Burger Patties
Transform ordinary burger-making into a fun and creative activity that everyone will love! By using cookie cutters, you can shape your burgers into exciting and unique forms. Plus, this technique ensures that your patties are perfectly round and evenly cooked every time. Give it a try and impress your friends and family with your delicious and creative burger creations!
This post may contain affiliate links, which means that I make a small commission off items you purchase at no additional cost to you. Please read my Affiliate Disclosure
OK, I have to share how these fun burger patties came about. If you honestly don’t want all the fun details you can jump to the Details Part or scroll down to the recipe.
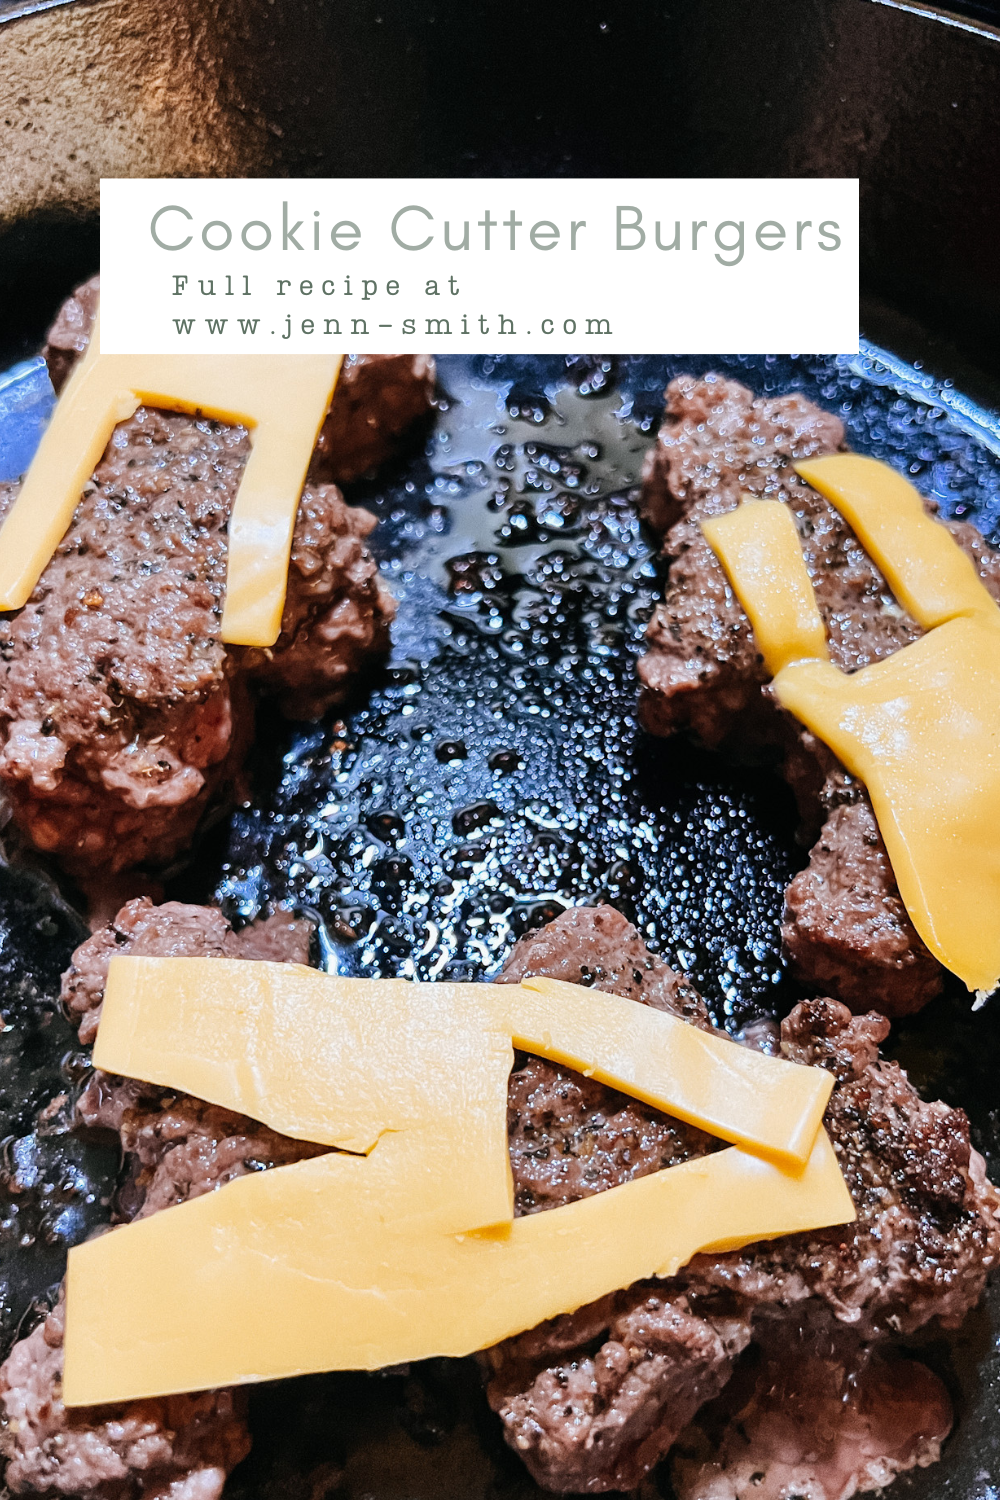
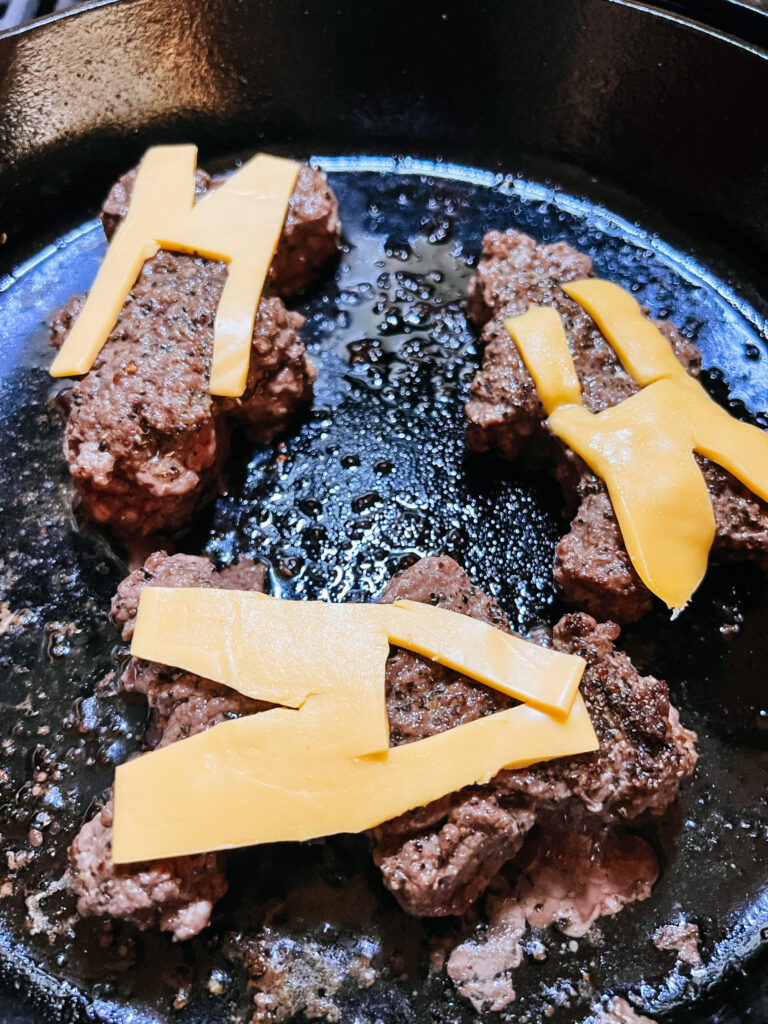
It was a Friday night and my husband and I were hanging out at a friend’s house. At some point, it was decided burgers were going to be made. Apparently… earlier that day our friend Beth wanted to buy a burger patty maker which she ended up not getting. I wasn’t there for that part so that’s all I really have on that. But either way… Since she didn’t have this patty maker, she decided she would make burgers out of a cookie cutter. Trying to figure out the shape to use we all thought a gingerbread man cookie cutter was a fantastic idea. She and I even made cheese overalls and ketchup bow ties. We all agreed that Burger “Meat Men” was a fantastic thing. Honestly… It was delicious and fun.


Of course, this needed to be documented… so I went back and recreated it, but with a circle cutter. Honestly… now that I’ve done it this way… I may never go back to mashing burger meat into a patty. It wasn’t more time. I actually handled the burgers far less than when I patty them and my burgers were perfect sizes! Also for those of you who hate touching meat… this is for you, it’s very minimal.
What Cookie Cutter Should You Use
Really you can use any cookie you want. Hence the burger men. For round burger patties, I have a set of round cookie cutters that are different size circles. I love this set. I use it for everything from scones to biscuits to now, burgers!
Deciding Cookie Cutter Size
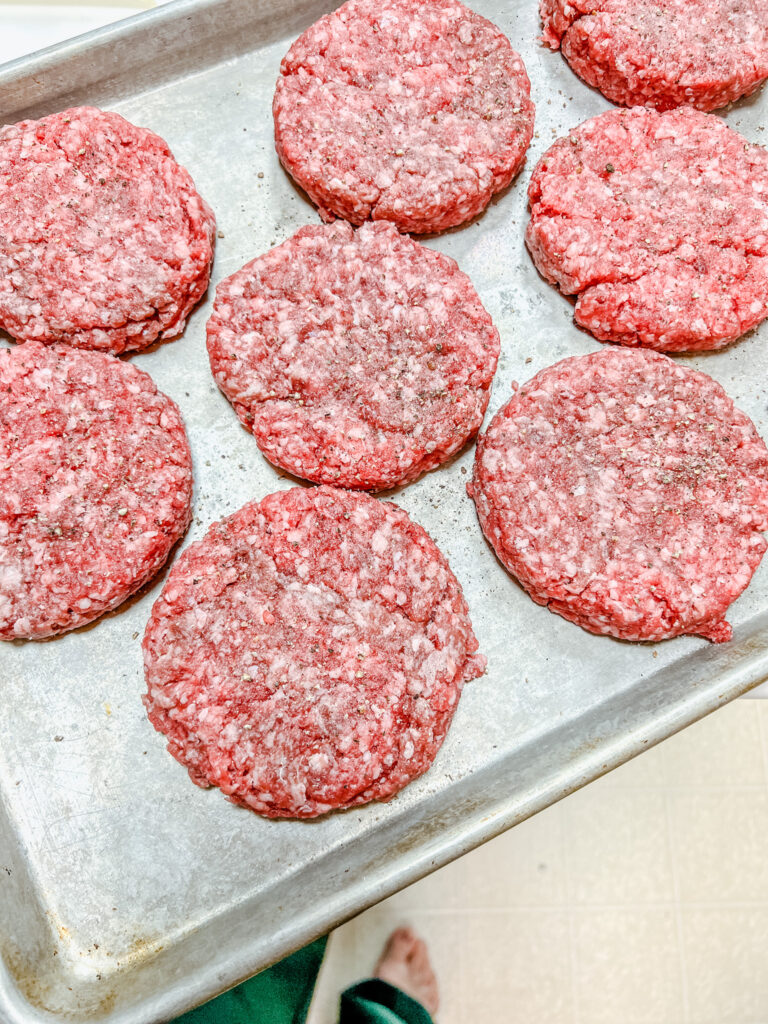
I recommend going a size just a little bigger than the buns. Your burgers will shrink due to the fat mixed into the burgers. In the images below in the “Making Burger Pattie Details” I used the 4.1-inch diameter round.
Making Burger Patties Details
Here is the gist of the process itself, I included photos just in case you needed more detail. Don’t need this part? Skip over to the recipe.
There are two ways you can do this. Roll the meat out then cut out each shape. Or using the cookie cutter as a mold, smash the meat into the cutter.
Rolling out the Meat
- To start, I took burger meat (I have to defrost mine first because I get mine from half a cow that we buy from a local butcher).
- Then, on a piece of parchment paper, I push all the meat together into a cohesive lump so that it doesn’t fall apart (your meat might come from the grocery store and may already be in a good state where you can skip this part, mine are in tubes so I have to mash it together).
- Next, cover with another piece of parchment paper and roll out to about 1/4 of an inch or the thickness of your cookie cutter. It doesn’t have to be perfect, but it should be fairly even.


- Now, you’re going to cut the meat. I personally didn’t have any problems doing it without freezing. If you find your meat isn’t staying together or the cookie cutter isn’t really cutting, freeze the meat for 15-20 minutes then cut.
- Continue reading to see how to deal with leftover meat.”scraps”.


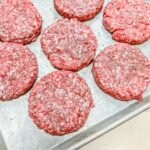
Smashing the Meat into the Cutter
- Take the meat, split it into equal amounts and smash it into the cookie cutter until it hits the edges. then pat around until the meat is an even thickness.


Cook or Freeze Burger Patties
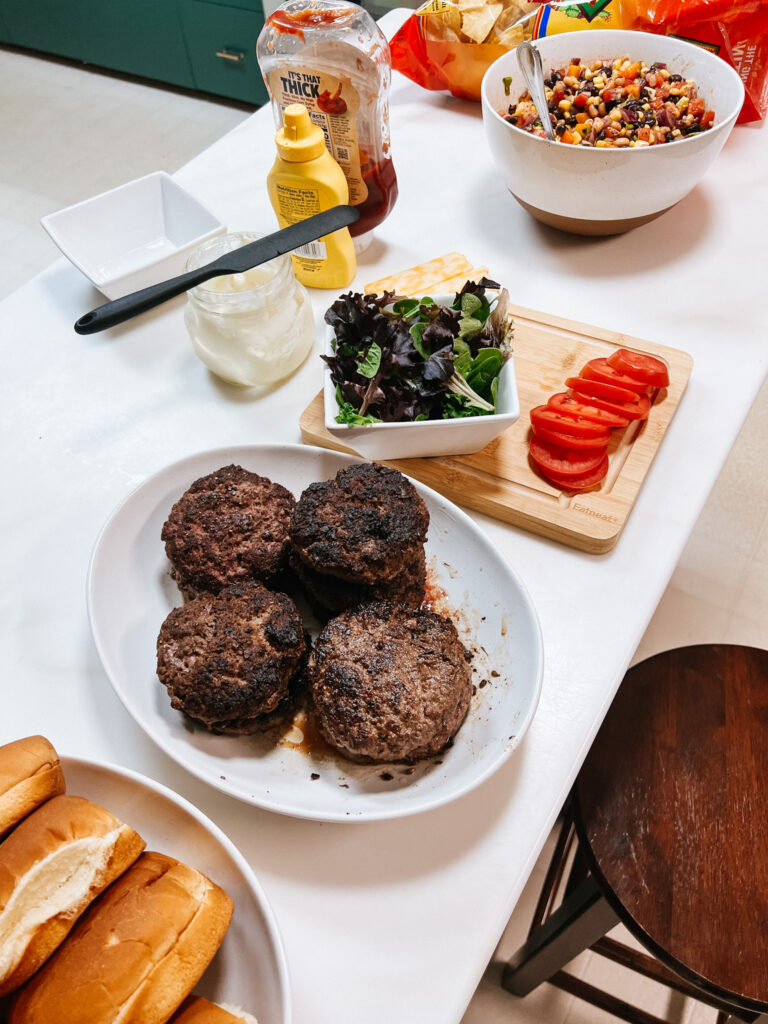
Now that the burger patties are done, you can cook them or freeze them. I used a cast iron skillet and fish spatula (my go-tos for indoor burgers). Of course, if you are able to… grill them! You’ll want to season them before you cook them, I just used salt and pepper.


You can also freeze them. I highly recommend lying them in one flat layer on a silicon mat and rimmed baking sheet. Freezing them for an hour. Then you can stack the patties on each other (still frozen). Store them in a freezer-safe bag (you can also use pieces of parchment paper to help keep them separate).
If you freeze ground beef and keep it frozen it will keep safe indefinitely. It is best if used within 4 months.
Did you try it, have questions?
Your feedback is important to me! Please let me know what you think of this recipe in the comments and rate this recipe using the star icons. Your input helps me improve future posts and the blog overall, and in the end, it all helps me to help YOU. Thank you!
Let’s get social!
Don’t forget to tag me on Instagram or Facebook, @jenngiamsmith #JennGiamSmith I will always share your posts on my stories and tag you! You can also share it on this post’s Pinterest Pin! Don’t forget to follow me on Pinterest for a steady stream of recipe (and other) inspiration!
It’s always wonderful to see loved ones coming together over delicious food.
Cookie Cutter Burgers
- Total Time20 minutes
- Yield6 (2.5 oz) patties 1x
Your kids (and YOU) are gonna love making burgers out of fun shapes. This also makes creating perfectly round burger patties even easier.
Ingredients
- 1 lb of ground beef (I recommend 80/20 for the best burgers, but you can also use ground turkey or chicken.)
- Salt and pepper (this will be to preference)
- any other seasoning you may like.
Instructions
- To start, I took burger meat (I have to defrost mine because I get mine from my half a cow I buy from a local butcher).
- Then, on a piece of parchment paper, I push all the meat together into a cohesive lump so that it doesn’t fall apart ( you meat might come from the grocery store and may already be in a good state where you can skip this part, mine are in tubes so I have to mash it together).
- Next, cover with another piece of parchament paper and roll out to about 1/4 of an inch or the thickness of your cookie cutter. It doesn’t have to be perfect, but it should be fairly even.
- Now, you’re going to cut the meat. I personally didn’t have any problems doing it without freezing, but if you find your meat isn’t stying together or the cookie cutter isn’t really cuttin, try freezing for 15-20 minutes then cut the meat.
- check out Smashing the Meat into the Cutter to see how to deal with leftover meat.
- Take the meat, split it into equal amounts and smash it into the cookie cutter until it hits the edges. then pat around until the meat is an even thickness.
Equipment
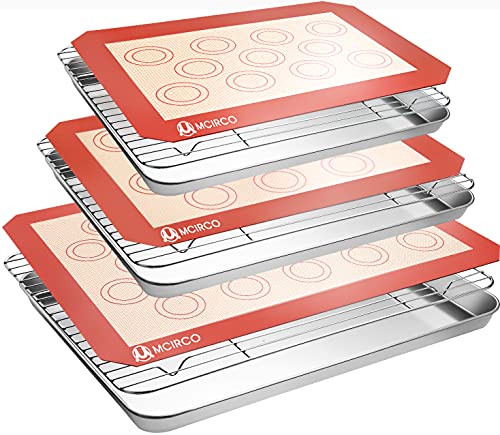
Stainless Steel Baking Sheet Set with Silicone Mats and Cooling Racks (Set of 9)
Buy Now →
French Marble 11″ Rolling Pin with Base
Buy Now →
12 Pieces Round Cookie Biscuit Cutter Set
Buy Now →Notes
*Cooking time will vary on you and how you like your burger.
Deciding Size
I recommend going a size just a little bigger than the buns because your burgers will shrink due to the fat mixed into the burgers. In the images below in the “Making Burger Details” I used the 4.1-inch diameter round.
Nutrition
- Serving Size: 1 (2.5 oz) patty
- Calories: 192
- Sodium: 51
- Fat: 15
- Saturated Fat: 6
- Protein: 13
- Cholesterol: 54
- Prep Time: 15 minutes
- Category: Bar Food, BBQ, Dinner, Main Course, Party Food, Picnic
- Cuisine: American
Want to remember this post?
Pin it to your favorite Pinterest Board!


Photo, Prop Styling, and Food Styling by Jenn Smith © 2023 Always Jenn Smith; Jenn Smith, LLC
This Blog Post is © 2014-2023 Always Jenn Smith™; Jenn Smith, LLC (FKA Smith Country, LLC) See below for details
Please Be Respectful
All rights reserved. You may NOT sell, trade, share or redistribute this recipe in any way or use any of my photographs for your site. If you are linking back to this post to a list of recipes, giving credit for the recipe to myself and my site, you may use ONE photo. You must site me and my blog as the creators of the recipe and give credit for the photo. ©2023 Always Jenn Smith; Jenn Smith, LLC
Jenn Smith of Always Jenn Smith™; Jenn Smith, LLC is a participant in the Amazon Services LLC Associates Program, an affiliate advertising program designed to provide a means for sites to earn advertising fees by advertising and linking to amazon.com. As well as the Apple affiliate program now called the Performance Partners Program.
This site displays third-party ads and contains affiliate links, See terms and conditions for ALL affiliates.
If you have any questions feel free to comment below or e-mail me directly.
Thank you for visiting!